A Beginner's Guide to French and Dutch Braiding | Master the Classic Styles
Your Journey into the World of Braiding Begins Here
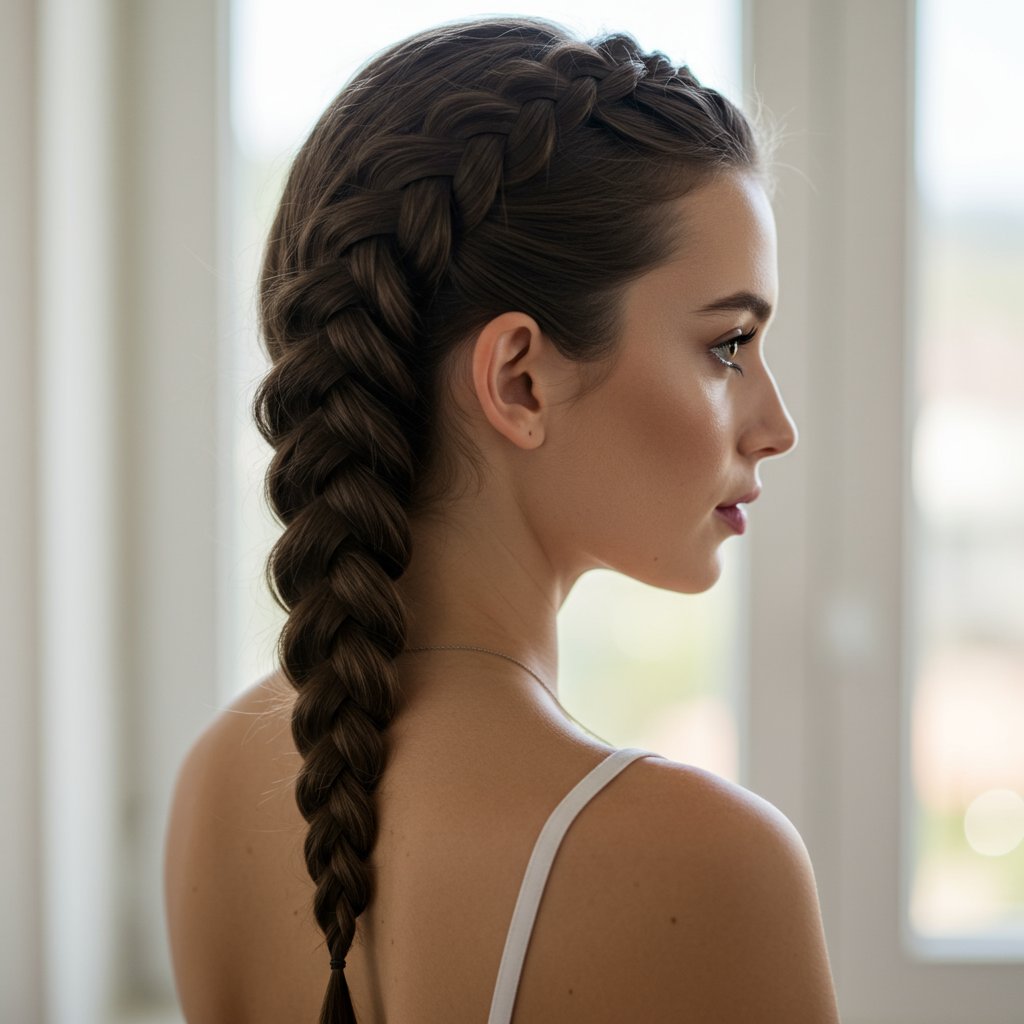
French and Dutch braids are more than just hairstyles; they are timeless art forms that blend elegance with practicality. From the schoolyard to the red carpet, these intricate weaves have remained a staple of hair fashion for centuries. Whether you’re seeking a chic look for a special occasion, a durable style for a workout, or a protective option for your hair, mastering the art of French and Dutch braiding is a skill that will serve you for a lifetime. This comprehensive beginner's guide is designed to demystify the process, transforming what might seem like a complex tangle of fingers and hair into a simple, achievable technique.
Learning to braid your own hair is an empowering act of self-care and creativity. It opens up a world of stylistic possibilities, from a single, classic plait to elaborate updos and crowns. While the initial attempts may feel clumsy, patience and practice are the keys to success. In this guide, we will break down every step, from preparing your hair to perfecting the final look. We’ll explore the fundamental differences between the two styles, provide detailed, step-by-step instructions, and share professional tips to troubleshoot common issues. Get ready to unlock your inner stylist and create beautiful, lasting braids with confidence.
The Foundation: Understanding the Difference Between French and Dutch Braids
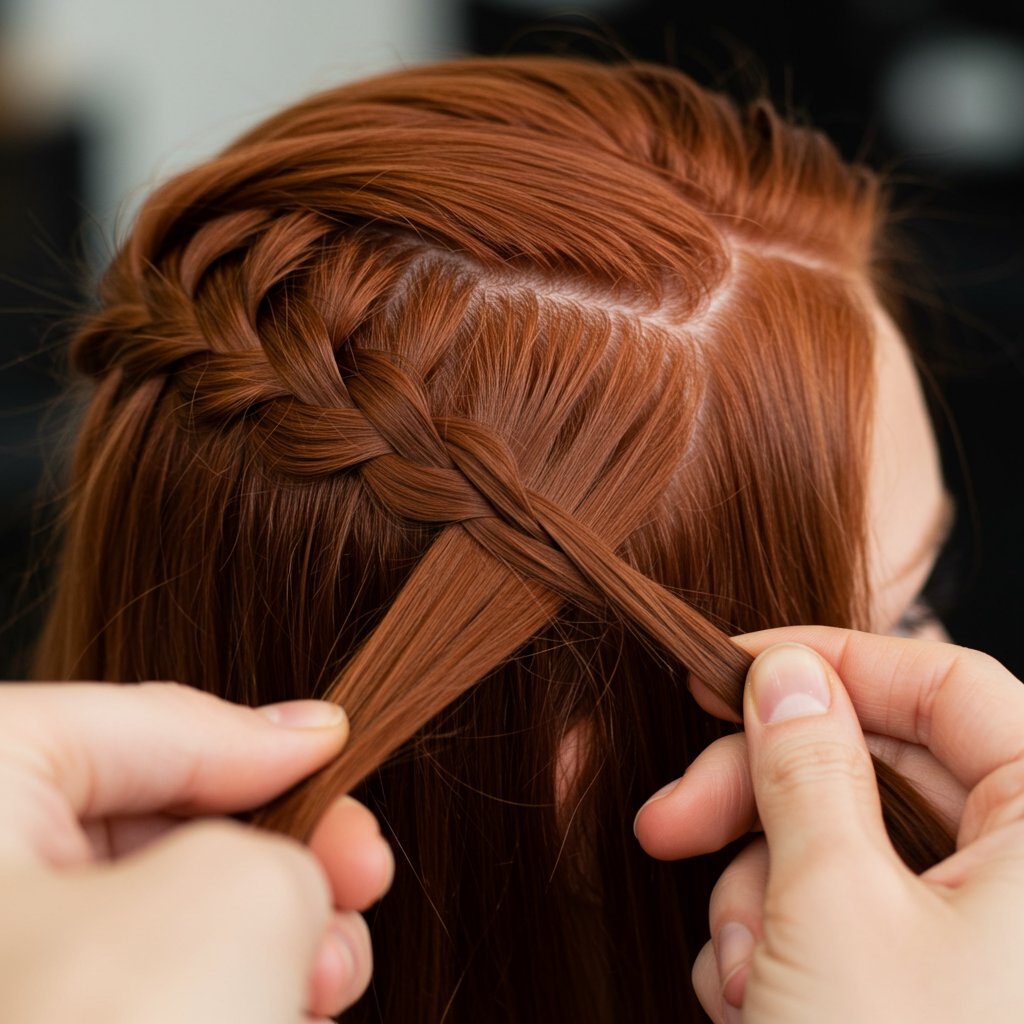
Before you pick up a single strand of hair, it’s crucial to understand the one key difference that separates a French braid from a Dutch braid. It all comes down to the direction of the weave. A French braid is an inverted plait where you cross the side strands over the middle strand. This technique creates a smooth, seamless braid that lies flat against the scalp, with the woven pattern flowing elegantly into the hair. It’s often seen as the more classic and subtle of the two styles, perfect for a polished, sophisticated look.
Conversely, the Dutch braid is an everted plait, often called the "inside-out braid" or "boxer braid." For this style, you cross the side strands under the middle strand. This simple change in direction has a dramatic effect on the final look. The braid sits on top of the hair, creating a raised, three-dimensional effect that stands out with bold definition. The Dutch braid offers a more pronounced, statement-making style and is the foundation for many intricate looks, including cornrows. Understanding this "over versus under" principle is the most important concept you'll learn, as it's the building block for both techniques.
Prepping Your Hair for Perfect Braids
A beautiful braid starts long before the first section of hair is picked up. Proper preparation is the secret to a smooth, frizz-free, and long-lasting style. Skipping this step can lead to tangles, flyaways, and a braid that quickly falls apart. First, it’s best to work with hair that isn’t freshly washed. Second-day hair often has a bit more natural grit and texture, which provides a better grip and helps the braid hold its shape. If you must start with clean hair, a light spritz of dry shampoo or texturizing spray at the roots can mimic this effect, adding the necessary hold.

Next, thoroughly detangle your hair. This is a non-negotiable step. Working with knotted hair is not only difficult but can also cause breakage. Use a wide-tooth comb or a detangling brush, starting from the ends and working your way up to the roots to gently remove all snags. Once your hair is smooth, consider applying a small amount of product to aid the braiding process. A light-hold mousse, a smoothing cream, or a touch of hair oil can help tame flyaways, add shine, and give you more control over the strands. Apply the product evenly from roots to ends, but be careful not to overdo it, as too much can make the hair slippery and difficult to handle.
Step-by-Step Guide: Mastering the Classic French Braid
The French braid is the quintessential elegant plait. Its smooth, cascading appearance makes it a versatile choice for any occasion. Follow these detailed steps to create your own.
Step 1: Create Your Starting Section
Begin at your front hairline. Gather a triangular or rectangular section of hair from the top-center of your head, as if you were creating a half-up style. The size of this initial section will determine the starting width of your braid. For a finer braid, start with a smaller section; for a chunkier one, start larger. Brush this section back so it's smooth and separate from the rest of your hair.Step 2: Begin the Initial Weave
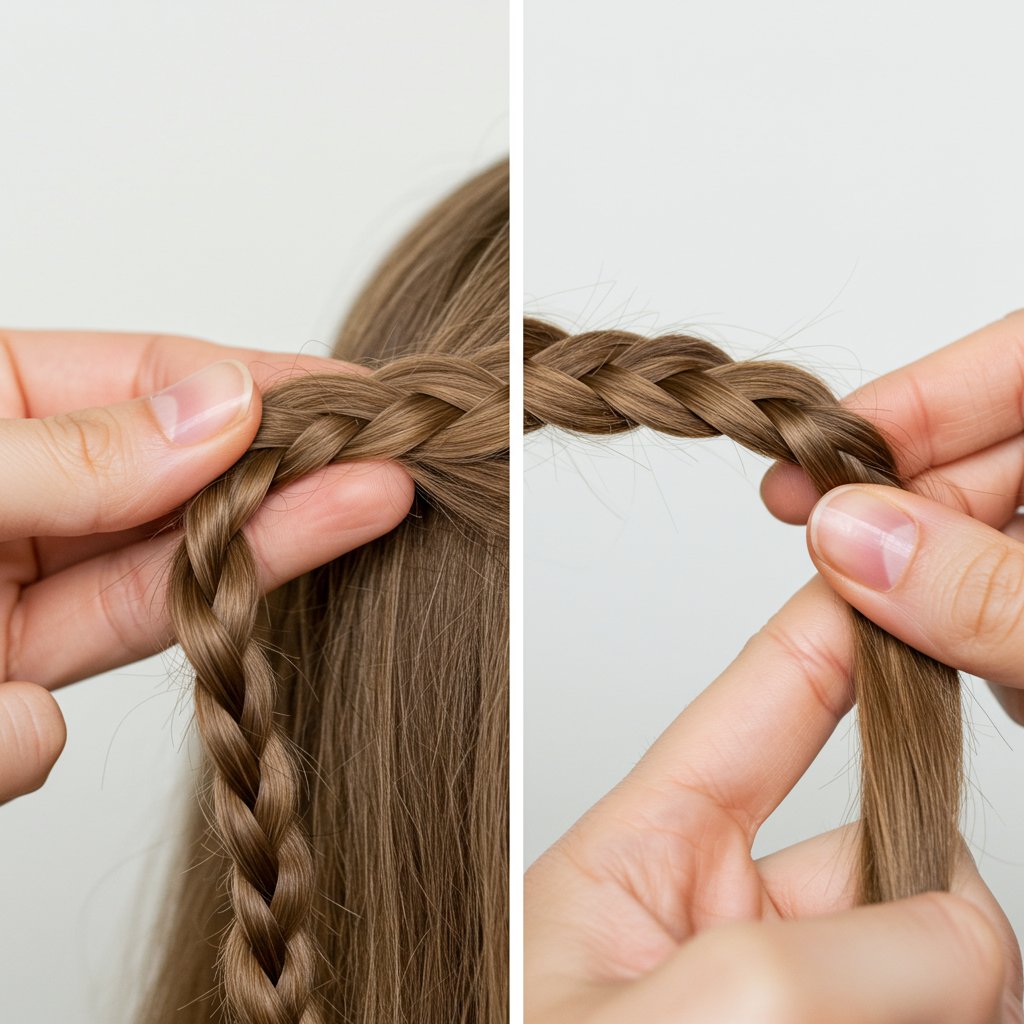
Divide this starting section into three equal strands: left, middle, and right. Hold the left and right strands in each hand and let the middle strand hang freely for a moment. Begin a standard three-strand plait for one or two stitches to establish the pattern: cross the right strand over the middle strand. The original right strand is now the new middle strand. Then, cross the left strand over the new middle strand.Step 3: Incorporate New Hair
This is the key step that defines the French braid. Before you cross a side strand over the middle again, gather a small, new section of loose hair from that same side of your head. Join this new hair with the existing side strand, making it one thicker piece. Now, cross this entire combined section (the original side strand plus the new hair) over the middle strand. Repeat on the other side: gather a new section of hair from the left side, join it with the left strand, and cross the entire combined piece over the middle.Step 4: Continue Down the Head
Continue this pattern down the back of your head. With each crossover, add a new, even section of hair from the corresponding side. Try to pick up sections that are consistent in size to keep the braid looking uniform and neat. Maintain a firm, even tension with your fingers. If your hands get tired, you can gently hold the base of the braid with one hand while you adjust your grip with the other.Step 5: Finish and Secure the Braid
Once you reach the nape of your neck and have incorporated all the loose hair, you will be left with three strands. Continue braiding these three strands in a standard plait (right over middle, left over middle) all the way to the ends. Secure the braid with a clear elastic or a hair tie that matches your hair color. You can gently tug at the edges of the braid to loosen it for a fuller, more romantic look if desired.Step-by-Step Guide: Conquering the Dutch Braid (The "Inside-Out" Braid)
The Dutch braid makes a bold statement with its prominent, 3D appearance. The technique is nearly identical to the French braid, but with one crucial reversal.
Step 1: Isolate Your Top Section
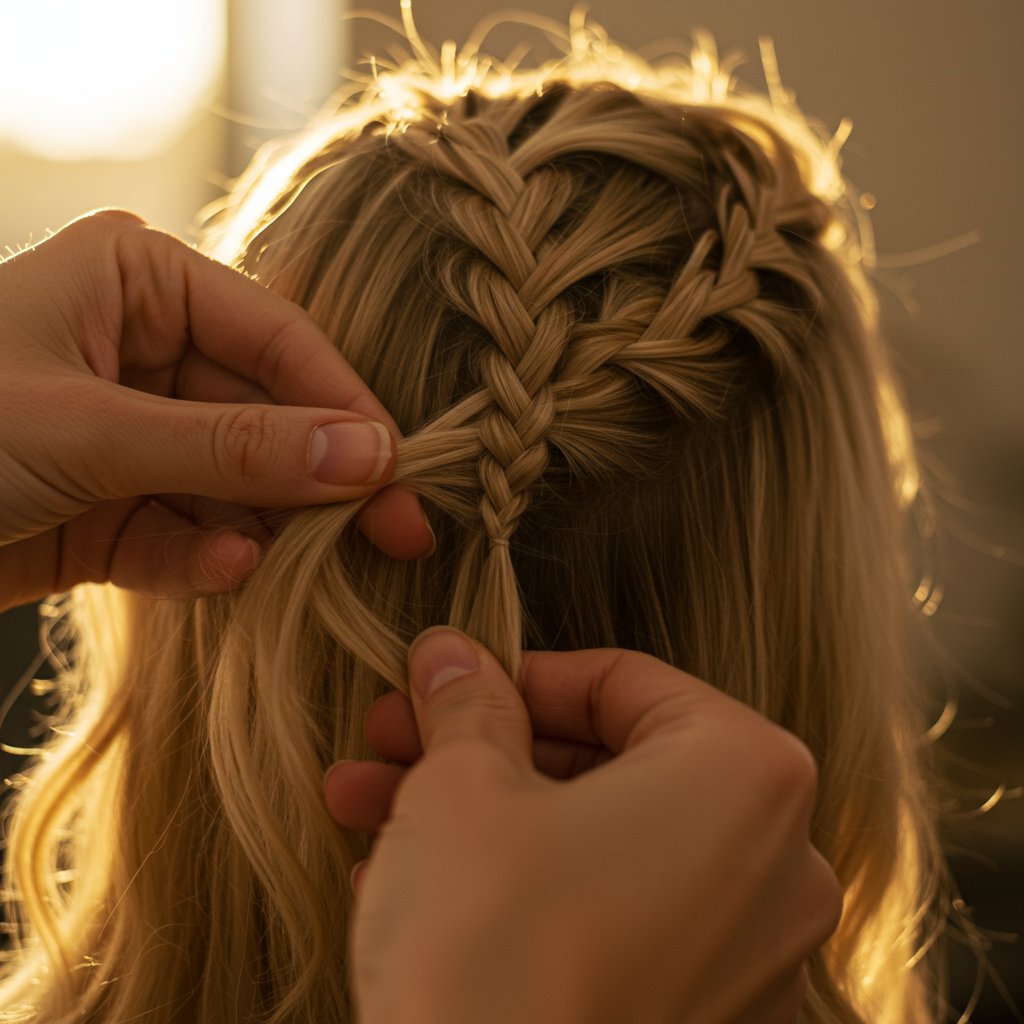
Just like the French braid, start by gathering a clean section of hair at the top of your head. Brush it back smoothly. The size of this section will dictate the initial size of your braid. Divide this hair into three equal strands: left, middle, and right.Step 2: The "Under" Weave
Here is the fundamental difference. Instead of crossing over, you will cross under. Take the right strand and cross it under the middle strand. It now becomes the new middle strand. Then, take the left strand and cross it under the new middle strand. Complete this initial plait once or twice to establish the pattern. You should already see the braid starting to sit on top of the hair.Step 3: Add Hair from the Sides
Now it's time to incorporate more hair. Before you cross the right strand under the middle, gather a new section of loose hair from the right side of your head. Combine it with the right strand. Now, take this entire, thicker right strand and cross it under the middle strand. Repeat on the other side: gather a new section from the left, join it to the left strand, and cross the whole piece under the middle.Step 4: Maintain Tension and Pattern
Continue this "under" pattern all the way down your head. Each time you are about to cross a side strand under, add a new piece of hair to it. Keeping a tight, consistent tension is especially important for Dutch braids, as it helps the braid to "pop" and stand out. Use your thumbs to guide the new sections of hair cleanly into the braid and keep the parts defined.Step 5: Braid to the Ends
When you've gathered all the hair at the nape of your neck, continue with a standard three-strand plait to the ends, but remember to keep the "under" pattern consistent (right under middle, left under middle). Secure the end with an elastic. For a more dramatic effect, gently pull on the outer edges of the Dutch braid. This technique, called "pancaking," can make it look significantly thicker and more voluminous.Common Mistakes Beginners Make (and How to Fix Them)
Every braiding expert was once a beginner, and making mistakes is a natural part of the learning process. Here are some of the most common hurdles and how to overcome them.

- The Braid is Too Loose: This is often caused by not maintaining enough tension. As you braid, keep your hands and fingers close to the scalp. After each weave, give a gentle tug on the three strands to tighten the plait. A bit of pomade or braiding gel on your fingertips can also improve your grip.
- Uneven Sections and a Lopsided Braid: The key to a balanced braid is taking symmetrical sections of hair. Try to eyeball the amount of new hair you add with each pass, making it as equal as possible on both sides. Braiding in front of a mirror (or even a two-mirror setup) is incredibly helpful until the movements become muscle memory.
- Bumps and Bubbles: If you notice bumps near your scalp, it’s usually because the hair wasn't brushed smoothly into the braid. Before adding a new section, quickly run your fingers through it to ensure it's flat and tangle-free. If a bubble forms, you may need to undo a few stitches of the braid and re-incorporate that section more smoothly.
- Tired Arms: Braiding your own hair, especially when it's long, is a workout! Don't be afraid to take breaks. You can rest your arms by holding the braid in place with one hand or a clip. As you get faster and more efficient with practice, arm fatigue will become less of an issue. Try sitting in a comfortable chair with back support to help your posture.
Adapting Braids for Different Hair Types and Textures
French and Dutch braids are wonderfully versatile, but certain hair types may require a few adjustments for the best results.
- For Fine or Silky Hair: This hair type tends to be slippery, making it difficult for braids to hold. The solution is to add texture. Before braiding, apply a texturizing spray, volumizing mousse, or a sprinkle of grit powder to the roots and lengths. This will give the strands the grip they need to stay in place. Creating tighter, smaller braids also tends to work better than large, loose ones.
- For Thick or Coarse Hair: While thick hair creates beautifully lush braids, it can be challenging to manage. Work in smaller, more numerous sections to maintain control. Applying a smoothing cream or leave-in conditioner can make the hair more pliable. Using larger, stronger hair ties is also a must to secure the substantial weight of the finished braid.
- For Curly and Coily Hair: Braiding on curly hair can create a stunning, textured look. You can choose to braid it dry for a voluminous, bohemian style or braid it while damp for a more defined braid that results in a beautiful wave pattern when taken out. A moisturizing curl cream or gel will help control frizz and define the curls within the plait. Be gentle to avoid disrupting your natural curl pattern too much.
- For Layered Hair: Layers are notorious for poking out of braids. To combat this, apply a light pomade or wax to the strands as you braid. This will help the shorter pieces adhere to the longer ones. Another trick is to braid the hair when it's slightly damp. As the hair dries, the layers tend to set in place within the braid. If pieces still pop out, a few strategically placed bobby pins can hide them.
Pro Tips for Elevating Your Braids
Once you've mastered the basics, these professional tips will take your French and Dutch braiding skills to the next level.
- Master the "Pancake" Technique: This is the ultimate trick for faking volume. After your braid is secured, start at the bottom and gently pull on the outermost edges of each woven section. Work your way up the braid, pulling gently and evenly on both sides. This flattens and widens the plait, creating the illusion of much thicker, fuller hair. Be careful not to pull too hard or you might loosen the braid completely.
- Start with Texture: Don't underestimate the power of a good texturizing spray or sea salt spray. Misting your hair before you begin adds grit and hold, making the hair easier to grip and ensuring your finished style lasts all day. It's the secret weapon used by stylists for that perfectly undone, editorial look.
- Second-Day Waves: One of the best parts of braiding your hair is the beautiful, heatless waves you get the next day. For the best results, braid your hair when it's about 80% dry and apply a light-hold mousse. Sleep on it (a silk pillowcase helps reduce frizz), and in the morning, carefully undo the braid. Gently separate the waves with your fingers—don't brush them—and set with a light-hold hairspray for effortless, beachy texture.
Frequently Asked Questions About Braiding
Why is my Dutch braid not "popping out"?
This almost always comes down to two things: tension and technique. Ensure you are consistently crossing the strands under the middle section, not over. Also, maintaining firm tension as you braid helps the plait sit tightly on top of the hair. Finally, use the pancaking technique after the braid is secured to gently pull the edges and accentuate the raised effect.How can I braid my own hair without my arms getting tired?
This is a universal struggle for beginners! Try sitting in a supportive chair and propping your elbows on a table or counter in front of a mirror. Take short breaks between sections, holding the braid securely with one hand while you rest the other. With practice, your muscle memory will improve, and you'll become much faster, reducing overall strain.Can I do French or Dutch braids on short hair?
Absolutely! For shorter hair (like a bob or lob), you'll need to create smaller, tighter braids and keep your fingers very close to the scalp. A French or Dutch braid crown that follows the hairline or two smaller braids can work beautifully. Using a pomade or wax will be essential to help grip the shorter strands and prevent them from popping out.What products should I use to make my braids last longer?
A good foundation is key. Start with a texturizing spray or mousse to give the hair grip. A light pomade or braiding gel on your fingertips as you work will help control flyaways. Once finished, a generous misting of a strong-hold, non-sticky hairspray will lock everything in place for hours, or even days.How do I sleep with braids to keep them neat?
To protect your braids overnight and minimize frizz, the best option is to wrap your hair in a silk or satin scarf, or sleep in a satin bonnet. These materials create less friction than cotton pillowcases, helping to keep your style smooth and intact. If you don't have a scarf, a silk or satin pillowcase is the next best thing.What's the difference between a Dutch braid and a cornrow?
A Dutch braid is the foundational technique for a cornrow. The main difference is scale and proximity to the scalp. A cornrow is essentially a very tight, small, and precise Dutch braid that is crafted very close to the scalp. While you might have one or two larger Dutch braids, a cornrowed style typically features many small, intricate braids patterned across the head.Conclusion: Practice Makes Perfect
Learning French and Dutch braiding is a journey of patience and practice. Your first few attempts may not be perfect, but each one will bring you closer to mastering these beautiful and versatile techniques. Remember the fundamental rule: French is over, and Dutch is under. By preparing your hair properly, following the steps carefully, and learning from common mistakes, you will soon be able to create stunning braided styles with ease and confidence.
Embrace the creative process, experiment with different looks, and don't be afraid to make it your own. Whether you're aiming for a sleek, professional French braid or a bold, voluminous Dutch braid, the skills you develop will unlock a new level of hairstyling artistry. For those seeking more advanced techniques or intricate braided updos for a special event, consulting with an experienced stylist at a professional hair salon can provide personalized guidance and a flawless, show-stopping result.


