Box Braids: The Ultimate Protective Style Guide | Installation, Care & Trends
Introduction: Embracing the Timeless Elegance of Box Braids
Box braids are more than just a hairstyle; they are a cultural touchstone, a statement of beauty, and one of the most versatile protective styles available. With roots tracing back thousands of years to Africa, this iconic look has endured, evolving in style while remaining a steadfast choice for protecting natural hair from daily manipulation and environmental stressors. This comprehensive guide to box braids will walk you through every step of the journey, from preparing your hair for installation to maintaining the style for longevity and ensuring a safe takedown process. By understanding the nuances of this beloved style, you can promote healthy hair growth and enjoy the boundless styling possibilities they offer.
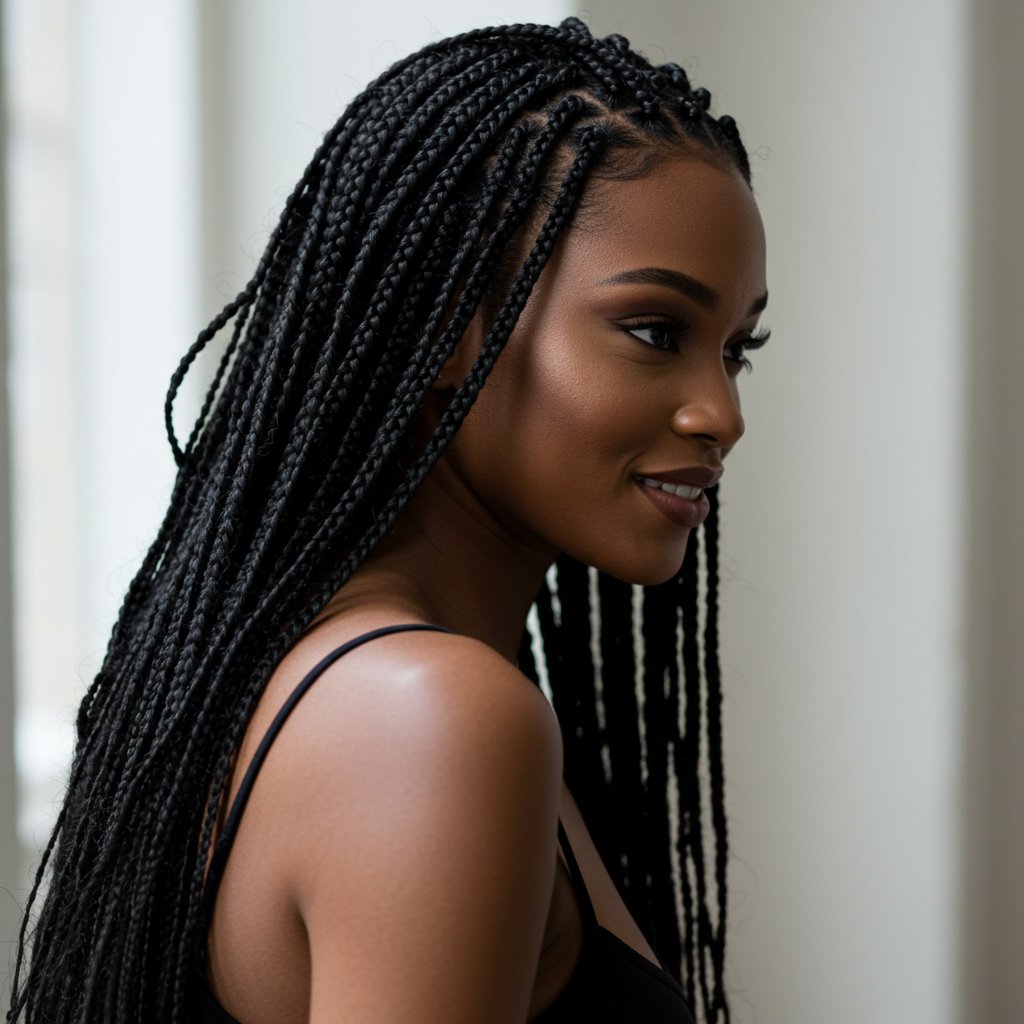
As a premier protective style, box braids work by encasing your natural hair within extensions, shielding it from breakage, split ends, and moisture loss. The name itself comes from the characteristic square-shaped, or "boxy," partings used to section the hair before braiding. Whether you opt for a sleek, long look, a chic bob, or vibrant, colorful strands, box braids provide a stunning aesthetic while giving your natural hair a much-needed rest. This guide is designed to be your ultimate resource, ensuring your box braid experience is not only beautiful but also beneficial for the health of your hair.
What Exactly Are Box Braids? A Deep Dive into the Style
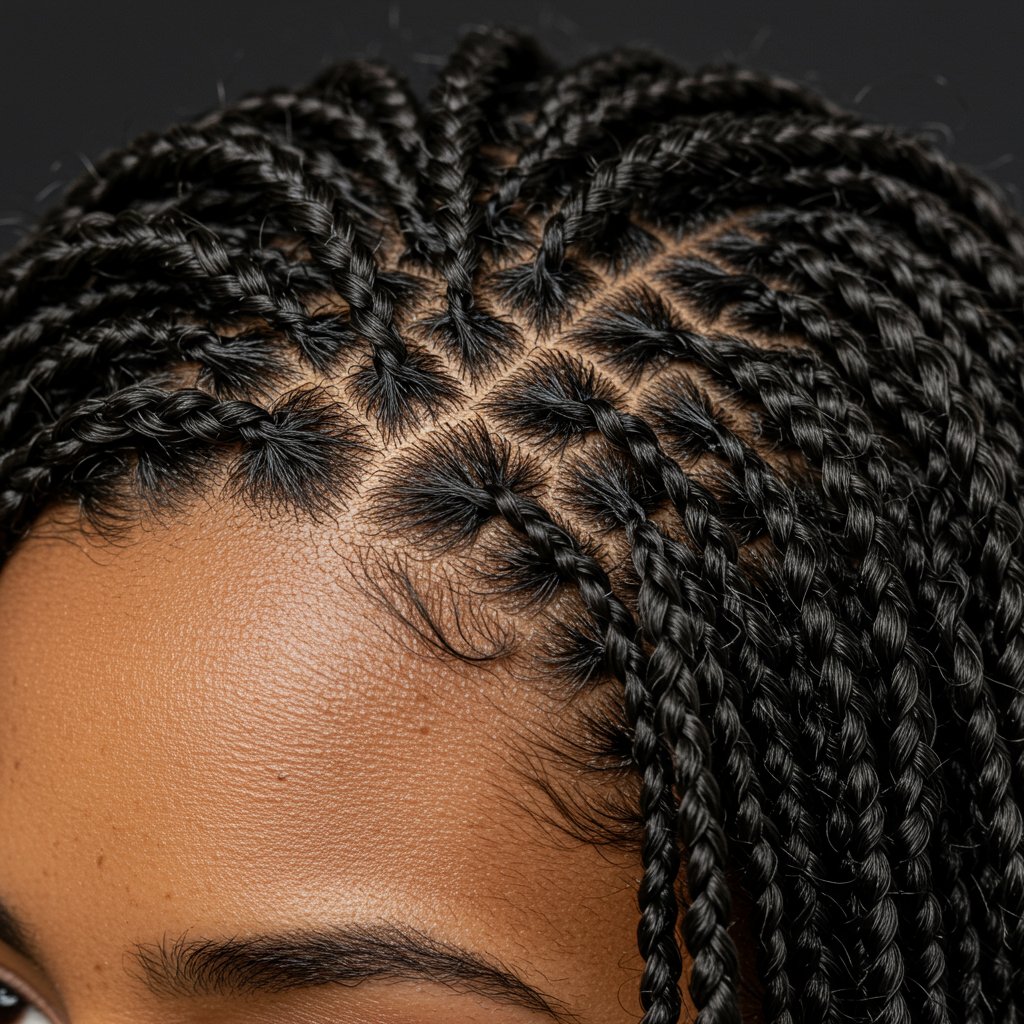
At its core, a box braid is a three-strand braid, but its distinction lies in the precise, sectioned parting at the scalp. Unlike cornrows, which are braided flat against the scalp, box braids hang freely, allowing for incredible movement and styling versatility. This freedom is what makes them a go-to for ponytails, updos, buns, and countless other creative looks. The style is created by incorporating synthetic or human hair extensions, which add length, volume, and color, while also protecting the natural hair that is braided within.
There are several popular variations of box braids, each offering a unique look and feel. Traditional box braids feature a small knot at the base of the braid where the extension is secured to the natural hair. This method is known for its durability. In contrast, knotless box braids have surged in popularity due to their flatter, more natural-looking start. This technique involves gradually feeding the extension hair into the braid, creating a seamless transition that is lighter and puts less tension on the scalp. Other variations include micro braids, which are incredibly small and can mimic the look of loose hair, and jumbo braids, which make a bold statement with thick, dramatic plaits.
Beyond aesthetics, the primary function of box braids is protection. By tucking away your natural ends and reducing the need for daily combing, heat styling, and manipulation, you create an optimal environment for hair retention and growth. The style helps to lock in moisture, minimizes breakage, and can be a lifesaver for those with busy lifestyles who want a low-maintenance yet consistently polished look. When installed and cared for properly, box braids are a powerful tool in any healthy hair journey.
Preparing Your Natural Hair for Flawless Box Braids
A successful and long-lasting box braid installation begins long before you sit in the stylist's chair. The health of your natural hair is the foundation of the entire style. Neglecting proper preparation can lead to dryness, breakage, and scalp irritation. To ensure your hair thrives underneath the braids, a thorough prep routine is non-negotiable. This process involves cleansing, conditioning, and trimming to create the perfect canvas.
Deep Cleansing and Clarifying
Start with a clean slate. Use a clarifying shampoo to remove any product buildup, dirt, or oils from your hair and scalp. Buildup can lead to itching, flaking, and can even inhibit moisture absorption once the braids are in. A clean scalp promotes healthier hair growth and makes for a more comfortable experience. Follow the clarifying shampoo with a moisturizing, sulfate-free shampoo to replenish hydration without stripping the hair of its natural oils.Deep Conditioning and Protein Treatments
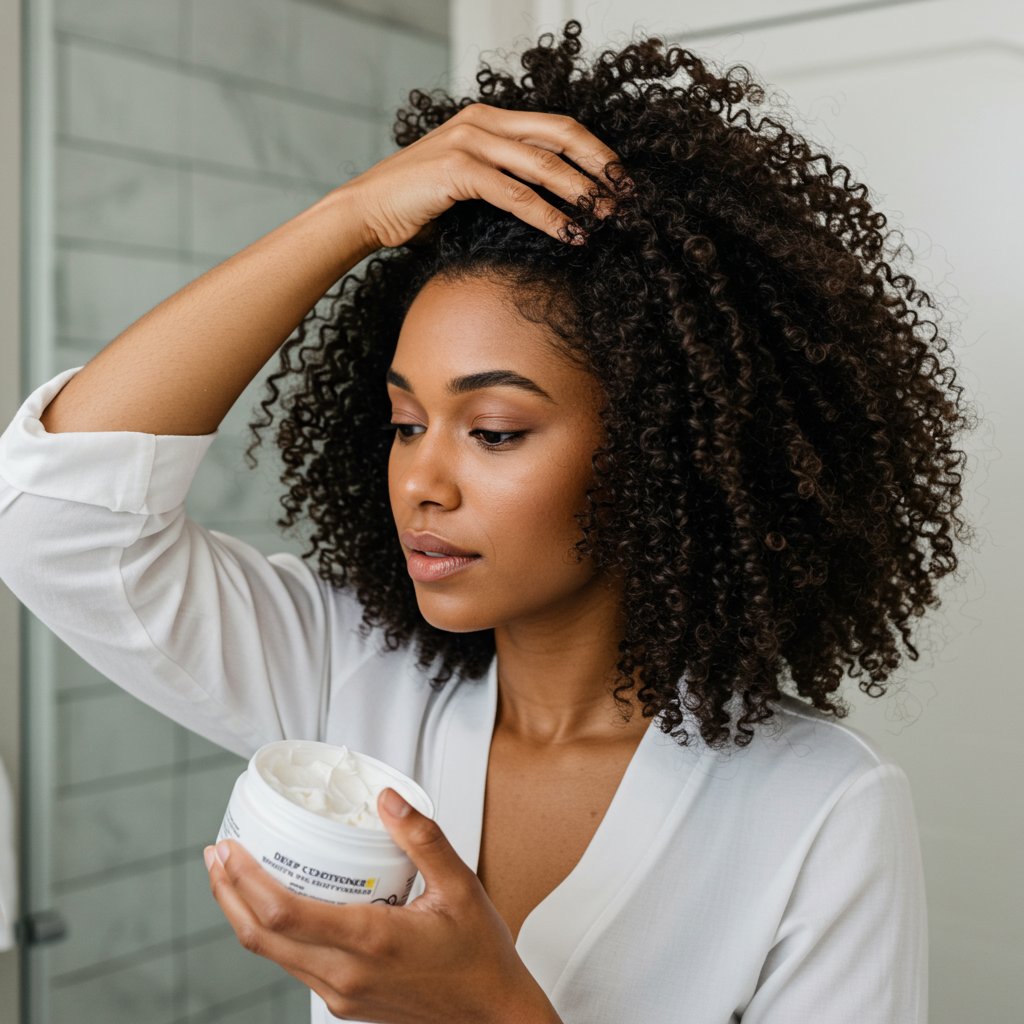
This is perhaps the most critical step. After cleansing, your hair needs a powerful dose of moisture and strength to prepare it for weeks of being in a fixed style. Apply a rich, deep conditioner or hair masque, focusing on your ends. For an extra boost, use a steamer or a heated cap to help the conditioner penetrate the hair shaft more effectively. If your hair feels weak or overly porous, consider a protein treatment a week or two before your appointment. This will fortify the hair strands, making them less susceptible to tension-related breakage. However, be sure to follow up with a moisturizing deep conditioner, as too much protein can lead to stiffness.Thorough Detangling and Trimming
Once your hair is clean and conditioned, it's time to detangle and trim. Gently detangle your hair from ends to roots using your fingers or a wide-tooth comb. This step is crucial for preventing knots and matting within the braids. After detangling, give your hair a light stretch using a blow dryer on a low heat setting. This makes the parting and braiding process smoother and more precise for the stylist. Finally, inspect your ends and trim away any split ends or single-strand knots. Removing damaged ends prevents them from traveling up the hair shaft and ensures that when you take your braids out, your hair is healthy from root to tip.Choosing the Right Braiding Hair, Size, and Color
The braiding hair you choose directly impacts the final look, feel, and weight of your box braids. With a multitude of options available, making the right choice can seem daunting. Understanding the different types of hair, braid sizes, and color possibilities will help you achieve the exact style you envision while ensuring comfort and manageability.
Types of Braiding Hair
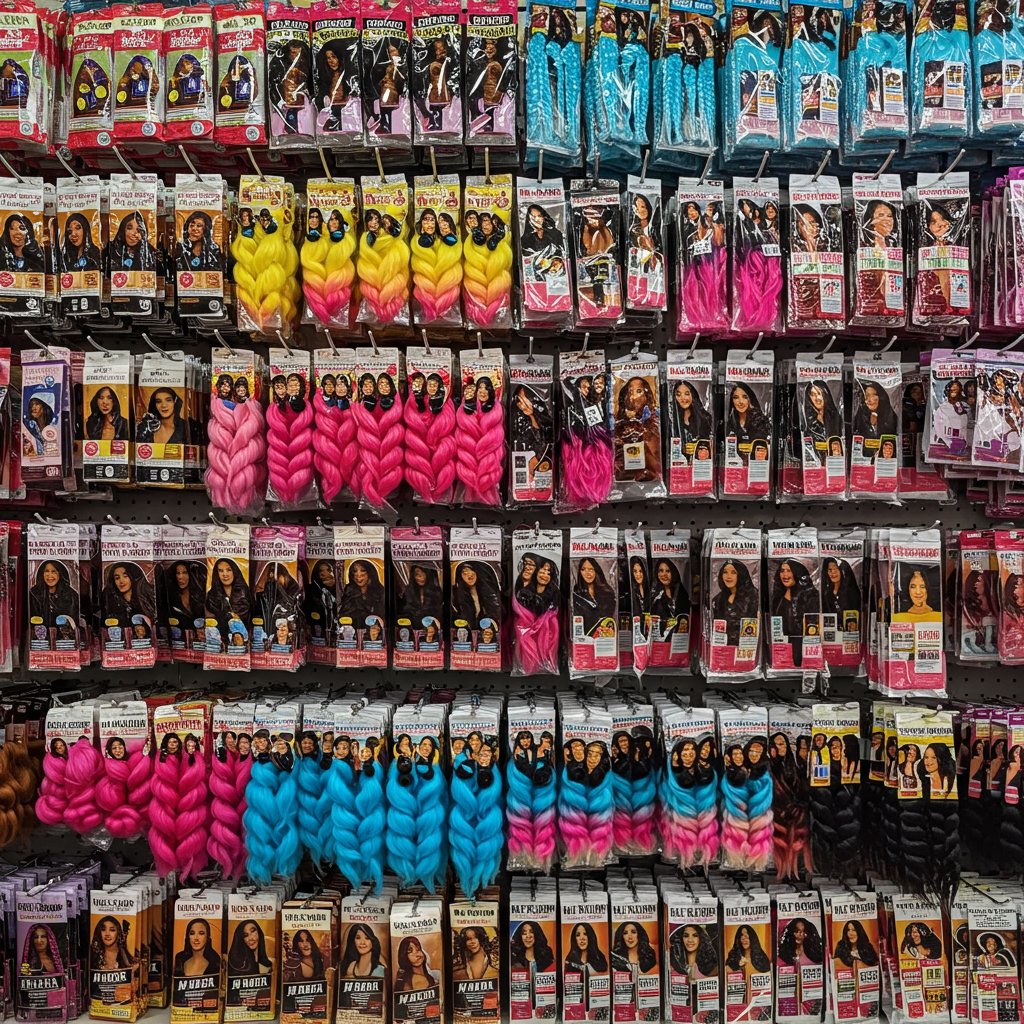
Kanekalon is the most popular and widely used synthetic fiber for braiding. It's known for being lightweight, easy to handle, and having a texture that closely mimics natural hair. It's also flame-retardant and can be sealed with hot water for a smooth, lasting finish. X-Pression is a premium type of Kanekalon hair, famous for its extra-long length, soft texture, and tangle-free quality, making it a favorite for long box braids. For a more luxurious and natural look, human hair can be used, though it is significantly more expensive and requires more maintenance. It offers unparalleled movement and softness but may not hold the braid structure as firmly as synthetic options.Selecting the Braid Size
Braid size is a matter of personal preference but also has practical implications. Jumbo box braids are thick, quick to install, and create a bold, dramatic look. However, they can be heavy and may not last as long as smaller braids. Medium box braids are the most common choice, offering a perfect balance of fullness, manageability, and longevity. Small or micro braids provide a very full, long-lasting style that can look like loose strands of hair from a distance. While beautiful, they take much longer to install and take down and can place more tension on the scalp if not installed correctly.Color and Style Choices
This is where you can truly express your personality. The options are limitless, from natural blacks and browns that blend seamlessly with your hair to bold neons, soft pastels, and sophisticated ombrés. You can mix and match colors for a custom blend or opt for a single, striking shade. Consider your lifestyle, profession, and personal style when choosing a color. A subtle honey blonde can add warmth and dimension, while a vibrant blue or burgundy can make a powerful fashion statement.The Installation Process: What to Expect from a Professional Service
While a DIY approach is possible for some, seeking a professional stylist for box braid installation is highly recommended to ensure neatness, proper tension, and overall hair health. A skilled braider has the expertise to create clean parts and execute the braid with a technique that minimizes stress on your scalp and edges. Understanding the professional process can help you know what to look for in a stylist and what to expect during your appointment.
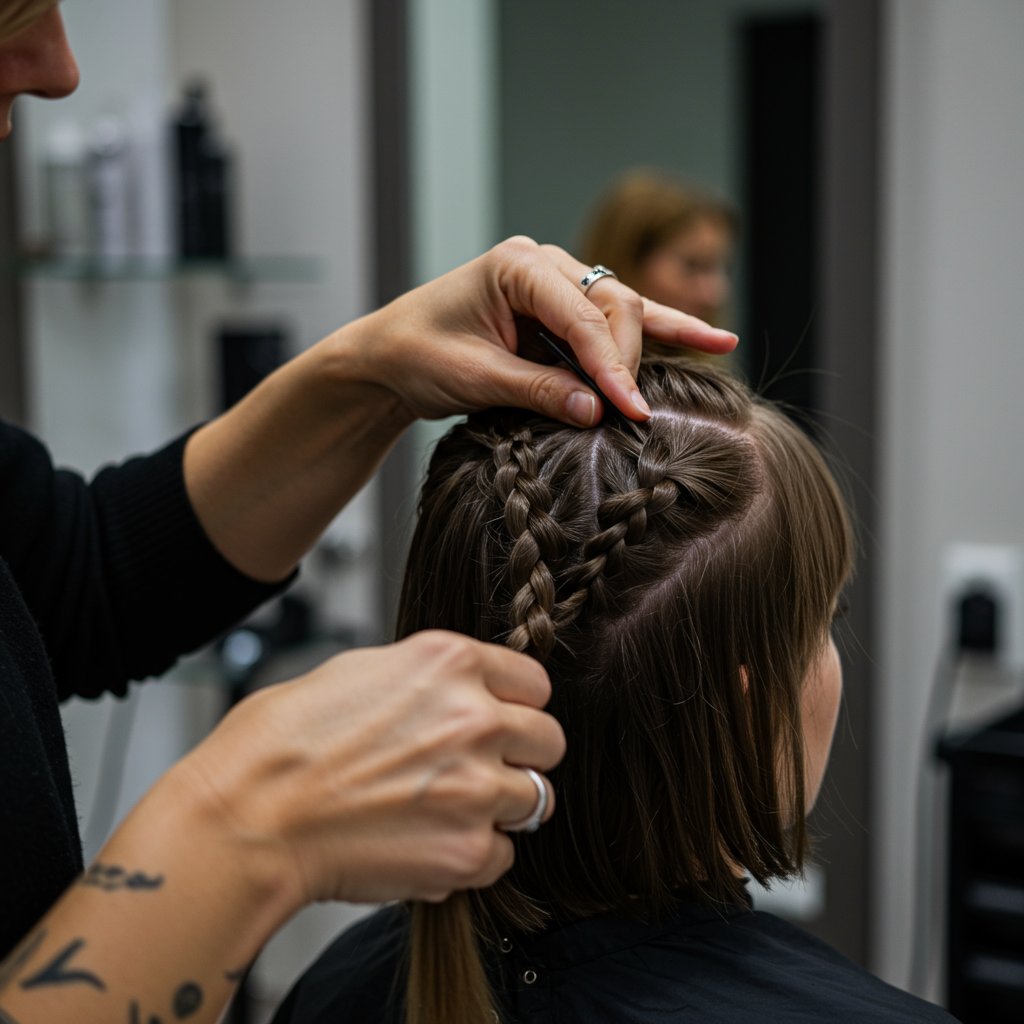
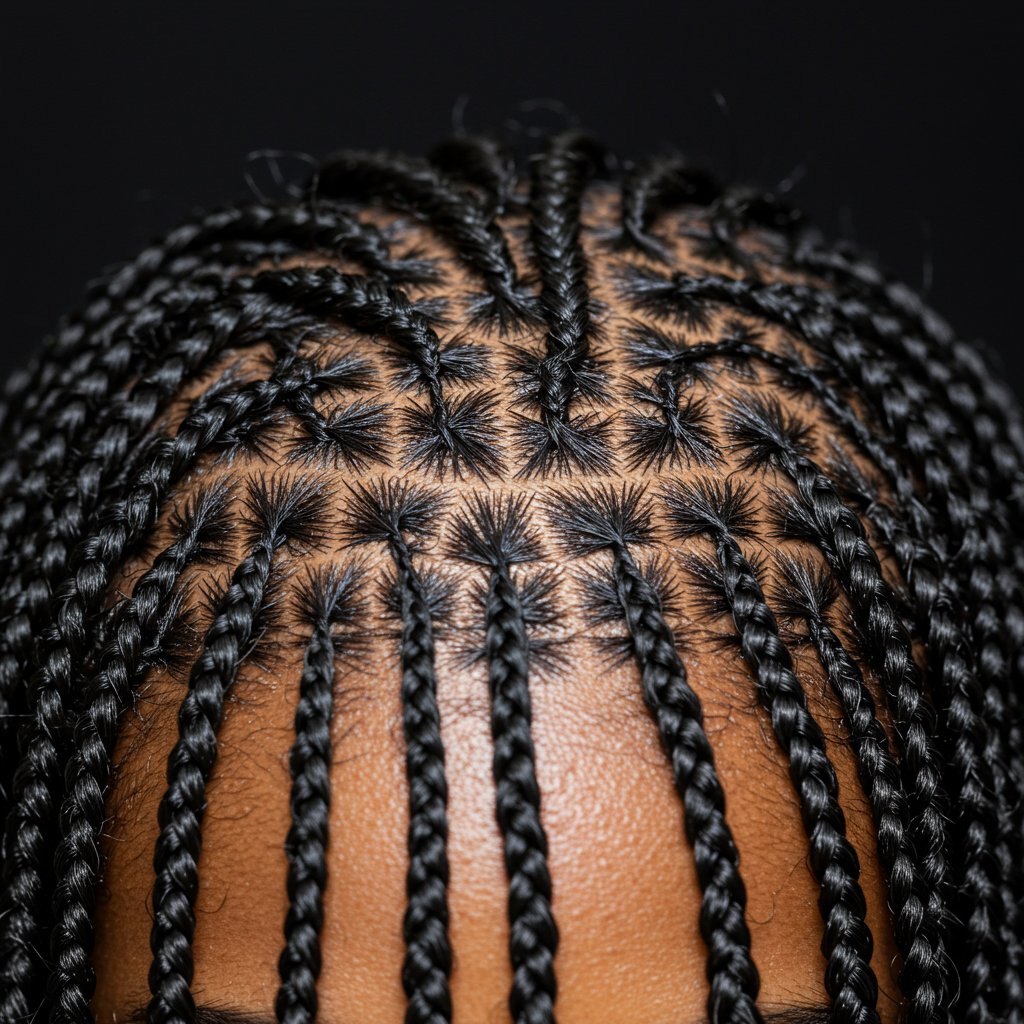
The Parting Process
The foundation of beautiful box braids is clean, precise parting. Your stylist will use a rat-tail comb to create a grid of squares, triangles, or even diamond shapes across your scalp. The consistency and neatness of these parts are what give the style its polished, professional look. The size of each part will correspond to the desired braid size. Clear communication with your stylist about the size and pattern you want is key to achieving your desired outcome.The Braiding Technique
As mentioned earlier, there are two primary techniques. For traditional braids, the stylist will take a piece of extension hair, fold it in half, and create a small knot at the base of the natural hair section before beginning the three-strand plait. For knotless braids, the stylist begins braiding with just your natural hair and then gradually feeds in small pieces of the extension hair. This feed-in method creates a flatter, more seamless look that is often praised for being lighter and more flexible from day one, allowing for immediate styling into ponytails and updos with less tension.Sealing the Ends
Once the braids are complete, the ends must be sealed to prevent them from unraveling. The most common method is dipping the ends in hot water. This not only seals the synthetic fibers but also makes the braids smooth and flexible. Some stylists may quickly run a lighter along the very tip of the braid, but this method requires extreme caution and is best left to experienced professionals. Alternatively, ends can be secured with beads, rubber bands, or left curly by using perm rods before the hot water dip.Essential Box Braid Maintenance for Longevity and Health
Proper maintenance is the secret to keeping your box braids looking fresh and, more importantly, ensuring your natural hair remains healthy underneath. A consistent care routine will help you extend the life of your style, prevent product buildup, and soothe any scalp irritation. Neglecting maintenance can lead to a dry, itchy scalp and brittle hair upon takedown.
Scalp Care and Cleansing
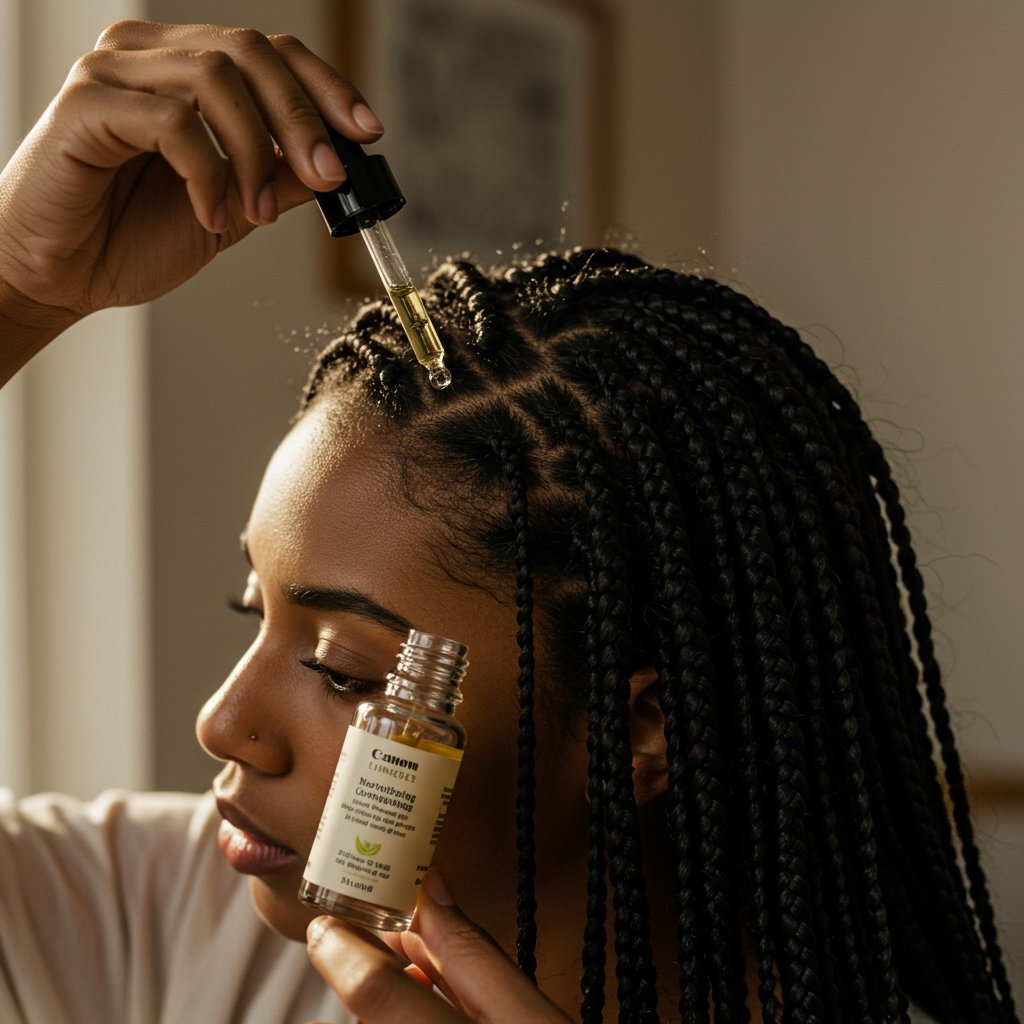
A clean scalp is a happy scalp. While you won't be washing your hair in the traditional sense, it's crucial to keep your scalp clean. You can do this every 7-10 days. Mix a small amount of shampoo with water in a spray bottle and spritz it directly onto your scalp. Gently massage with the pads of your fingers (not your nails) to lift dirt and oil. Rinse thoroughly by letting water run down the length of your braids. Alternatively, you can use a cloth soaked in witch hazel or sea breeze to wipe down your scalp between washes. Follow up with a light oil like jojoba or almond oil to replenish moisture.Moisturizing Your Braids and Natural Hair
Your natural hair still needs moisture, even when it's tucked away. Create a daily moisturizing spray by mixing water, a bit of leave-in conditioner, and a few drops of your favorite natural oil in a spray bottle. Lightly mist your braids and scalp every day or every other day. This will keep your natural hair hydrated and prevent it from becoming dry and brittle inside the braids. Pay special attention to your edges, applying a moisturizing cream or gel to keep them healthy.Nighttime Protection
This is a non-negotiable step. To protect your braids from frizz and your edges from friction, you must cover your hair at night. Use a large satin or silk bonnet or scarf to tuck your braids away. If your braids are very long, you can pile them into a loose bun on top of your head before covering them. For added protection, sleeping on a satin or silk pillowcase provides a second line of defense against moisture loss and frizz-causing friction.How Long Should You Keep Box Braids In?
One of the most common questions about box braids is how long they can be worn. While it’s tempting to keep a beautiful style in for as long as possible, wearing them for too long can be detrimental to your hair's health. The general consensus among hair care professionals is to wear box braids for no longer than eight weeks. The ideal window is typically between four to six weeks.
After about a month, you'll notice significant new growth. While this is a great sign that your hair is growing, it's also when potential problems can arise. The new growth can begin to tangle and mat at the root if left unattended. Furthermore, the weight of the braids on the new, unsupported growth can cause tension and breakage. It's also important to remember that your scalp and hair need a break to be thoroughly cleansed, conditioned, and allowed to breathe.
Pay attention to the signs your hair gives you. If you notice excessive product buildup that won't go away, persistent scalp itchiness or tenderness, or a lot of frizz and stray hairs, it's definitely time to take them out. Pushing the style beyond the recommended timeframe risks compromising the very hair you're trying to protect, potentially leading to issues like traction alopecia, a form of hair loss caused by constant pulling.
The Takedown and Post-Braid Hair Care Routine
How you remove your box braids is just as important as how you install and maintain them. A rushed or careless takedown process can undo all the benefits of protective styling, leading to unnecessary breakage and hair loss. Patience is your best friend during this process. Set aside several hours and gather your tools: scissors, a rat-tail comb, and a good detangling product or oil.
Safe Removal Techniques
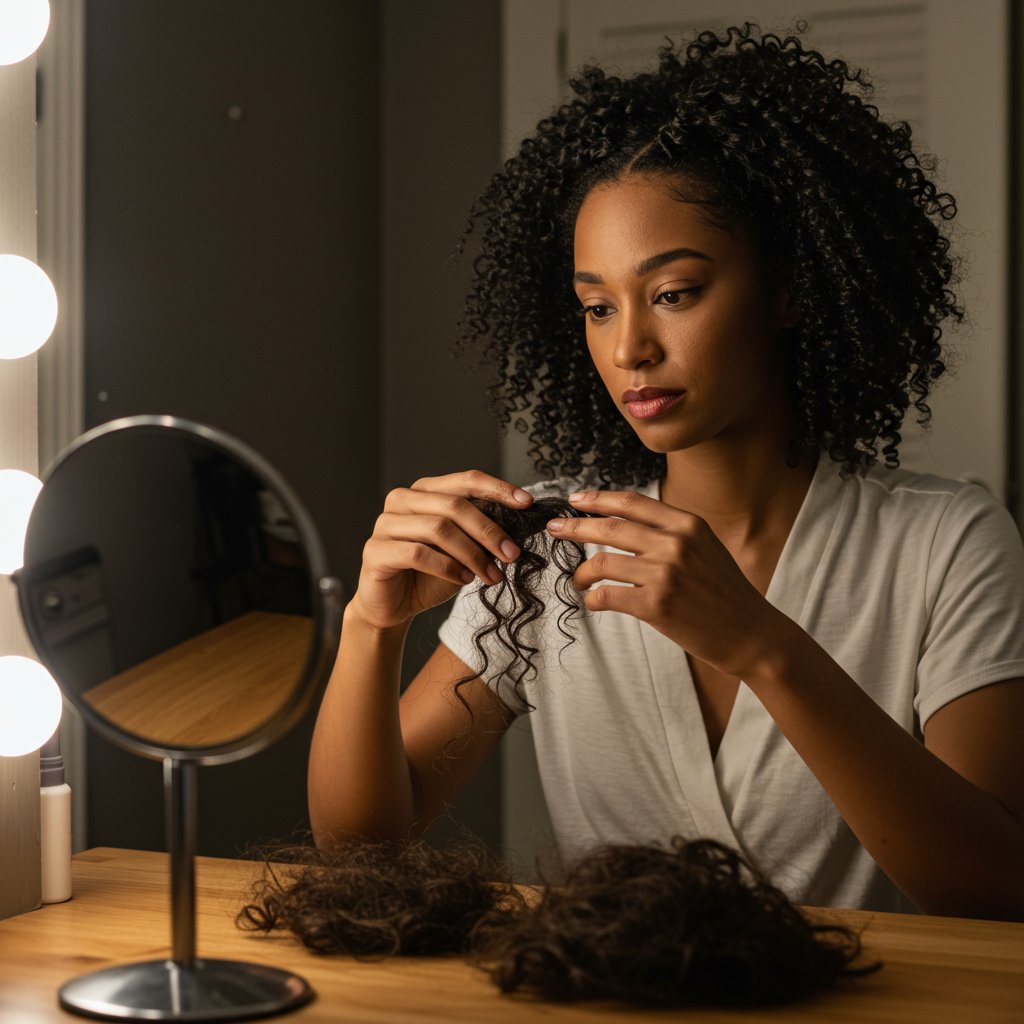
Start by cutting each braid a few inches below where your natural hair ends. If you're unsure, it's always better to cut lower down the braid to be safe. After cutting, begin to unravel the braid from the bottom up. Once you reach the root, you'll encounter a buildup of product and shed hair. Apply a generous amount of oil (like coconut or olive oil) or a product with a lot of slip to this area to help lubricate the strands and make separation easier.The Importance of Detangling
This is the most critical part of the takedown. Your hair naturally sheds about 50-100 strands per day. When in braids, that shed hair has nowhere to go and gets trapped. It's essential to gently remove this accumulated shed hair before you wash your hair. Washing matted, shed hair will create a tangled nightmare. Working in small sections, use your fingers to gently separate the strands and remove the shed hair. Then, follow up with a wide-tooth comb, starting from the ends and working your way up to the roots.Post-Takedown Treatment
Once your hair is fully detangled, it's time for some serious TLC. Begin with a clarifying shampoo to remove all remaining product buildup. Follow up with a hydrating, restorative deep conditioner or hair masque. Let it sit for at least 30 minutes under a plastic cap or steamer to allow for maximum penetration. After rinsing, apply a leave-in conditioner and seal with an oil. It's highly recommended to give your hair and scalp a break for at least one to two weeks before installing another long-term protective style.Pro Tips for Flawless Box Braids
- Communicate with Your Stylist: Be clear about braid size, length, and parting. Don't be afraid to speak up if a braid feels too tight during installation. A little tension is normal, but pain is a sign of potential damage.
- Don't Neglect Your Edges: Your hairline is delicate. Avoid styles that pull too tightly on your edges and apply a nourishing edge control or cream daily to keep them moisturized and laid.
- Refresh Your Style: A great way to extend the life of your braids and keep them looking fresh is to use a styling mousse. Apply it over the braids and tie them down with a scarf for 20-30 minutes to tame frizz and add shine.
- Manage Itchiness: An itchy scalp is common, especially in the first week. Instead of scratching (which can cause damage), gently pat the area or use an anti-itch scalp spray containing ingredients like tea tree oil or peppermint oil.
- Stay Hydrated: Healthy hair starts from within. Drink plenty of water to keep your scalp and hair hydrated from the inside out.
Frequently Asked Questions About Box Braids
Can box braids damage your hair?
Box braids themselves do not damage hair; improper installation and poor maintenance do. If braids are installed too tightly, are too heavy for your hair density, or are left in for too long, they can cause tension, breakage, and even traction alopecia. Proper preparation, professional installation, and diligent care are key to a positive, damage-free experience.How much do box braids typically cost at a salon?
The cost of box braids varies widely based on location, stylist experience, braid size, and length. Generally, you can expect to pay anywhere from $150 to $400+. Smaller braids (micros) take much longer and will be at the higher end of the price range, while jumbo braids are typically less expensive.Can I wash my hair with box braids?
Yes, you can and should wash your scalp while wearing box braids, typically every 1-2 weeks. The key is to focus on the scalp rather than saturating the entire length of the braids, which can make them heavy and slow to dry. Use a diluted shampoo in a spray bottle for targeted application and rinse thoroughly.Are knotless box braids better than traditional ones?
"Better" is subjective and depends on your priorities. Knotless braids are often considered more comfortable, lighter, and gentler on the scalp, making them a great option for those with sensitive scalps. Traditional box braids are known for their longevity and crisp, defined look. Both are excellent options when installed correctly.What's the best way to relieve an itchy scalp with braids?
An itchy scalp can be relieved by applying a light oil like tea tree or peppermint oil mixed with a carrier oil (like jojoba or coconut) directly to the scalp. You can also use a specialized anti-itch braid spray. Avoid heavy greases that can clog pores and attract dirt. Gently patting the scalp can also provide relief without disrupting the braids.Can I get box braids on short hair?
Yes, you can get box braids on hair that is at least 2-3 inches long. A skilled stylist can grip short hair and seamlessly blend it into the extensions. However, the style may not last as long as it would on longer hair, and smaller braids are often recommended for a more secure hold.Conclusion: Your Journey to Beautiful, Healthy Braids
Box braids are a testament to the beauty, versatility, and resilience of textured hair. They offer a unique opportunity to protect your natural hair, experiment with new looks, and enjoy a low-maintenance routine. The key to a successful experience lies in knowledge and intention—understanding how to prepare your hair, choosing the right style and stylist, committing to a consistent maintenance routine, and knowing when it's time for a gentle takedown.
By following the comprehensive advice in this guide, you are well-equipped to make your next box braid installation your best one yet. Embrace the protective power and stylistic freedom of this timeless look, and remember that healthy hair is always the ultimate goal. For a flawless installation and personalized advice, always consider consulting with an experienced, professional hair stylist who specializes in protective styling.


