Mastering the Classic French Twist: Your Ultimate Guide to Effortless Elegance
Introduction: The Epitome of Effortless Chic
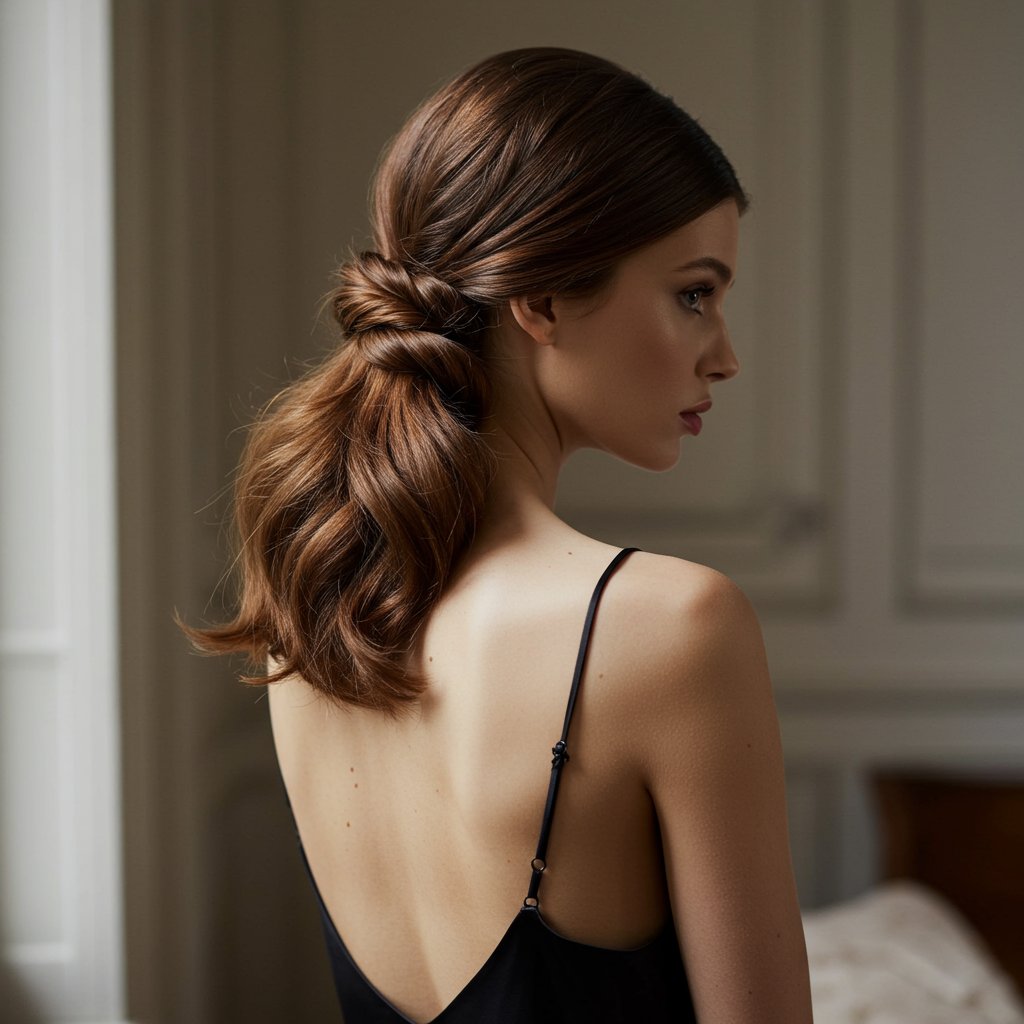
There are few hairstyles as iconic and enduring as the classic French Twist. A symbol of sophistication and grace, this elegant updo has graced red carpets, adorned brides, and elevated everyday looks for decades. Its magic lies in its beautiful contradiction: it appears intricate and complex, yet it embodies an effortless, 'je ne sais quoi' chic. The French Twist is more than just a hairstyle; it's a statement of polished confidence, capable of transforming any ensemble from simple to stunning. Whether you're preparing for a black-tie event, a pivotal business meeting, or simply wish to bring a touch of glamour to your day, mastering the classic French Twist is an invaluable skill.
This comprehensive guide is designed to demystify the process, breaking down every step to ensure you can create a flawless French Twist at home. We will journey through its rich history, explore the essential tools and products for a perfect foundation, and provide a detailed, step-by-step tutorial. Furthermore, we'll delve into modern variations to suit any occasion, troubleshoot common styling pitfalls, and share professional secrets for a long-lasting, salon-quality finish. Prepare to unlock the secrets behind this timeless hairstyle and add a touch of effortless elegance to your personal style repertoire.
A Journey Through Time: The Enduring Legacy of the French Twist
The French Twist, known as chignon à la française in its country of origin, boasts a history as elegant as the style itself. While its exact origins are debated, its precursor styles can be traced back to the sophisticated updos of the late 19th and early 20th centuries. It truly rose to prominence in the mid-20th century, becoming a hallmark of the post-war era's return to glamour and femininity. It was the hairstyle of choice for discerning women who sought a look that was both neat and incredibly stylish, suitable for both day and evening wear.
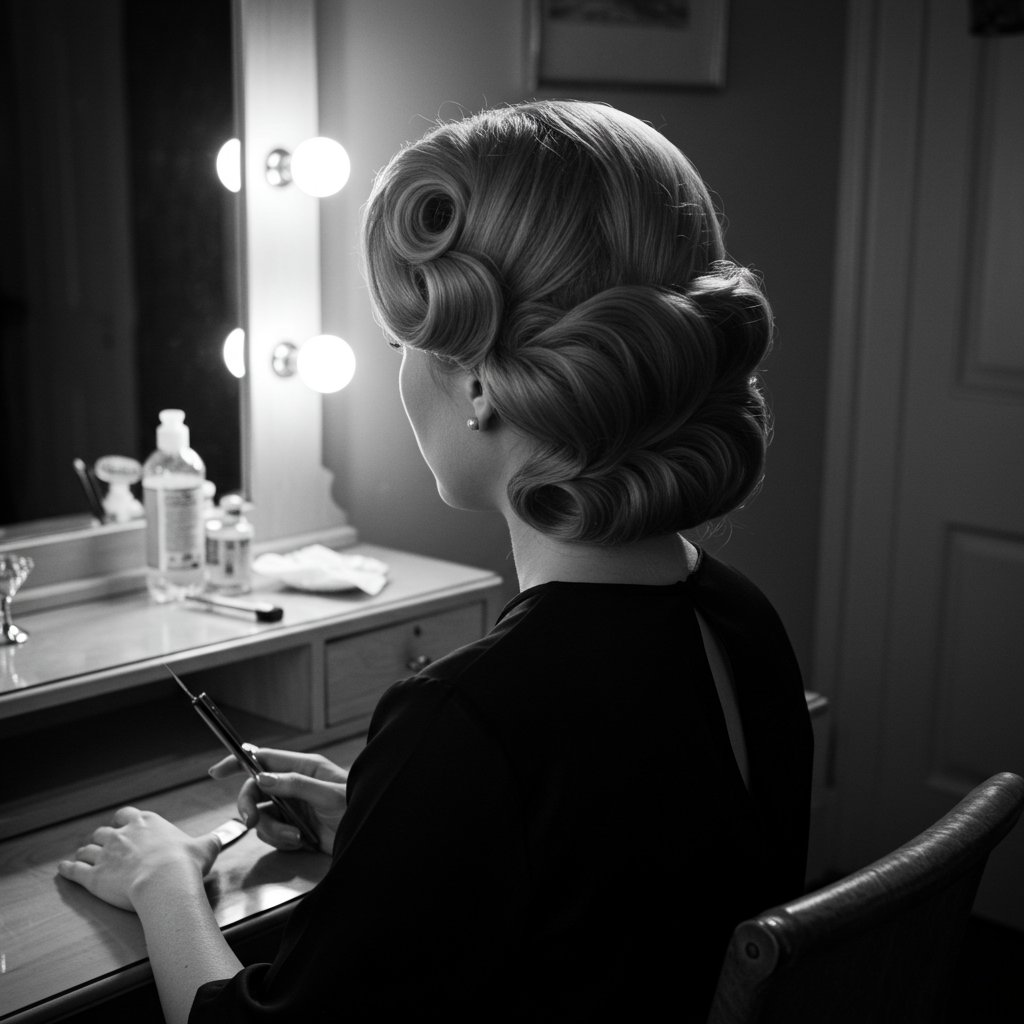
Hollywood's Golden Age cemented the French Twist's status as an icon of screen-siren glamour. Audrey Hepburn famously wore a sophisticated version in Breakfast at Tiffany's, pairing it with her little black dress to create one of the most memorable looks in cinematic history. Grace Kelly, the epitome of regal elegance, often favored the style, showcasing its versatility and royal appeal. From the formal, structured twists of the 1950s to the slightly softer, more voluminous versions seen on First Lady Jacqueline Kennedy in the 1960s, the style has continuously adapted while retaining its core identity. Its ability to evolve with fashion trends is a testament to its perfect design, securing its place as a go-to for refined beauty through the decades.
The Foundation of Perfection: Preparing Your Hair for the Twist
Achieving a flawless classic French Twist begins long before the first pin is placed. Proper preparation is the secret to a smooth, secure, and long-lasting style. The ideal canvas for a French Twist is hair that is not freshly washed. Second-day hair often has more grip and texture, making it less slippery and easier to mold. If you must start with clean hair, it's crucial to add artificial texture. A light mist of texturizing spray or dry shampoo at the roots will provide the necessary hold and prevent the style from slipping.

- Boar Bristle Brush: This type of brush is excellent for smoothing hair and taming flyaways without creating static, resulting in a polished base.
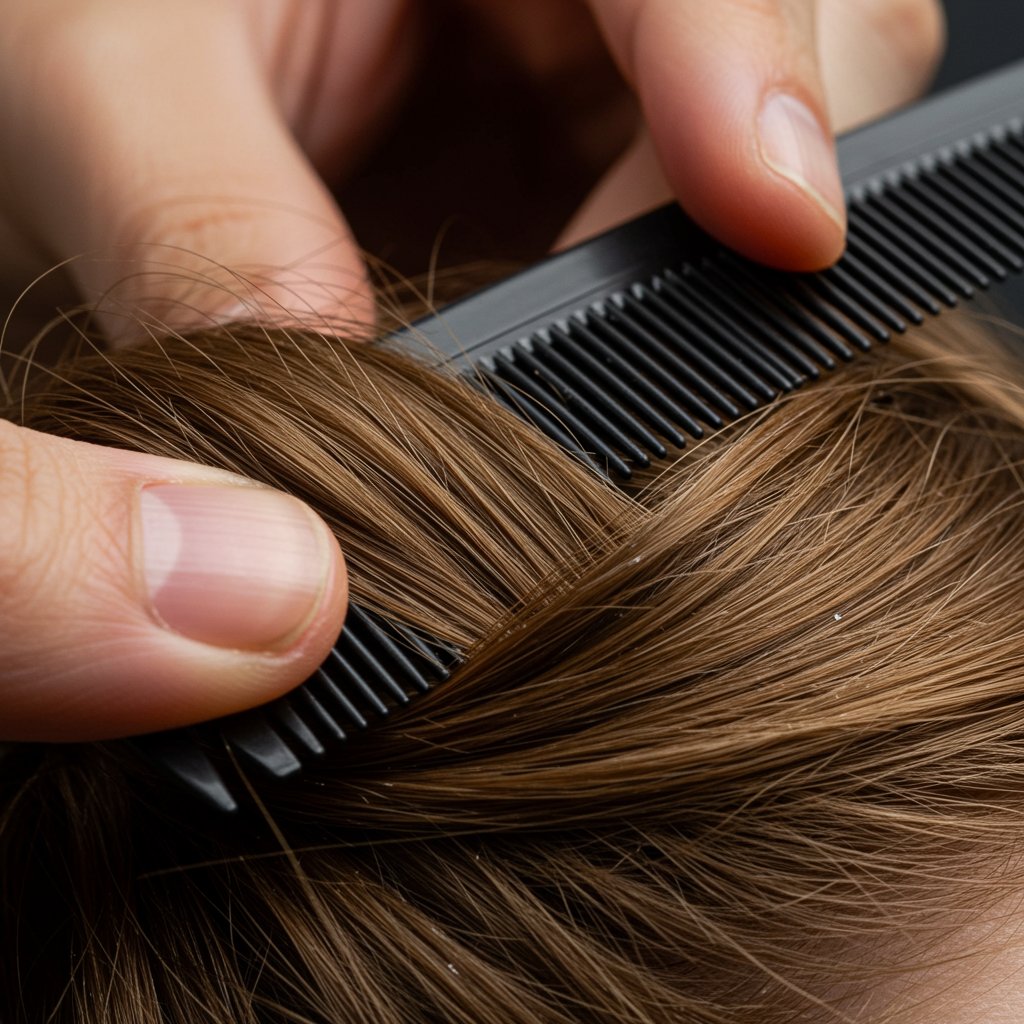
- Fine-Tooth Comb: Essential for backcombing or teasing the roots to build volume and create a secure anchor for your pins.
- Styling Mousse or Volumizer: Applied to damp hair before blow-drying, this builds body and makes fine hair feel fuller, providing a more substantial structure for the twist.
- Bobby Pins and U-Pins: You'll need both. Bobby pins are for securing the foundation of the twist, while U-pins (or French pins) are perfect for tucking in ends and securing the roll without being visible.
- Strong-Hold Hairspray: The final step to lock everything in place. Choose a formula that offers firm control without leaving hair feeling stiff or crunchy.
The Art of the Twist: A Detailed Step-by-Step Tutorial
With your hair prepped and tools at the ready, you can now begin crafting the perfect classic French Twist. Patience and precision are key. Work in front of a mirror, and consider using a second hand mirror to check the back as you go. Follow these steps methodically for a beautiful result.
Step 1: Create the Base
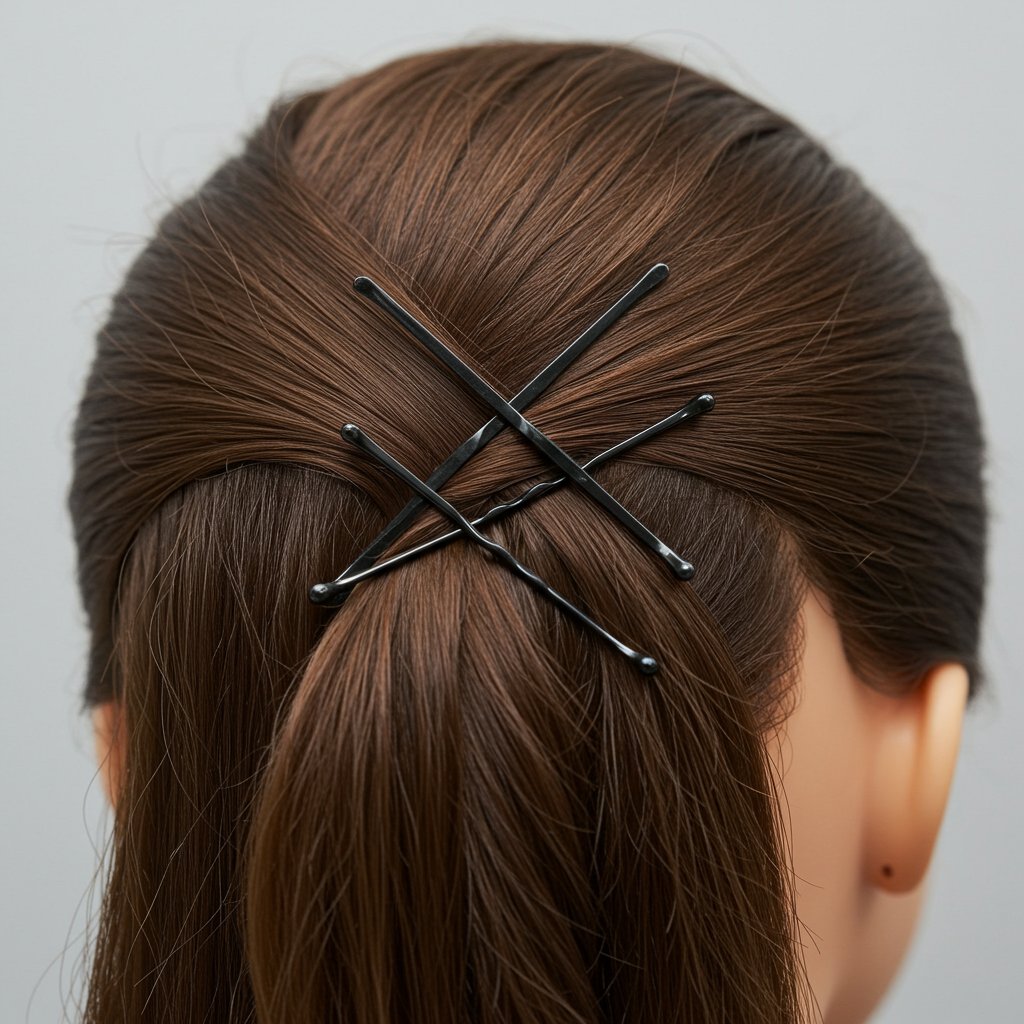
Begin by brushing all of your hair to one side of your head, smoothing it as you go. For example, gather all hair over your left shoulder. The direction you choose will determine the direction of the twist's seam. To create a secure anchor, insert a vertical row of bobby pins along the back of your head, about an inch from the center part. These pins should be placed from the nape of your neck up to the crown, creating a 'track' that your twist will be secured into. Criss-crossing the pins will provide extra hold.Step 2: The Initial Twist
Now, take the section of hair you gathered and gently pull it back over the row of bobby pins, ensuring you cover them completely. Use your boar bristle brush to smooth the surface of the hair. Begin to twist the hair inward, toward your head. Use your hands to create a tight, uniform roll. Your thumbs can guide the hair, tucking it under as you twist, while your fingers keep the roll compact and smooth.Step 3: Tucking and Rolling
Continue twisting the length of your hair, moving vertically up your head. As you roll, tuck the ends of the hair into the 'pocket' created by the twist. This is the most crucial part of achieving the signature look. The goal is to create a clean, seamless pleat. The tightness of your roll will determine the final look; a tighter roll is more formal and classic, while a slightly looser roll can feel more modern and relaxed.Step 4: Securing the Style
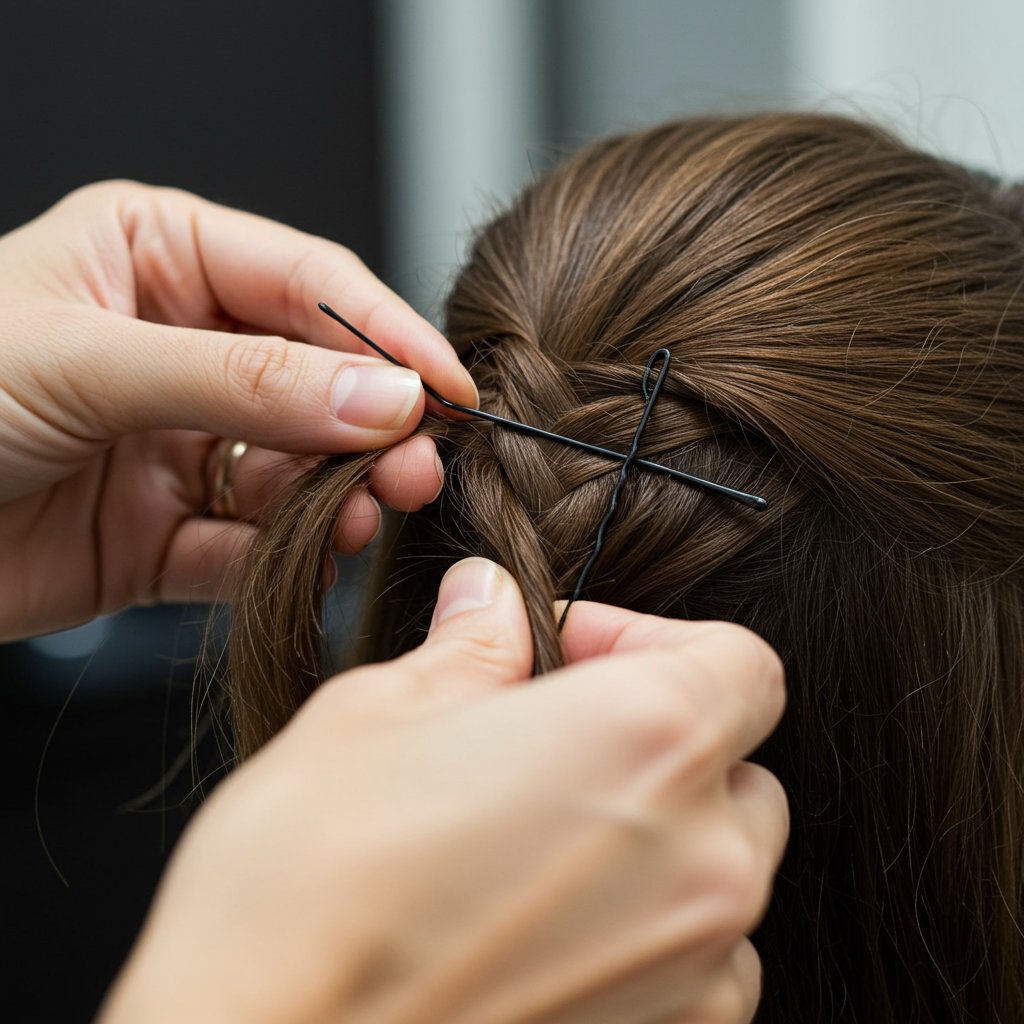
Once the entire length of your hair is tucked into the roll, it's time to secure it. This is where your U-pins come into play. Take a U-pin and insert it into the outer edge of the roll, catch a bit of the hair from the base of your scalp underneath the roll, and then push the pin back into the twist. This anchoring technique hides the pin and provides incredible hold. Continue placing U-pins along the entire length of the twist, focusing on the top, middle, and bottom. Gently test the security of the twist; if it feels loose, add more pins.Step 5: The Finishing Touches
With the twist securely in place, the final step is to perfect the look. Use the tail of your fine-tooth comb to gently tuck away any stray hairs. Lightly mist your entire head with a strong-hold hairspray to set the style and tame any remaining flyaways. For a high-gloss finish, you can use a shine spray, holding the can about 12 inches from your head for a fine, even mist. The result should be a sleek, polished, and effortlessly elegant updo.Beyond the Classic: Modern Variations for Every Occasion
The timeless structure of the French Twist makes it a wonderfully versatile base for creative variations. By making small adjustments to texture and placement, you can tailor the style to suit any event, from a casual brunch to the most formal gala.
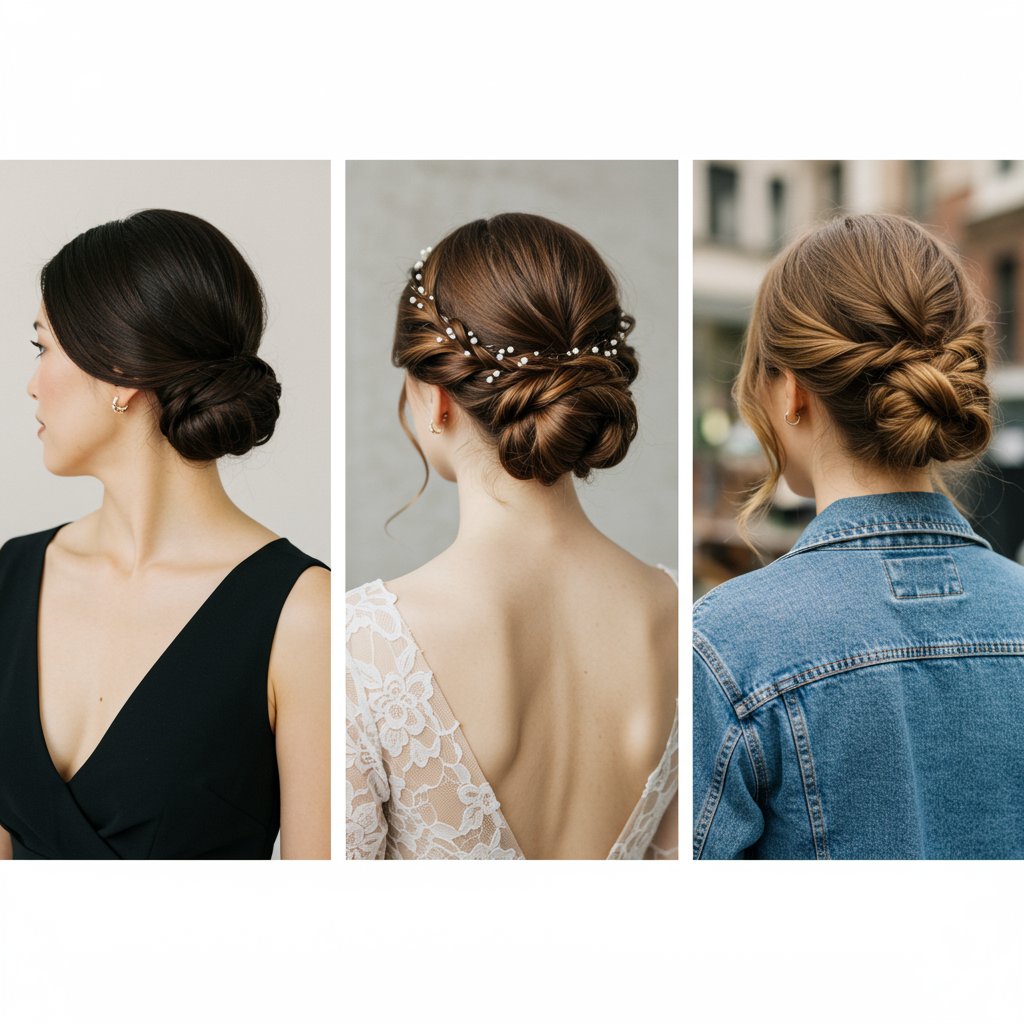
The Sleek and Polished Twist (For Formal Events)
This is the quintessential classic French Twist. The key to this look is a flawless, high-shine finish. Start with a smoothing serum or cream before you begin styling to eliminate all frizz. Maintain high tension as you create the roll to ensure it is tight and compact. Finish with a generous amount of glossing hairspray. This polished version is perfect for black-tie affairs, weddings, or any occasion that calls for ultimate sophistication. It pairs beautifully with statement earrings and an elegant neckline.The Soft and Romantic Twist (For Weddings and Date Nights)
For a softer, more ethereal take, focus on texture and volume. Begin by curling your hair to create soft waves before you start the twist. When gathering your hair, leave a few face-framing tendrils out. Keep the twist slightly looser and don't worry about perfection; a little bit of 'undone' texture adds to the romantic feel. After pinning the twist in place, gently pull at the roll to increase its volume. You can adorn this style with delicate accessories like pearl pins, fresh flowers, or a jeweled hair comb for a truly bridal or special occasion look.The Modern, Textured Twist (For Everyday Chic)
This version proves the French Twist isn't just for formal wear. The modern twist is all about texture and a relaxed attitude. Start by liberally applying a texturizing spray or sea salt spray to your hair. Instead of a sleek, tight roll, create a looser, more deconstructed twist. Don't be afraid to let some pieces fall out. The goal is an 'I woke up like this' elegance. This style can be positioned slightly lower on the head or even diagonally for an edgier feel. It pairs perfectly with casual workwear, jeans, or a stylish weekend outfit.Troubleshooting Common Challenges: Achieving a Flawless Finish
Even with a great tutorial, you might encounter a few hurdles. Here’s how to overcome the most common French Twist challenges for a picture-perfect result every time.
- The Twist Feels Loose or Unravels: This is usually a result of inadequate prep or poor pinning. Ensure your hair has enough grit from a texturizing product. More importantly, check your pinning technique. The vertical row of bobby pins is non-negotiable for a strong foundation. When securing the final roll, make sure your U-pins are catching the base hair underneath the twist before being pushed back in. This creates an anchor and is far more effective than simply pushing pins straight into the roll.
- Bumps and Lumps: A smooth surface is key to the classic look. The primary cause of bumps is not smoothing the hair adequately before you start twisting. Use a boar bristle brush to create a sleek, uniform section of hair. If a bump forms as you twist, gently use the tail end of a comb to smooth it out before you continue. Don't be afraid to undo the twist and brush the section out again if needed.
- Visible Pins: The mark of a professional-looking updo is hidden hardware. If your bobby pins or U-pins are showing, you're likely inserting them at the wrong angle. Pins should be inserted parallel to the scalp and tucked deep within the pleat of the twist. Choose pins that match your hair color for extra camouflage. U-pins are generally less visible than traditional bobby pins for securing the final roll.
Professional Secrets: Tips for a Salon-Quality French Twist at Home
Want to elevate your French Twist from homemade to professionally styled? Incorporate these insider tips used by experienced stylists for a truly impeccable finish.
First, product layering is essential. Don't rely on just one product. A good regimen starts with mousse for volume, followed by a texturizing spray for grip, and ends with a flexible-hold hairspray during styling, and a strong-hold spray to set. This multi-product approach creates a structure that is both manageable and durable. Second, master the art of backcombing. For fine or silky hair that struggles to hold a style, light teasing at the crown and at the base where you will be pinning provides a powerful cushion for the pins to grip onto, dramatically increasing the longevity of your updo.
Another pro secret lies in customizing the style for your hair length. For medium-length hair that struggles to tuck away neatly, you can create a small ponytail at the nape where the twist will end. Twist the hair up from there, and then wrap and pin the ponytail's ends around the base of the twist. For very long, thick hair, you may need to first fold the length of your hair in half before you begin rolling it into the twist. This helps manage the bulk and ensures the final twist isn't overwhelmingly large. Finally, always finish your style by warming a small amount of pomade or smoothing cream on your fingertips and gently running them over the surface of the updo to catch any last, tiny flyaways.
Frequently Asked Questions About the French Twist
How long does my hair need to be for a French Twist?
Ideally, your hair should be at least shoulder-length. This provides enough length to create the twist and securely tuck the ends. While it's more challenging on shorter hair, layered hair just past the shoulders can work with plenty of texturizing spray and pins. For very long hair, you may need to fold it first to manage the bulk.
Can I do a French Twist on fine or thin hair?
Absolutely! The key is to create the illusion of more hair. Use a volumizing mousse before blow-drying and liberally apply texturizing spray or dry shampoo. Backcombing the hair at the roots before you begin twisting will also create a fuller base and help the style hold its shape.What's the best way to make my French Twist last all day?
Longevity comes from three things: preparation, a solid foundation, and proper pinning. Start with second-day hair or add texture with products. Create a firm, vertical line of criss-crossed bobby pins to anchor the twist. Finally, use U-pins to secure the roll by hooking them into the base hair. A final mist of strong-hold hairspray is essential.How do I hide my bobby pins effectively?
Choose pins that match your hair color. When creating the initial anchor row, make sure you pull the hair completely over them. For the final securing pins, insert them deep inside the seam or 'pleat' of the twist. The U-pin anchoring technique (in, down, up, and in) is specifically designed to be invisible while providing maximum hold.Is it possible to do a French Twist on curly hair?
Yes, and it can be a stunning look. You have two options: you can either blow out your hair straight for a classic, sleek twist, or you can embrace your natural texture. A curly French Twist will have a softer, more romantic, and voluminous look. The key is to use a moisturizing curl cream to prevent frizz and to be gentle as you gather and twist to keep your curl pattern intact.What is the difference between a French Twist and a Chignon?
A French Twist is a vertical roll, creating an elegant seam up the back of the head. A Chignon, on the other hand, is a knot or bun hairstyle that is typically positioned at the nape of the neck or the lower back of the head. While both are classic updos, the French Twist is defined by its vertical orientation, while the Chignon is defined by its knotted or coiled bun shape.Conclusion: Embrace Your Inner Grace
The classic French Twist is far more than a method of pinning up hair; it is an accessible art form that allows anyone to channel a sense of timeless elegance and poise. It is a testament to the idea that true style is not about fleeting trends, but about classic forms that celebrate grace and beauty. By understanding the fundamentals of preparation, mastering the step-by-step technique, and learning to adapt the style for any occasion, you have empowered yourself with a skill that will serve you for years to come.
Whether you opt for a sleek and polished look for a formal event or a soft, textured version for a casual day, the French Twist remains an unparalleled choice for sophisticated style. We encourage you to practice, experiment with the variations, and make this iconic updo your own. Embrace the process, and you will find that creating this look is a rewarding ritual that leaves you feeling confident, put-together, and effortlessly chic.


