Heatless Curls: The Ultimate Guide to Overnight, Damage-Free Waves | [Your Salon Name]
Your Dream Hair is an Overnight Success: The Magic of Heatless Curls
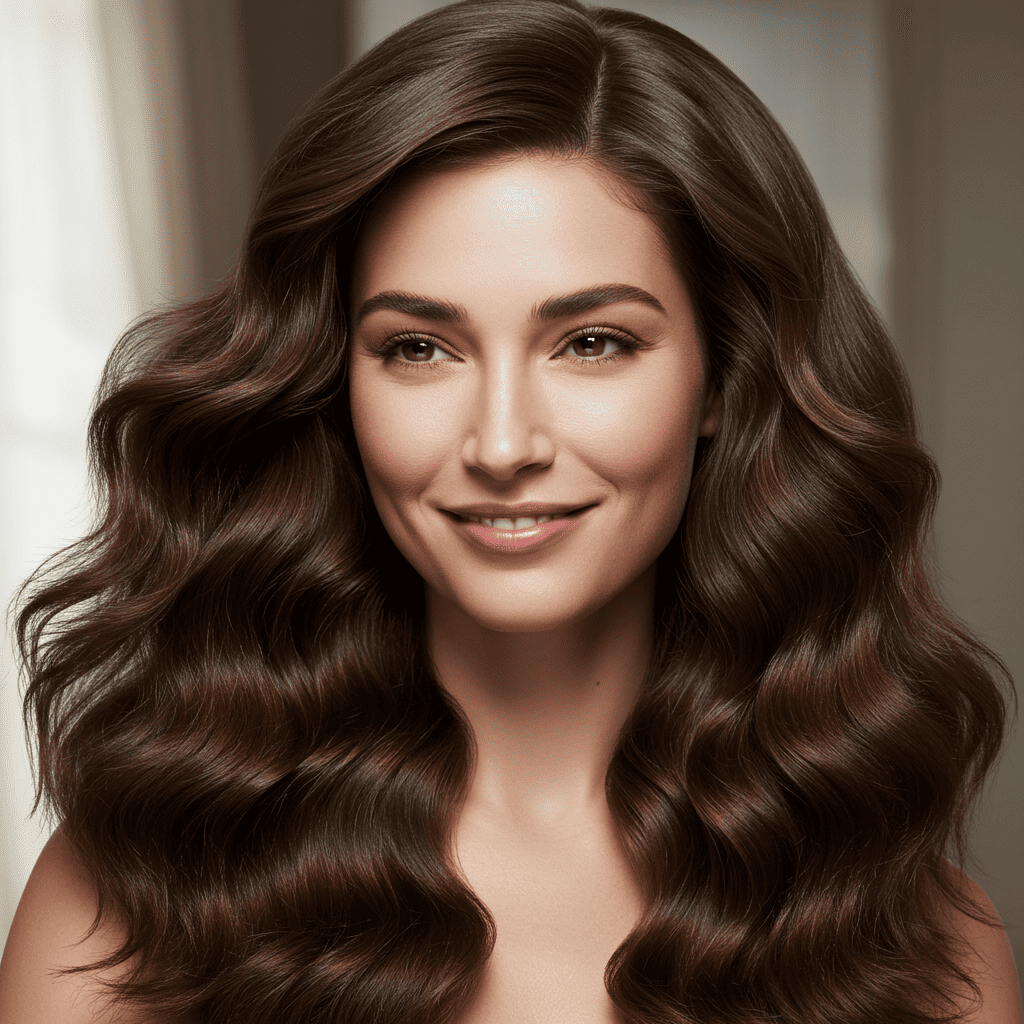
Imagine waking up with perfectly formed, bouncy waves that cascade over your shoulders—hair that looks effortlessly styled, full of volume, and radiantly healthy. Now, imagine achieving this look without a single hot tool touching your precious strands. This isn't a fantasy; it's the reality of heatless curls. In a world where we're constantly battling the damage caused by curling irons, flat irons, and blow dryers, the move towards gentle, heat-free styling is more than a trend; it's a revolution in hair health. This comprehensive guide will walk you through everything you need to know to master the art of overnight heatless curls, transforming your hair while you sleep.
At our salon, we see firsthand the cumulative effects of heat damage: dryness, brittleness, split ends, and a loss of natural shine. While professional heat styling has its place, your daily routine doesn't have to contribute to the problem. Heatless curling techniques offer a powerful alternative, allowing you to create stunning styles while giving your hair a much-needed break. Whether you have fine hair that struggles to hold a curl or thick hair that's prone to frizz, there's a heatless method that will work for you. Get ready to embrace healthier hair and more beautiful mornings.
Why Go Heatless? The Science Behind Damage-Free Hair

To truly appreciate the benefits of heatless styling, it's essential to understand what happens to your hair when you apply high temperatures. Your hair strands are primarily composed of a protein called keratin, protected by an outer layer of overlapping scales known as the cuticle. When you use a hot tool, the intense heat can cause irreversible damage to this delicate structure.
First, heat styling boils the water molecules inside the hair shaft, creating tiny, steam-filled bubbles that permanently damage the hair's internal structure, leading to weakness and breakage. Second, temperatures above 300°F (150°C) begin to degrade the keratin proteins, compromising the hair's strength and elasticity. Finally, the heat lifts and cracks the protective cuticle layer, causing moisture to escape and leaving the hair looking dull, frizzy, and prone to tangles. This is why even with the best heat protectants, frequent use of hot tools will eventually take its toll.
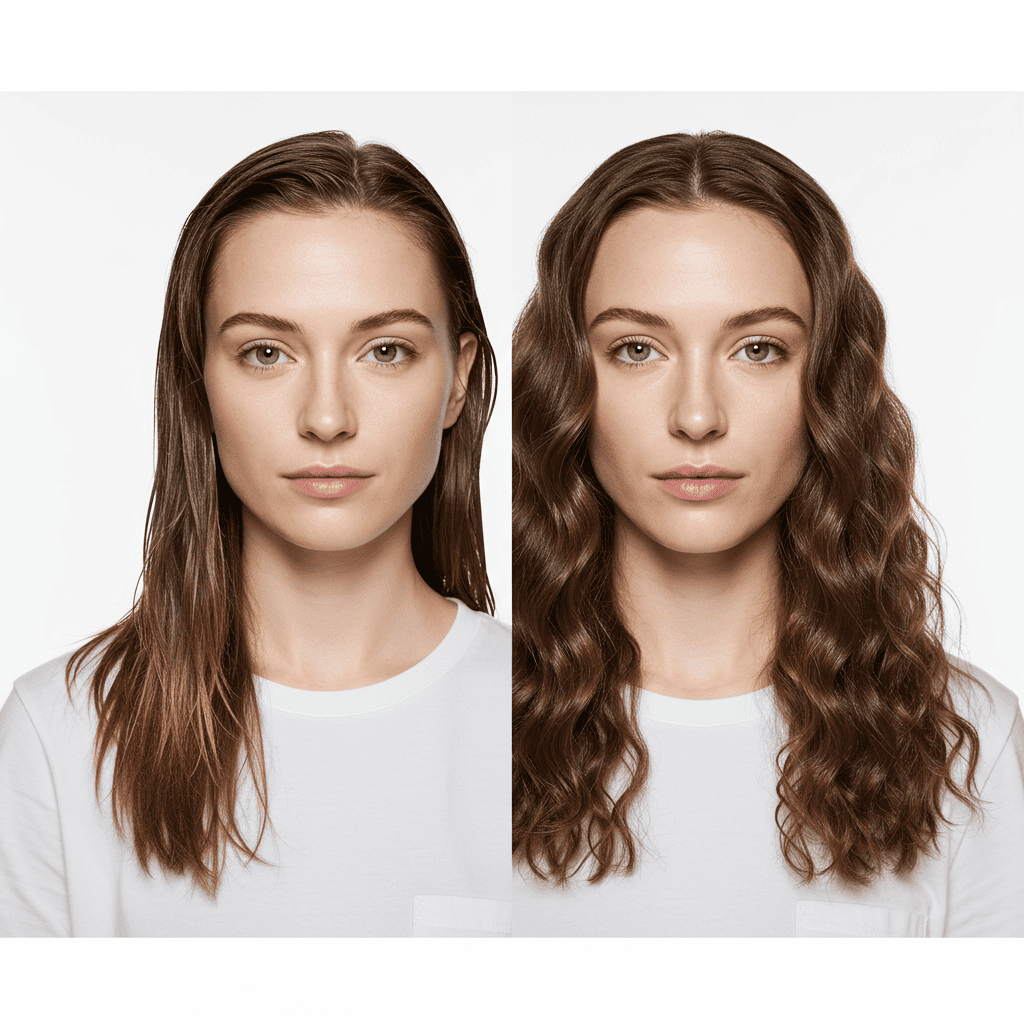
By opting for heatless curls, you completely sidestep this damage. These techniques rely on setting damp hair into a desired shape and allowing it to dry slowly overnight. This process gently molds the hair's hydrogen bonds into a new curly or wavy pattern without altering the protein structure or stripping moisture. The result is a style that not only looks beautiful but also supports the long-term health and integrity of your hair. You're not just avoiding damage; you're actively promoting stronger, shinier, and more resilient hair.
Prep School: Setting the Stage for Perfect Overnight Curls
The secret to flawless heatless curls lies in the preparation. Simply wrapping dry, unprepared hair won't yield the bouncy, long-lasting results you're after. A successful outcome starts with a proper foundation. Following these prep steps will ensure your hair is in the optimal state to be molded into beautiful, frizz-free waves overnight.
Step 1: Start with the Right Level of Dampness
Hair needs to be damp, not soaking wet, to set properly. If it's too wet, it won't dry completely overnight, leaving you with limp, semi-damp waves. If it's too dry, the hydrogen bonds won't be pliable enough to reform into a new shape. The ideal state is about 70-80% dry. After washing, gently squeeze out excess water with a microfiber towel or an old t-shirt to minimize friction and prevent frizz. Then, let it air dry or use a blow dryer on a cool setting until it feels only slightly cool and damp to the touch.
Step 2: Apply the Right Products
Product is your best friend when it comes to hold, definition, and frizz control. Applying a styling product to damp hair before wrapping is non-negotiable.- For Fine Hair: A lightweight mousse or a volumizing spray will provide hold without weighing your hair down. Apply from roots to ends for maximum body.
- For Thick or Coarse Hair: A styling cream or a leave-in conditioner with hold will help tame frizz and provide moisture and definition.
- For All Hair Types: A touch of light-hold gel or a curl-enhancing cream can help define the wave pattern. Ensure the product is evenly distributed using a wide-tooth comb.
Step 3: Detangle Thoroughly
Before you begin wrapping, ensure your hair is completely free of knots and tangles. Any snags will disrupt the curl pattern and can cause breakage. Use a wide-tooth comb or a detangling brush, starting from the ends and working your way up to the roots. This creates a smooth canvas, allowing each section of hair to be wrapped cleanly and uniformly, which is crucial for a polished final look.The Top 5 Heatless Curling Techniques: A Step-by-Step Guide
Now for the fun part! There are numerous ways to achieve heatless curls, each producing a slightly different result. Experiment with these five popular methods to find your perfect match.
1. The Robe Tie or Headband Method (For Loose, Glamorous Waves)
This viral technique is popular for a reason—it's incredibly easy and creates beautiful, uniform waves.- Placement: Place the tie from a bathrobe or a long silk scarf over the top of your head like a headband, securing it with a claw clip on top to keep it stable.
- Wrapping: Starting with a two-inch section of hair from the front, wrap it away from your face, going over and around the robe tie. Before you wrap that same section around again, pick up a new section of hair from behind it and add it to the original piece (similar to a French braid).
- Continue: Continue this process, adding more hair with each wrap, until you reach the back of your head. Secure the ends to the robe tie with a silk scrunchie.
- Repeat: Repeat the process on the other side. For extra hold, you can gently mist your wrapped hair with a flexible-hold hairspray. Sleep with the wraps in, and gently unwind them in the morning.
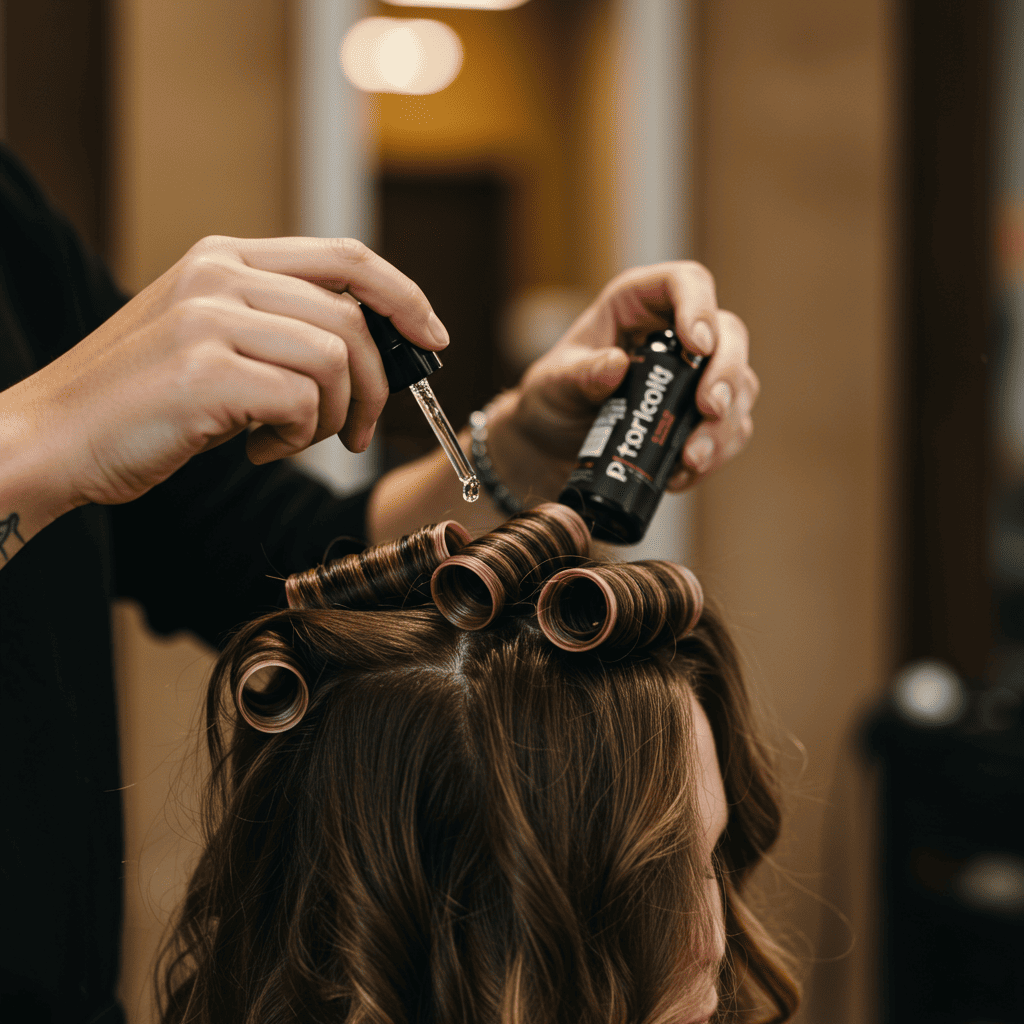
2. The Flexi-Rod Set (For Bouncy, Defined Curls)
Flexi-rods are foam-covered wires that can be bent into any shape, making them perfect for creating everything from tight ringlets to loose spirals.- Sectioning: Divide your damp, prepped hair into sections. The smaller the section, the tighter the curl.
- Rolling: Place the end of a hair section at the middle of a flexi-rod. Roll the rod up towards your scalp, keeping the hair smooth and flat against it. For a spiral curl, wrap the hair around the rod instead of rolling.
- Securing: Once you reach the scalp, bend both ends of the flexi-rod inward to secure it in place. The ends should cross over each other to form a loop.
- Drying: Allow your hair to dry completely overnight. In the morning, gently unbend the rods and unwind your hair. Separate the curls with your fingers, using a little hair oil to tame flyaways.
3. The Braiding Method (For Natural, Beachy Waves)
Braids are a classic for a reason. The type of braid you choose will determine the final wave pattern.- For Classic Waves: A simple three-strand braid will create a standard crimped wave. Two braids (pigtails) will ensure the hair at the back of your head is also waved.
- For Deeper Waves: A French or Dutch braid, starting from the crown of your head, will create waves that begin higher up, adding more volume.
- For Mermaid Waves: A fishtail braid creates a more intricate, less uniform 'S' wave pattern. No matter the braid, secure the ends with a gentle scrunchie to avoid kinks.
4. The Pin Curl Method (For Vintage, Hollywood Waves)
This old-school technique creates beautiful, sculpted waves and is surprisingly comfortable to sleep in.- Create a Curl: Take a small one-inch section of hair. Starting from the end, wrap it around two fingers to create a loop.
- Pin to Scalp: Carefully slide the loop off your fingers and pin it flat against your scalp using two bobby pins crossed in an 'X' shape for security.
- Set the Pattern: Continue creating and pinning these curls all over your head. You can alternate the direction of the curls for a more natural look or keep them uniform for a classic vintage set.
- The Reveal: In the morning, remove the pins and let the curls fall. Gently brush through them with a wide-tooth comb or a boar bristle brush to meld them into soft, glamorous waves.
5. The Sock Bun Method (For Soft, Voluminous Curls)
This method is excellent for creating large, soft curls, especially on long hair.- Create the Donut: Cut the toe off a clean sock and roll it down into a donut shape.
- Make a Ponytail: Gather your damp hair into a high ponytail at the crown of your head and secure it with a hair tie.
- Roll it Down: Pull the ponytail through the center of the sock donut. Slide the donut to the very end of your ponytail. Begin tucking the ends of your hair around the donut and start rolling it down towards the base of your ponytail. Your hair will wrap around the outside of the donut as you roll.
- Secure and Sleep: Once you reach the base, the bun should feel secure. Sleep on it, and in the morning, gently unroll the donut to reveal voluminous curls.
The Morning Reveal: Styling and Setting Your Masterpiece
You've patiently slept on your creation, and now it's time for the big reveal. How you take down and style your curls is just as important as how you set them.
- Gentle Takedown: Be gentle. Don't rip or pull at your hair. Carefully unwind each section, whether it's from a robe tie, flexi-rod, or braid.
- Wait Before You Touch: Let the curls settle for a few minutes after taking them down. This helps them lock into place before you begin styling.
- Finger Comb First: Avoid using a brush immediately, as this can pull out the curls and create frizz. Use your fingers to gently separate the curls and arrange them. Apply a drop or two of hair oil or anti-frizz serum to your palms to add shine and tame flyaways as you separate.
- Strategic Brushing (Optional): If you want a softer, more voluminous wave (like Hollywood waves from a pin curl set), you can use a boar bristle brush or a wide-tooth comb. Brush gently and slowly to meld the curls together without completely destroying the pattern.
- Lock It In: Once you're happy with the look, give your hair a light mist of a flexible-hold hairspray to provide memory and humidity resistance. For extra volume, flip your hair upside down and spritz a texturizing spray at the roots.
Making It Last: Pro Tips for Multi-Day Waves
One of the best things about well-set heatless curls is their longevity. With a few simple tricks, you can extend the life of your style for two, three, or even four days.
- Sleep on Silk or Satin: Cotton pillowcases create friction, which leads to frizz and can flatten your curls overnight. A silk or satin pillowcase allows your hair to glide, preserving your style. A silk bonnet or scarf is an even better option for maximum protection.
- The 'Pineapple' Method: At night, loosely gather your hair into a high ponytail on the very top of your head (the 'pineapple'). Secure it with a silk scrunchie. This keeps the majority of your curls from being crushed while you sleep.
- Dry Shampoo is Your Friend: On day two or three, your roots might start to look a bit greasy. Revive your style by spraying a quality dry shampoo at the roots to absorb oil and boost volume.
- Refresh with a Light Mist: If some waves have fallen flat, you can lightly mist them with water or a curl-refreshing spray and re-braid or re-twist just those few sections for about 20-30 minutes while you get ready.
FAQ: Your Heatless Curling Questions Answered
Q1: Can I do heatless curls on short hair?
Absolutely! While methods like the sock bun are better for long hair, techniques like pin curls, braids, and flexi-rods work wonderfully on shorter lengths. You'll just need to use smaller sections and smaller tools (like thinner flexi-rods).Q2: Why are my heatless curls frizzy?
Frizz is usually caused by one of three things: hair that was too dry when wrapped, friction overnight, or a lack of styling product. Ensure your hair is evenly damp, use an anti-frizz serum before wrapping, and always sleep on a silk pillowcase or in a bonnet.Q3: My hair is fine and straight. Will heatless curls even work for me?
Yes! The key for fine, straight hair is product. Using a mousse or a texturizing spray before wrapping will give your hair the grit and memory it needs to hold the curl. Also, opt for tighter wrapping methods like flexi-rods or smaller braids for a longer-lasting style.Q4: How long do I need to leave the curls in for?
For best results, you should leave them in until your hair is 100% dry. This is why overnight is ideal. If you're doing it during the day, plan for at least 6-8 hours. Rushing the drying process is the number one reason heatless curls fail.Conclusion: Embrace the Health, Love the Curls
Making the switch to heatless curls is one of the kindest things you can do for your hair. It's a journey of rediscovering your hair's natural texture and potential, all while protecting it from the damaging cycle of heat styling. By mastering these overnight techniques, you're not just creating beautiful, effortless waves; you're investing in the long-term health and vitality of your hair.
Experiment with different methods, find the products that your hair loves, and enjoy the freedom of waking up to a gorgeous, ready-to-go hairstyle. If you're unsure where to start or which technique is best for your specific hair type and goals, we're here to help. Book a consultation with one of our expert stylists, and let us guide you on your path to healthier, beautifully styled hair.


