The Modern Butterfly: How to Style Your New Layered Cut | A Complete Guide
The Modern Butterfly: Embracing Your New Layered Cut
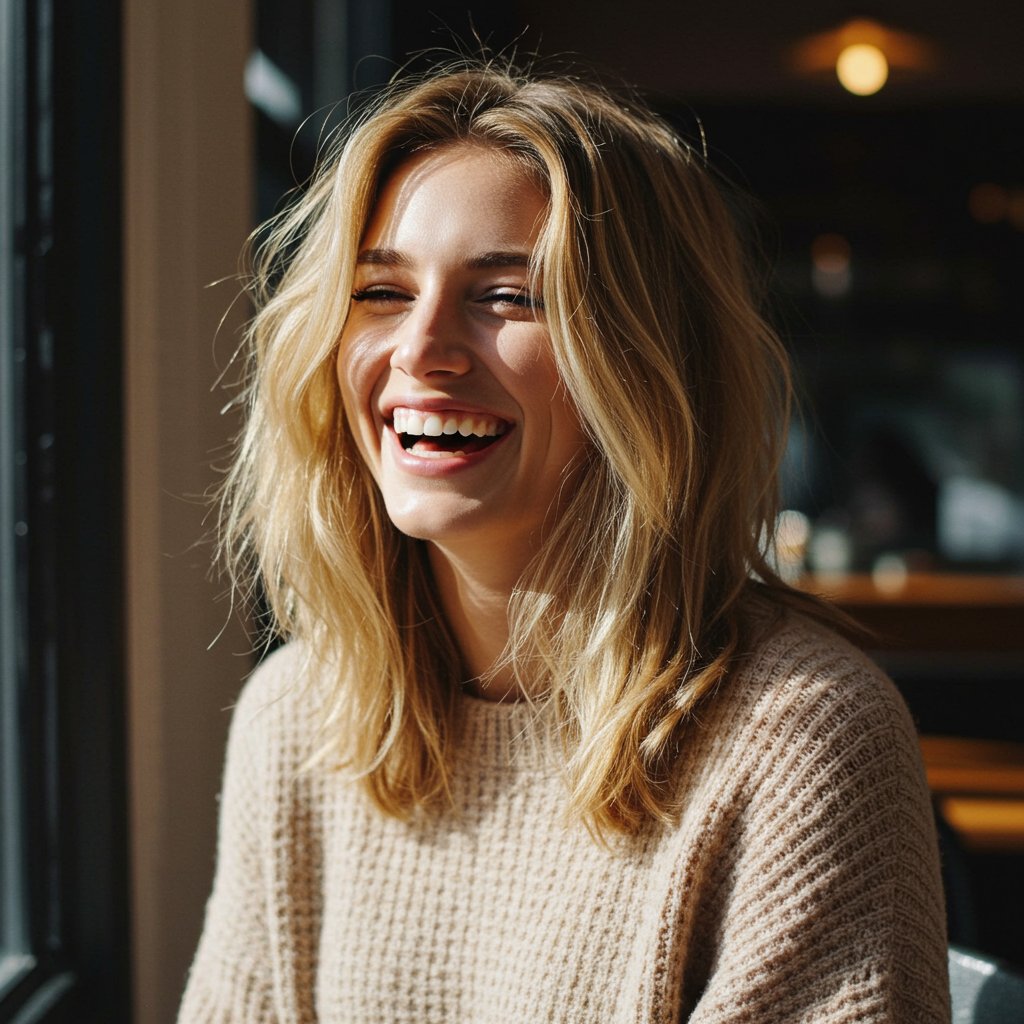
The hair world is buzzing with a trend that flawlessly marries retro glamour with contemporary chic: the modern butterfly cut. This highly sought-after style has taken social media and celebrity culture by storm, and for good reason. It’s a masterclass in movement, volume, and face-framing perfection. If you’ve recently taken the plunge and are now the proud owner of this beautifully dynamic haircut, you might be wondering, "What now?" How do you transform this salon-fresh look into an everyday masterpiece? This comprehensive guide will walk you through everything you need to know about how to style your new layered cut, ensuring you can recreate that professional finish from the comfort of your own home.
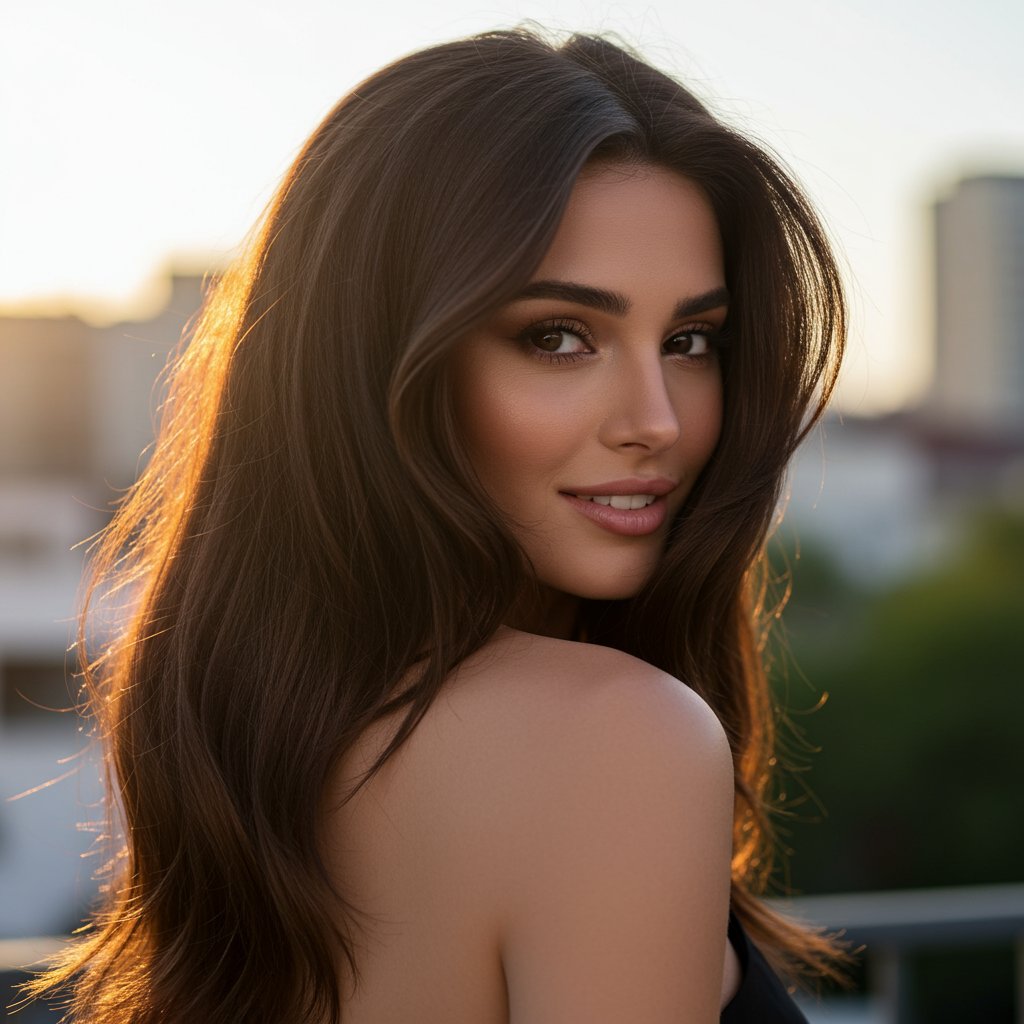
The modern butterfly cut is more than just a haircut; it's a statement. It’s versatile, flattering, and offers the illusion of shorter hair without sacrificing length. But its true potential is unlocked through styling. From the signature voluminous blowout that defines its shape to effortless everyday waves and glamorous evening looks, the possibilities are endless. We'll delve into the essential tools and products that form your styling arsenal, provide step-by-step tutorials for various looks, and share professional tips to maintain the health and beauty of your layers. Prepare to become an expert at styling your butterfly cut and turn heads wherever you go.
What Exactly is the Modern Butterfly Cut?
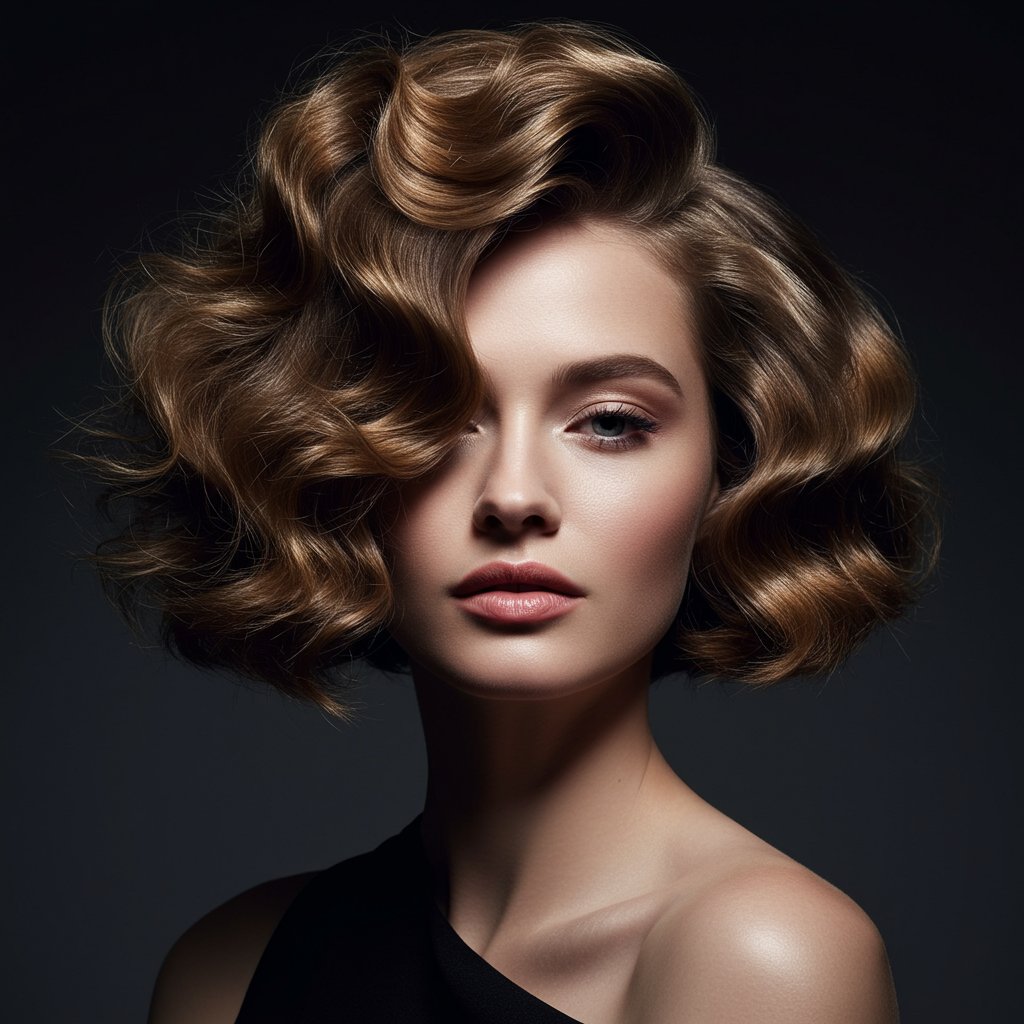
Before diving into the styling techniques, it's crucial to understand the architecture of the modern butterfly cut. This style is a sophisticated hybrid, drawing inspiration from the feathery, face-framing layers of the '70s shag and the bouncy, bombshell volume of '90s supermodel hair. The cut is defined by its strategic layering system: shorter, wispy layers are cut around the crown and face, often hitting around the chin or collarbone, while the longer layers are maintained throughout the rest of the hair. This creates a stunning duality—the shorter layers mimic the look of a bob, providing shape and volume, while the longer layers preserve overall length and add beautiful, cascading movement.
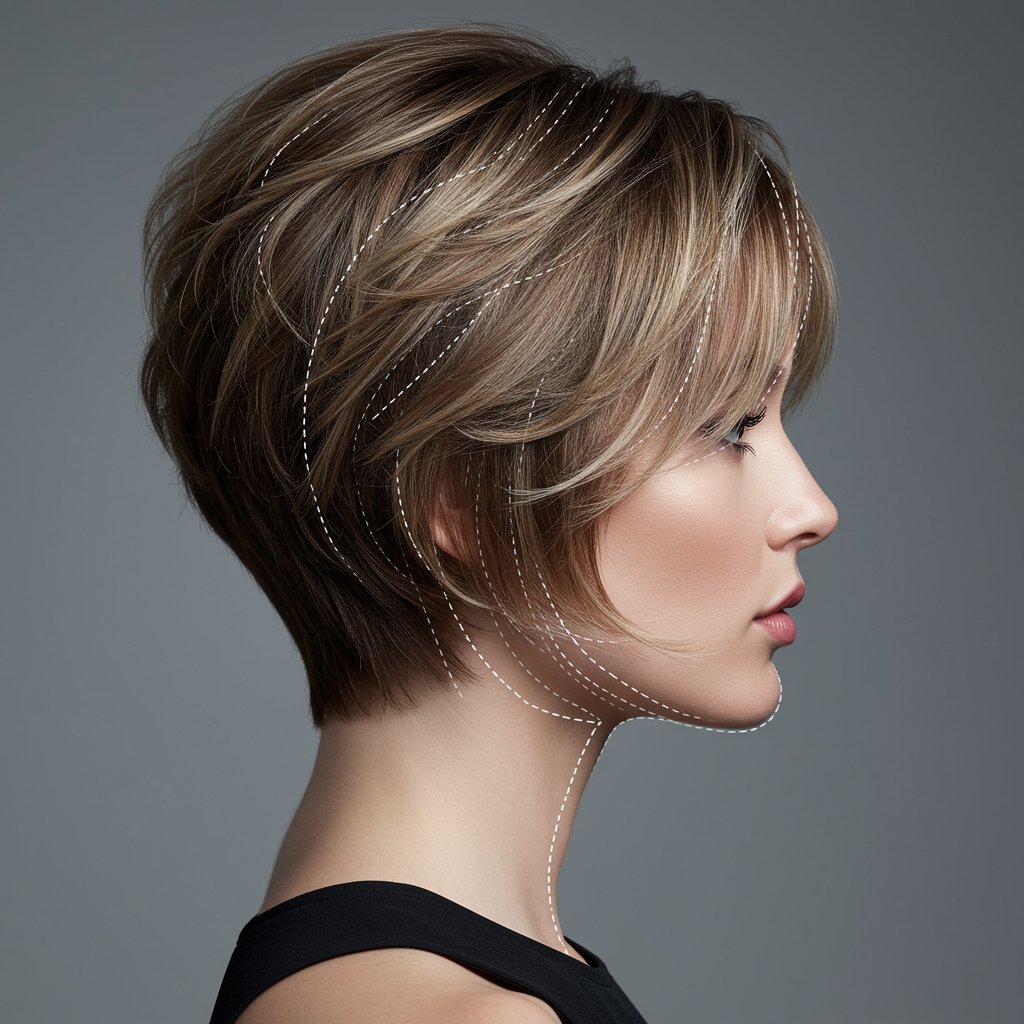
This clever construction is what makes the butterfly cut so universally flattering. The shorter layers are expertly tailored to frame the face, softening features and highlighting cheekbones and the jawline. The longer layers prevent the style from feeling heavy, creating an airy, light, and dynamic silhouette. It works beautifully on a variety of hair types, from straight to wavy. For those with fine hair, it creates the illusion of thickness and body. For those with thick hair, it removes excess weight, adding texture and shape without sacrificing the lushness. It’s a haircut that truly works with your natural texture to create a bespoke, effortlessly glamorous look.
Key Characteristics:
- Face-Framing Layers: Shorter layers that typically start around the chin to sculpt and define facial features.
- Long Interior Layers: Maintaining length in the back and underneath for a full, flowing look.
- Extreme Volume: The layering technique is designed to create maximum lift at the roots and crown.
- Feathery Ends: The layers are often point-cut or textured to create a soft, wispy finish rather than a blunt one.
The Essential Toolkit: Gathering Your Styling Arsenal
Achieving a salon-quality finish at home begins with having the right tools and products. The modern butterfly cut thrives on volume and movement, so your arsenal should be geared towards creating lift, bounce, and hold without weighing the hair down. Investing in high-quality items will not only make styling easier but also protect the integrity of your hair. Think of these as your partners in creating the perfect butterfly effect every single day.
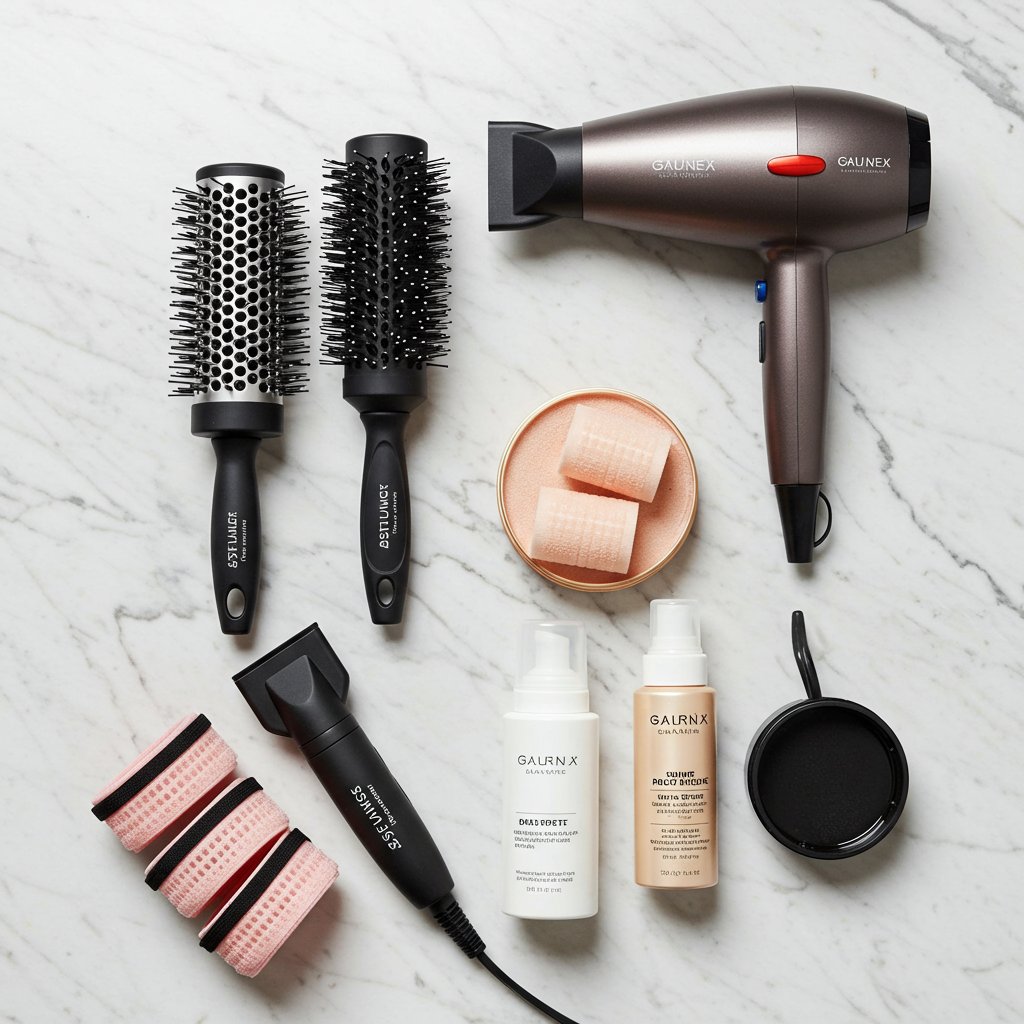
Must-Have Styling Tools:
- Powerful Blow Dryer with a Concentrator Nozzle: This is non-negotiable. The nozzle directs the airflow precisely where you need it, helping to smooth the cuticle and create lift at the root.
- Set of Round Brushes (Varying Sizes): A medium-sized brush (1.5-2 inches) is perfect for the longer layers, while a smaller brush (1-1.5 inches) gives you more control over the shorter, face-framing pieces.
- Large-Barrel Curling Iron or Wand (1.25 - 1.5 inches): Ideal for creating soft, bouncy waves and curls that complement the layers.
- Velcro or Hot Rollers: The secret weapon for achieving maximum, long-lasting volume and that classic '90s bombshell bounce.
- Sectioning Clips: These make handling your hair during blow-drying and styling infinitely more manageable.
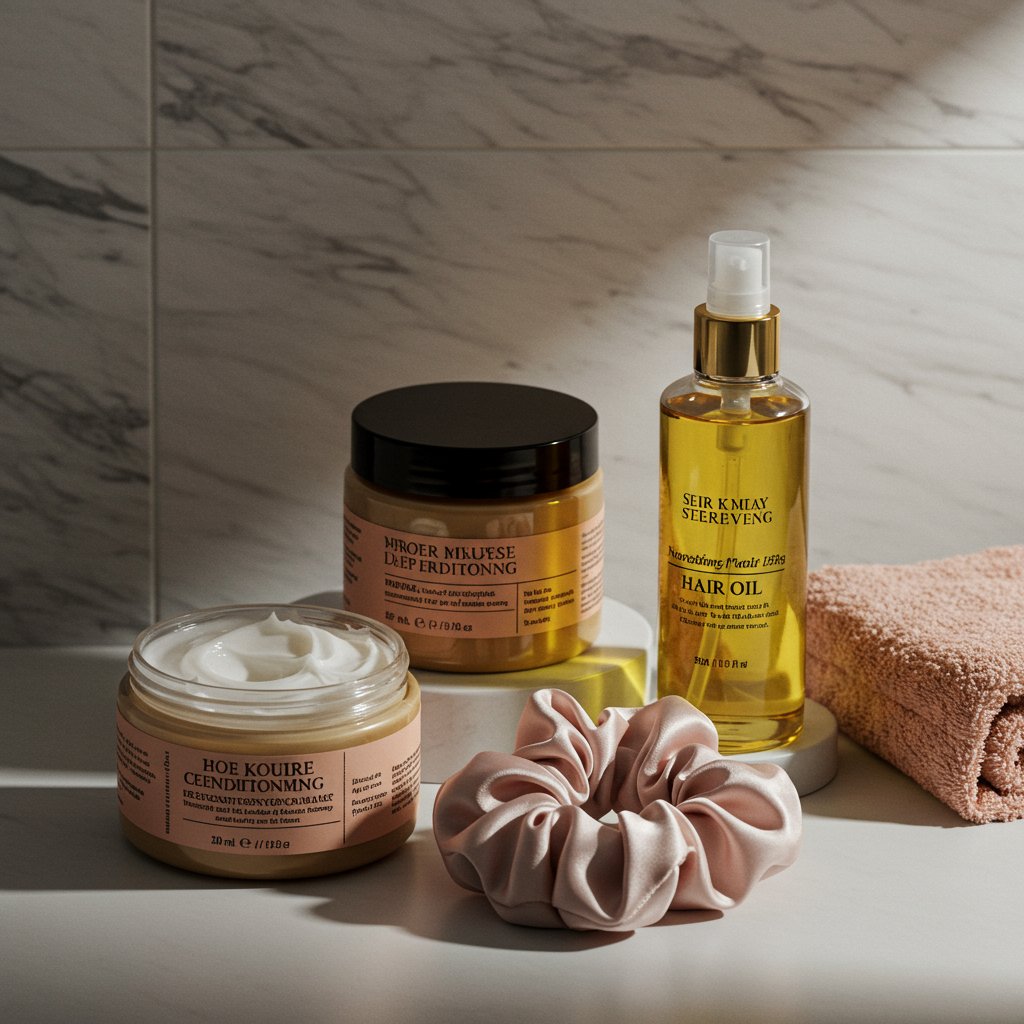
Go-To Styling Products:
- Heat Protectant Spray: Always the first step. This shields your hair from the damaging effects of heat styling, which is essential for keeping your layers healthy and split-end-free.
- Volumizing Mousse or Root-Lift Spray: Applied to damp roots, this provides the foundation for all that glorious volume.
- Texturizing Spray: Perfect for adding grit, separation, and that lived-in, airy feel to your finished style.
- Lightweight Hairspray: A flexible-hold formula will lock in your style without making it feel stiff or crunchy. You want the layers to move!
- Shine Serum or Oil: Use a tiny amount on the mid-lengths and ends to finish the look, tame flyaways, and add a healthy, polished sheen.
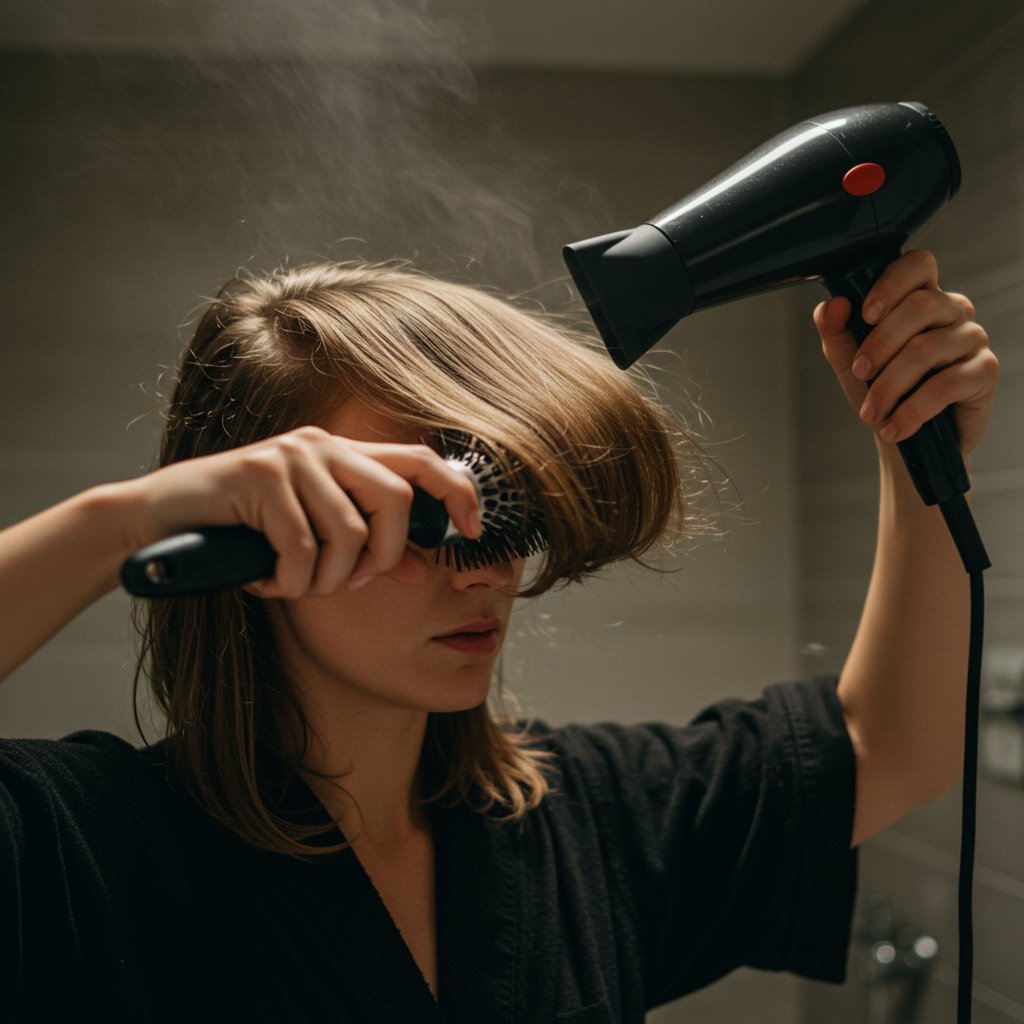
The Signature Blowout: Mastering Volume and Movement
The quintessential way to style a modern butterfly cut is with a voluminous blowout. This technique enhances every layer, creating the intended shape, bounce, and 'swoop' that defines the look. It may take a little practice, but mastering this blowout will be a game-changer. The key is to work in clean sections and focus on lifting the roots and curling the ends.
Step-by-Step Blowout Guide:
- Prep Your Hair: Start with freshly washed, towel-dried hair. It should be about 70-80% dry. Apply a heat protectant spray from roots to ends, followed by a generous amount of volumizing mousse, concentrating on the roots.
- Rough Dry and Section: Use your blow dryer to rough-dry your hair until it's about 90% dry, using your fingers to lift the roots. Then, divide your hair into manageable sections using clips. A good rule of thumb is to create a top 'mohawk' section, two side sections, and two back sections.
- Focus on the Under-Layers: Start with the bottom sections. Take a 2-inch wide piece of hair and place your medium round brush at the root underneath the section. Aim the blow dryer's nozzle (pointing downwards to prevent frizz) at the brush. Pull the brush through the hair, keeping tension, and rotating it as you move towards the ends. When you reach the ends, curl them under or slightly outwards.
- Master the Top and Face-Framing Layers: This is where the magic happens. For the top sections, pull the hair straight up from your head with the round brush. This creates maximum lift at the root. As you dry, direct the hair backwards, away from your face. For the shorter, face-framing layers, use your smaller round brush. Pull the hair forward and up, then curl it back and away from your face to create that signature 'swooping' curtain bang effect.
- Set with a Cool Shot: Once a section is dry and styled, hit it with the 'cool shot' button on your dryer for a few seconds. This helps to set the shape and adds shine. For extra volume, you can pin the warm, round-brushed sections into curls and let them cool completely before taking them down.
Effortless Everyday Waves: The Low-Maintenance Look
While a full blowout is stunning, you won't always have the time for it. Fortunately, the modern butterfly cut looks equally beautiful with more relaxed, everyday waves. This style leans into a more modern, beachy aesthetic while still showcasing the beautiful movement of your layers. The goal is an 'undone' look that feels effortless and chic.
Achieving Casual Waves:
- Start with Dry Hair: This style works best on dry hair (day one or two after washing). Always apply a heat protectant first!
- Use a Large-Barrel Iron: Grab your 1.25-inch or 1.5-inch curling iron or wand. A larger barrel is key to creating loose waves rather than tight curls.
- Alternate Directions: Take 1-2 inch sections of hair. Wrap the hair around the barrel, leaving the last 1-2 inches of the ends out. This creates a more modern, less 'perfect' look. Alternate the direction you wrap the hair with each section—some towards your face, some away. For the face-framing layers, always direct the curl away from your face to open up your features.
- Shake and Texturize: Once all sections are waved, let them cool completely. Then, gently run your fingers through your hair to break up the waves. Don't use a brush, as this can pull them out. Flip your head upside down and generously mist a texturizing spray throughout the roots and mid-lengths. This will add volume, separation, and that perfectly imperfect finish.
Glamorous Curls & Special Occasion Styling
When you need to dial up the glamour for a special event, the modern butterfly cut provides the perfect canvas. By exaggerating the volume and defining the curls, you can create a truly show-stopping, red-carpet-worthy look. This is where tools like Velcro rollers come into play, delivering unparalleled bounce and long-lasting hold.
Creating Bombshell Volume:
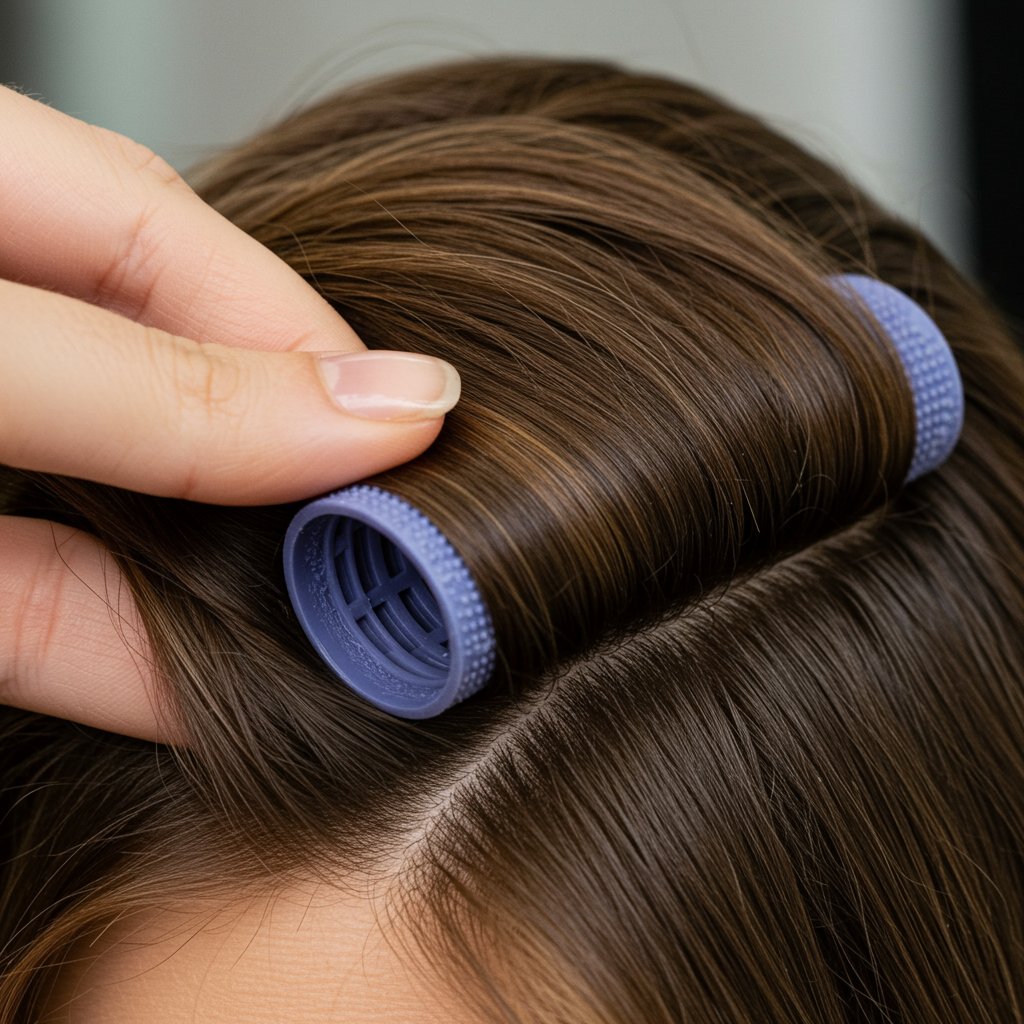
- The Roller Set Foundation: The best way to achieve this look is by setting your hair in rollers. You can do this on freshly blown-out hair for the best results. While the hair is still warm from the blow dryer, wrap 2-inch sections around large Velcro or hot rollers. For the top sections, roll the hair back and away from your face. For the side and back sections, you can roll them under.
- Let it Set: The longer you leave the rollers in, the more volume and curl you'll achieve. For Velcro rollers, leave them in until your hair is completely cool (at least 20-30 minutes). You can even give them a light mist of hairspray while they're in. For hot rollers, follow the manufacturer's instructions, typically leaving them in for 10-15 minutes.
- The Takedown and Finish: Carefully remove the rollers one by one. Your hair will have incredible volume and a beautiful, soft curl pattern. Gently use your fingers or a wide-tooth comb to style the curls into place. Avoid over-brushing. To finish, use a stronger-hold hairspray to lock everything in place and add a final spritz of shine spray for that high-gloss, polished look.
Maintaining the Magic: How to Keep Your Cut Looking Fresh
A great haircut is a collaboration between your stylist and your at-home care routine. To keep your modern butterfly cut looking its best, regular maintenance is key. The sharp, distinct layers are the star of the show, and if they grow out too much, the signature shape can be lost. A consistent care routine will protect your hair's health and make daily styling much easier.
Investing in the right products and scheduling regular salon visits will preserve the integrity and shape of your style. Healthy hair is easier to style and holds its shape better, so don't skimp on care. Treat your hair as the investment it is. Protect it from heat, nourish it with moisture, and trim it regularly to keep the ends crisp and the layers defined. This proactive approach ensures your butterfly cut continues to look as stunning as the day you left the salon.
Professional Maintenance and At-Home Care:
- Regular Trims: The most crucial step. To maintain the shape and prevent split ends from traveling up the hair shaft, book a trim with an experienced stylist every 6-8 weeks. This will keep your short layers from growing into your long layers and blurring the cut's definition.
- Hydration is Key: Layered hair looks its best when it's healthy and hydrated. Incorporate a deep conditioning mask or treatment into your routine once a week to replenish moisture, especially if you heat style regularly.
- Protect Your Ends: The ends of your layers are the most fragile. Apply a small amount of hair oil or serum to them daily to keep them sealed and smooth.
- Gentle Cleansing: Use a sulfate-free shampoo and conditioner suited to your hair type to avoid stripping your hair of its natural oils.
Pro Tips & Tricks for the Perfect Finish
Once you've mastered the basic styling techniques, a few professional tips and tricks can elevate your look even further. These small adjustments can make a big difference in the final result, adding extra polish, volume, and longevity to your style.
- Perfect the 'Flick': For the shorter face-framing layers, use a flat iron after your blowout. Gently bevel the iron outwards and backwards as you slide it down the hair shaft to create a perfect, feathery flick.
- Second-Day Refresh: The butterfly cut often looks even better on the second day. To revive it, spray dry shampoo at the roots for a boost of volume. You can also quickly touch up the face-framing pieces with a curling iron or round brush.
- Sleep Smart: To preserve your blowout or waves overnight, loosely twist your hair into a high bun on top of your head and secure it with a silk scrunchie. Sleeping on a silk or satin pillowcase also helps reduce frizz and prevent breakage.
- Product Layering: Don't apply all your products at once. Apply volumizing mousse to damp hair, heat protectant before drying, and texturizing or finishing sprays only when the hair is completely dry and styled. This ensures each product performs its job effectively without weighing the hair down.
Frequently Asked Questions (FAQ)
Q1: Can I get a butterfly cut with fine or thin hair?
Absolutely! In fact, the butterfly cut is fantastic for fine hair. The layering technique removes weight from the top sections, which allows for more lift and volume at the crown, creating the illusion of thicker, fuller hair.Q2: How is the butterfly cut different from a regular layered cut or a shag?
The main difference lies in the strategic placement and length of the layers. A butterfly cut features very distinct short layers (almost like a bob on top) combined with very long layers underneath. A traditional layered cut usually has more blended, seamless layers throughout, while a shag is choppier and more heavily textured, often with shorter layers all over.Q3: What's the best way to style the shorter, face-framing layers?
The key is to direct them away from your face. Use a small round brush and a blow dryer, or a large-barrel curling iron, to create a soft 'swoop' or 'C' shape that moves backward. This opens up the face and creates the signature feathered look.Q4: Can this cut be styled straight?
Yes, it can. When styled straight, the butterfly cut showcases the technical precision of the layers, creating a sleek look with lots of texture and movement. Be sure to use a shine serum to emphasize the different lengths and keep the look polished.Q5: How long does it take to style a butterfly cut in the morning?
Once you get the hang of it, a full blowout can take 20-30 minutes, depending on your hair's length and thickness. A quicker everyday wave style using a curling iron can be achieved in just 10-15 minutes.Q6: What is the one non-negotiable product for this hairstyle?
Volumizing mousse is arguably the most essential product. It provides the foundational lift and body at the roots that is critical for achieving the voluminous silhouette of the modern butterfly cut. Without it, the style can fall flat.Conclusion: Let Your Style Take Flight
The modern butterfly cut is a celebration of texture, volume, and artful movement. It’s a transformative style that offers incredible versatility, allowing you to switch between a powerful, polished blowout, casual waves, and full-on glamour with ease. While it may seem intricate, styling this cut is entirely achievable with the right tools, products, and techniques. By understanding the structure of your haircut and investing a little time in your styling routine, you can keep your layers looking dynamic and beautiful every single day.
Embrace the process of learning how to style your new layered cut. Experiment with different techniques, find the products that work best for your hair, and don't be afraid to play with your look. The beauty of the butterfly cut is its ability to adapt and transform, just like its namesake. So go ahead, master that blowout, perfect those waves, and let your new, gorgeous hair take flight.


