Knotless Braids: A Step-by-Step Guide to the Perfect Look | Your Ultimate Guide
Introduction: The Rise of Knotless Braids
In the world of protective styling, few trends have captured as much attention and admiration as knotless braids. This modern take on the classic box braid has revolutionized the braiding experience, offering a stylish, versatile, and significantly more comfortable alternative. Unlike traditional braids that start with a small, tight knot at the base, knotless braids begin with your natural hair and gradually incorporate braiding extensions. This feed-in method eliminates the tension-heavy anchor point, resulting in a lighter, more flexible style that lays flat from day one. This comprehensive knotless braids step-by-step guide will walk you through everything from pre-installation prep to long-term maintenance, ensuring you have all the knowledge needed to achieve and preserve the perfect look. Whether you're a seasoned braid enthusiast or considering them for the first time, understanding the process is key to protecting your hair's health and maximizing the style's longevity.

Knotless braids are more than just a fleeting trend; they represent a shift towards healthier hair practices within the protective styling community. The primary benefit is the drastic reduction of tension on the scalp, which minimizes the risk of traction alopecia—a form of hair loss caused by constant pulling. This makes them an excellent choice for individuals with sensitive scalps or fine hair. Furthermore, the seamless transition from natural hair to extension creates a more authentic, scalp-like appearance at the root. The immediate flexibility means you can style your braids in a high ponytail or bun right after leaving the salon, without the usual waiting period for the braids to loosen up. This guide will delve into the nuances of the technique, empowering you with the information to either communicate effectively with your stylist or better understand the intricate process.
What Are Knotless Braids? The Modern Protective Style Explained
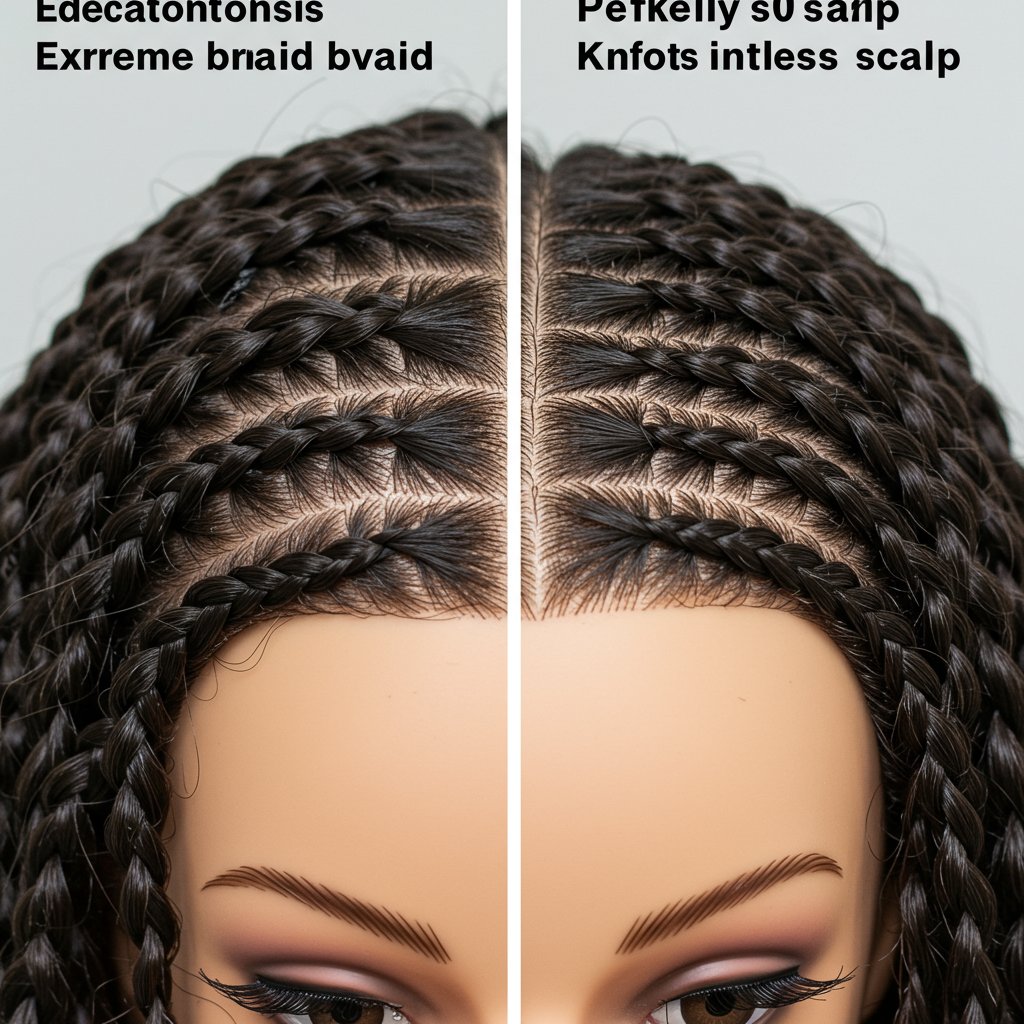
To fully appreciate the technique, it's essential to understand what sets knotless braids apart from their predecessors, primarily traditional box braids. The fundamental difference lies in the installation method. Traditional box braids are created by wrapping a small section of braiding hair around a parted section of your natural hair, forming a distinct knot at the scalp. While secure, this knot is the source of the initial tightness, scalp tension, and sometimes even discomfort associated with new braids. This method can put significant stress on the hair follicles, which, over time, can lead to breakage and hair thinning at the hairline and part lines.
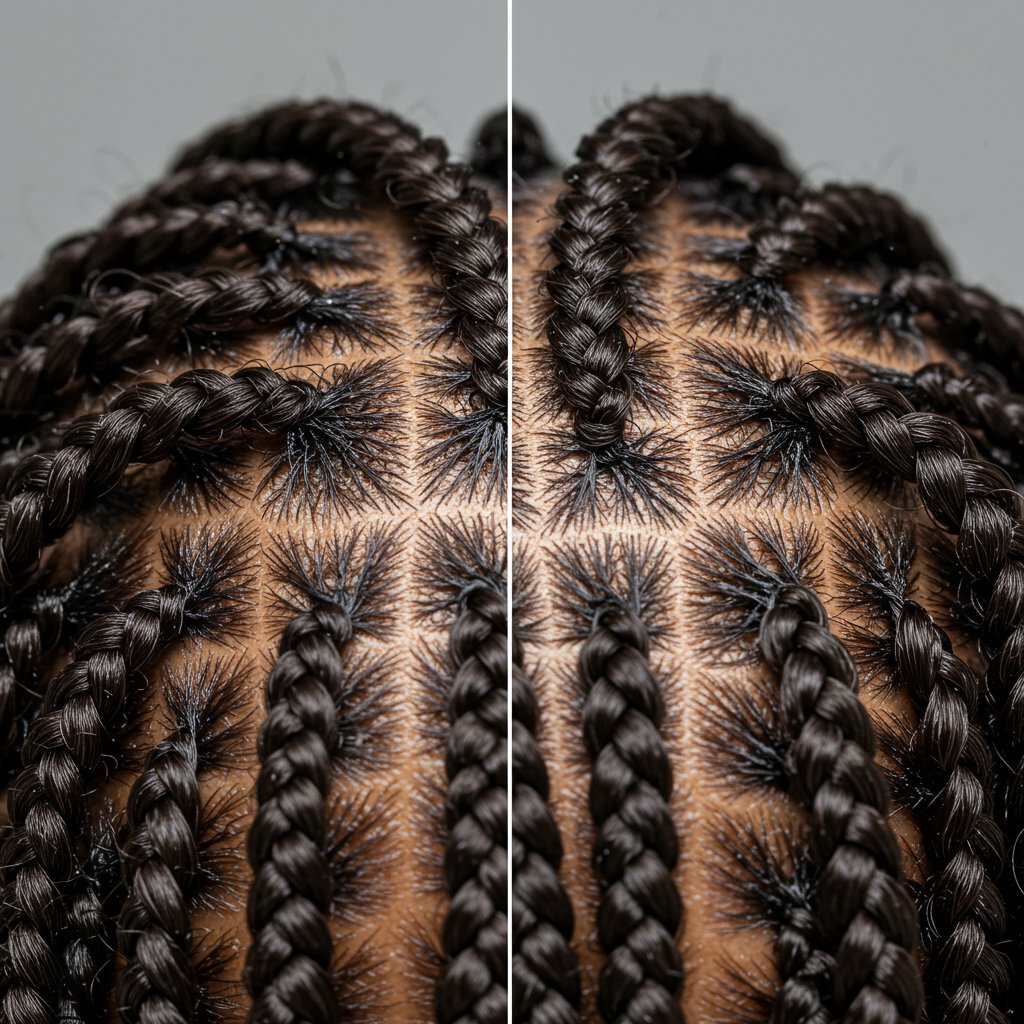
Knotless braids, conversely, employ a feed-in method. The braid is initiated using only your natural hair for the first few links of the plait. Then, small pieces of braiding hair are gradually and seamlessly fed into the braid as it moves down the hair shaft. This process distributes the weight of the extension evenly, eliminating the high-tension point at the root. The result is a braid that is virtually weightless at the scalp, lays flat, and moves like individual strands of hair. This not only enhances comfort but also contributes to a more natural and understated aesthetic. The absence of the bulky knot allows for a smoother look and feel, making the style appear as if it's growing directly from the scalp.
Beyond aesthetics and comfort, the long-term hair health benefits are a major reason for their soaring popularity. By avoiding the initial tight pull, knotless braids are gentler on the edges and the scalp as a whole. This makes them a superior protective option, as the primary goal of such styles is to give natural hair a rest from daily manipulation while promoting growth and length retention. The reduced tension helps maintain the integrity of the hair follicles, ensuring that when the braids are taken out, your natural hair is healthy and strong. This focus on hair preservation without sacrificing style is the core principle that defines the knotless braiding revolution.
Pre-Installation Prep: Setting the Foundation for Flawless Braids
Achieving beautiful, long-lasting knotless braids begins long before the first piece of braiding hair is added. Proper preparation of your natural hair is the most critical step in ensuring the health of your hair and the longevity of the style. A clean, moisturized, and well-detangled canvas allows for a smoother installation process and helps prevent issues like breakage, flaking, and scalp irritation. Skipping these foundational steps can compromise both the look of your braids and the health of your hair underneath.
Cleansing and Clarifying
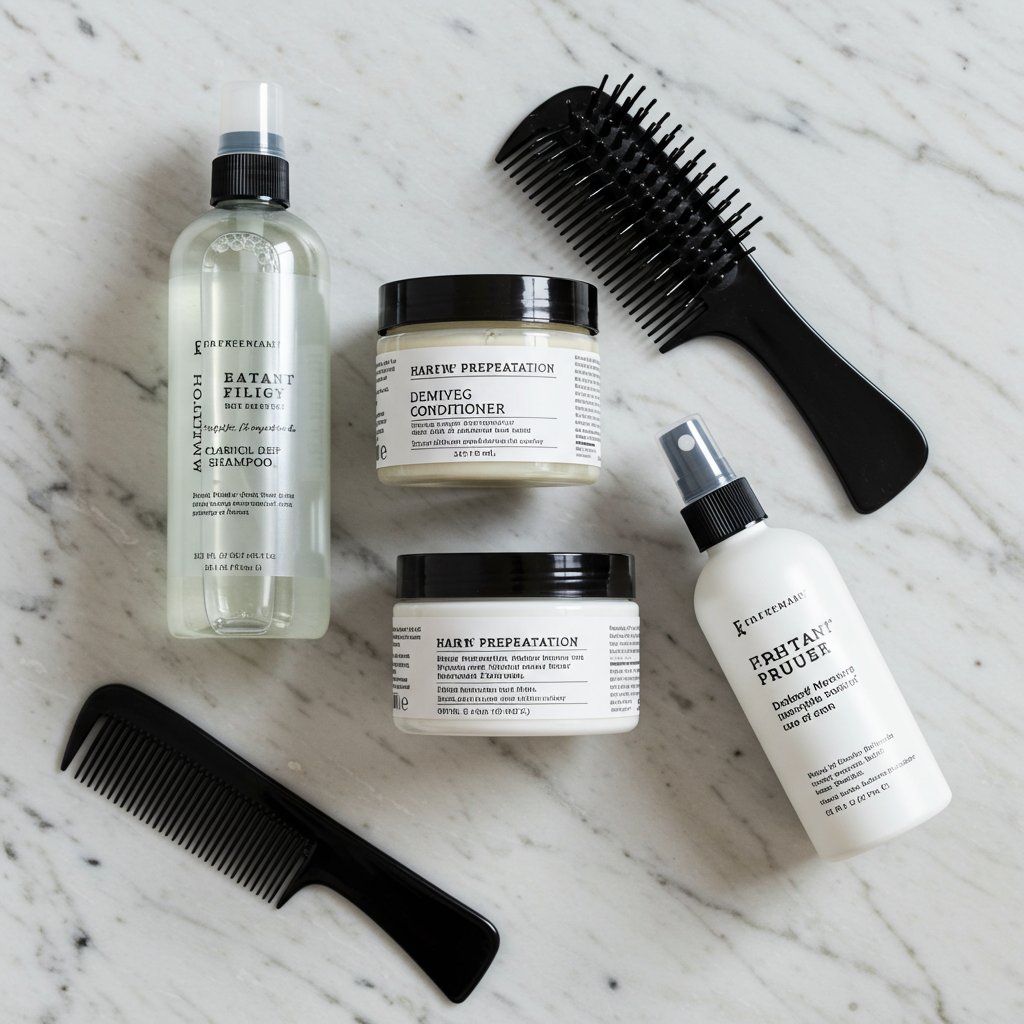
A thorough cleanse is non-negotiable. Start with a clarifying shampoo to remove any product buildup, dirt, or oils from your scalp and hair strands. This creates a clean base, preventing flakes and itchiness once the braids are installed. Follow up with a moisturizing, sulfate-free shampoo to replenish hydration without stripping the hair of its natural oils. Pay close attention to the scalp, using the pads of your fingers to gently massage and lift away any debris. A clean scalp is a healthy scalp, and it's the key to comfortable, long-term wear.Deep Conditioning and Moisturizing
After cleansing, your hair needs a powerful dose of moisture. Apply a high-quality deep conditioner or hair mask, focusing on the mid-lengths and ends. For an enhanced treatment, use a steamer or a plastic cap to trap heat, which helps the conditioner penetrate the hair shaft more effectively. Let it sit for at least 20-30 minutes before rinsing thoroughly. This step is crucial for fortifying your hair and infusing it with the moisture it will need to thrive while in braids. Once rinsed, apply a leave-in conditioner to seal in the moisture and prepare the hair for the next step.Detangling and Stretching
Properly detangled and stretched hair is essential for a neat and seamless knotless braid installation. Working in sections, apply a leave-in conditioner or detangling product and use a wide-tooth comb or your fingers to gently work through any knots, starting from the ends and moving up to the roots. Once detangled, it's highly recommended to stretch your hair. This can be done through various heat-free methods like banding, African threading, or large braids/twists left to dry overnight. For those comfortable with heat, a blow-dry on a low to medium setting using the tension method will also work. Stretched hair minimizes tangles during the braiding process, allows for cleaner parts, and helps the natural hair blend more seamlessly with the extensions.The Step-by-Step Knotless Braiding Process
The magic of knotless braids lies in the meticulous feed-in technique. While it requires patience and precision, understanding the steps can help you appreciate the artistry involved. This process is best handled by an experienced stylist who can ensure consistent sizing, clean parts, and appropriate tension for healthy hair. Here’s a breakdown of how professionals create the perfect knotless look.
Step 1: Sectioning and Parting Your Hair
With the hair prepped and stretched, the stylist will begin by creating a foundational part, often from ear to ear, to section off the hair. Then, they will create the individual part for the first braid using a rat-tail comb for precision. The parting pattern is a key element of the final style. Classic box parts (squares) are the most common, but other options like triangular parts or even curved, free-form parts can create unique and beautiful designs. Clean, crisp parts are the hallmark of a professional installation.Step 2: The Feed-In Technique
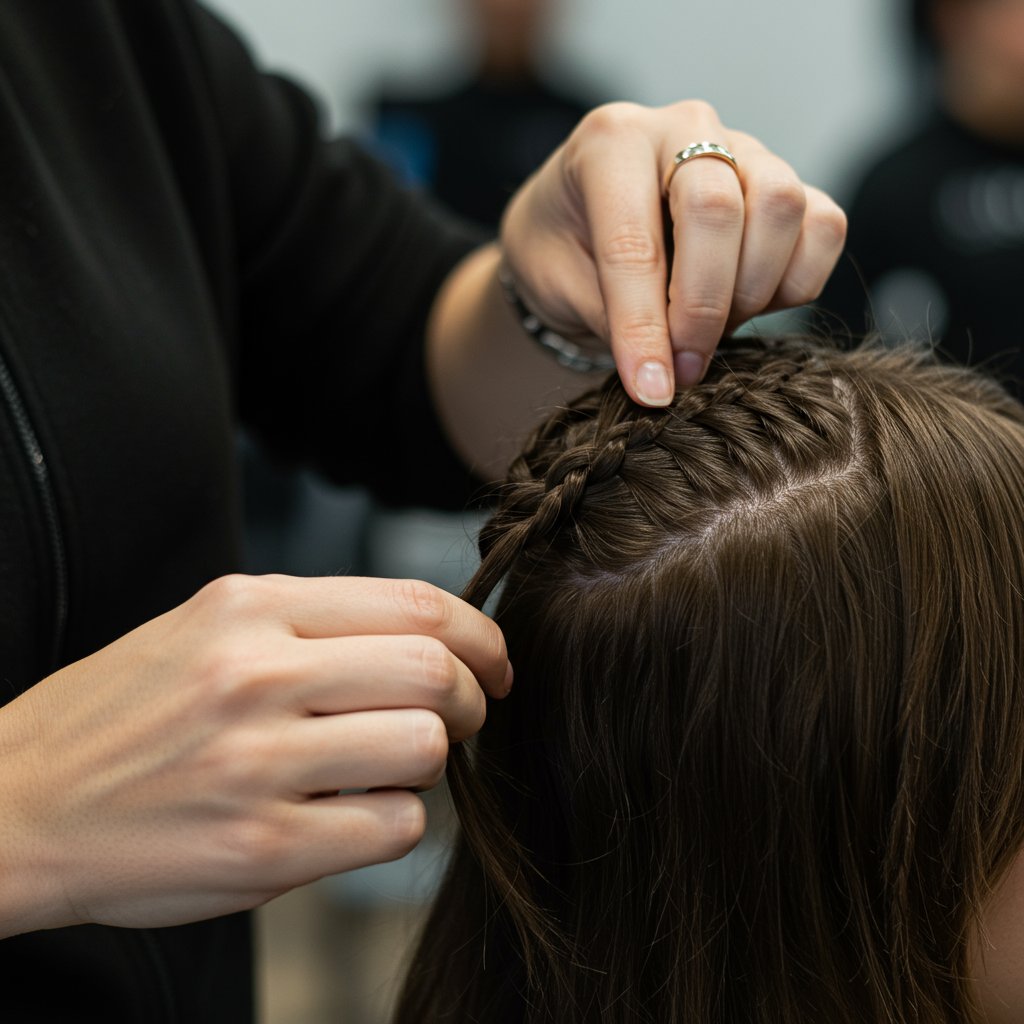
This is the core of the knotless method. The stylist takes the small section of natural hair and begins a standard three-strand plait. After two or three initial weaves of just the natural hair, they will take a very small piece of pre-stretched braiding hair and feed it into the braid, blending it with one of the three strands. They continue braiding down a few more links and then add another small piece of extension hair. This process is repeated—braid, feed, braid, feed—until the desired thickness of the braid is achieved. This gradual addition is what creates the seamless, flat base and eliminates the knot.Step 3: Braiding Down the Length
Once all the extension hair for that braid has been added, the stylist will continue braiding down the entire length. Consistent tension is key here—not too tight to cause damage, but firm enough to create a sleek, uniform braid that won't unravel. The stylist ensures that the natural hair is smoothly incorporated and concealed within the braiding hair to prevent any flyaways or frizz. This meticulous process is repeated for each braid across the entire head.Step 4: Sealing the Ends
The final step is to seal the ends of the braids to prevent them from coming undone. The most common and effective method is dipping the ends in hot water. This not only seals the synthetic Kanekalon fibers but also helps the braids lay smoothly and adds a bit of weight for a nice hang. The stylist will braid a few inches past your natural hair, trim any excess, and then quickly dip the ends into a cup of hot (not boiling) water for a few seconds before patting them dry with a towel. This creates a clean, secure finish that lasts.Choosing the Right Hair and Tools
The quality of your knotless braids is heavily dependent on the materials used. Selecting the right type of braiding hair and having the proper tools on hand are essential for a professional-looking and comfortable style. An experienced stylist will typically have their preferred brands and tools, but knowing what to look for is beneficial for any client.
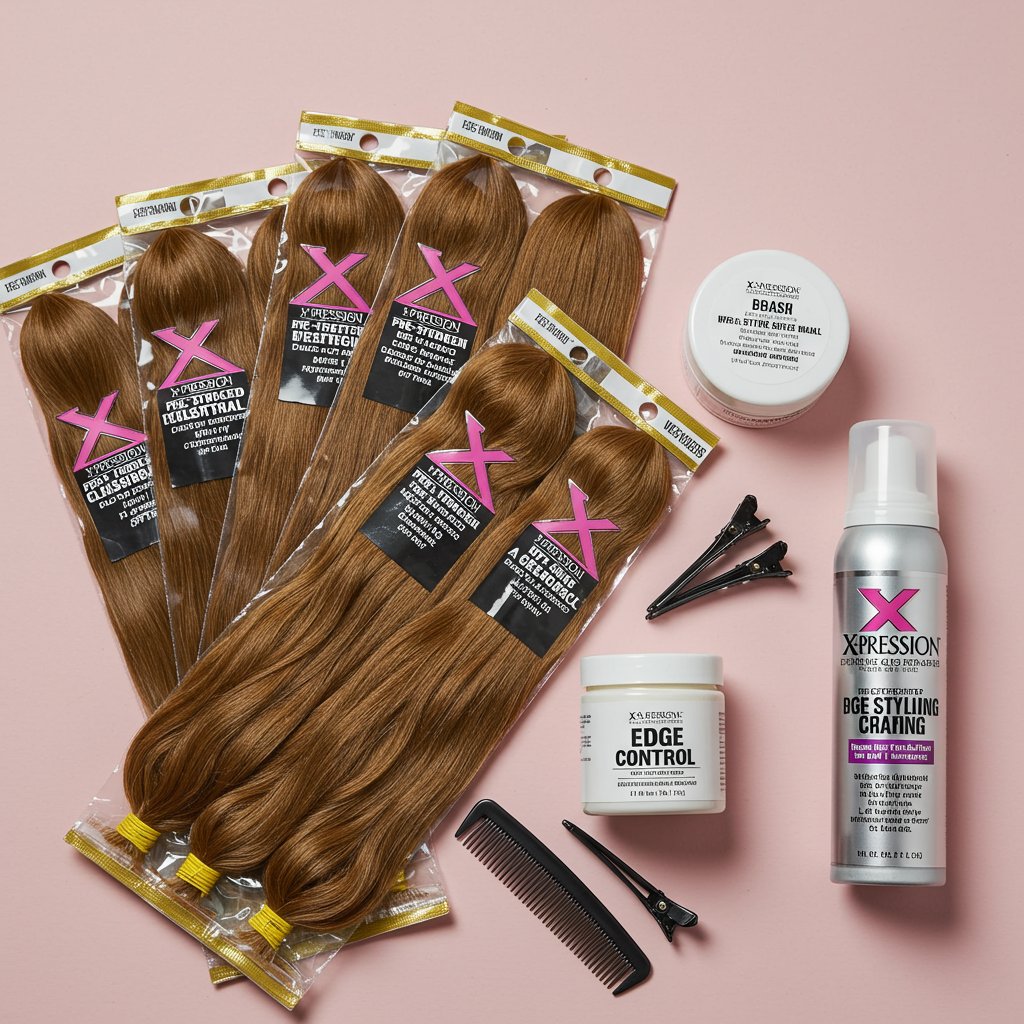
For knotless braids, pre-stretched braiding hair is the gold standard. This type of hair is professionally stretched and tapered at the ends, which saves the stylist significant prep time and results in a more natural, less bulky finish. Brands like X-pression Pre-Stretched or Ruwa are popular choices because they are lightweight, made from high-quality Kanekalon fibers, and are often set with hot water effectively. The texture of the braiding hair should also be considered; choosing a texture that closely mimics your own can lead to a more seamless blend. When it comes to quantity, a typical full head of medium-sized, mid-back length knotless braids requires about 5-8 packs of pre-stretched hair.
Beyond the hair itself, a specific set of tools is required for a clean installation. A rat-tail comb is indispensable for creating sharp, precise parts. Strong hair clips are needed to keep sectioned-off hair neatly out of the way. A good quality edge control or styling gel helps to smooth down the base of each section for a sleek appearance and to tame any flyaways. Finally, a light hair mousse is often applied after the installation is complete. It helps to set the braids, reduce any initial frizz, and give the style a beautiful, salon-fresh sheen.
Aftercare and Maintenance: Making Your Knotless Braids Last
Proper aftercare is crucial for extending the life of your knotless braids and maintaining the health of your natural hair underneath. With a consistent routine, you can keep your style looking fresh and your scalp healthy for anywhere from 4 to 8 weeks. Neglecting maintenance can lead to frizz, buildup, and potential hair damage.

Nightly Routine
Your nightly routine is the most important factor in preserving your braids. Tying your hair up with a silk or satin scarf or bonnet is non-negotiable. These materials prevent friction against cotton pillowcases, which can cause frizz, flyaways, and moisture loss. For very long braids, you can gather them into a loose, high bun on top of your head before covering them. This simple step protects the braids, keeps your edges smooth, and helps the style last significantly longer.Scalp Care
A healthy scalp is the foundation of a successful protective style. It's important to keep your scalp clean and moisturized without causing excessive product buildup. A few times a week, you can apply a light oil (like jojoba, grapeseed, or a specially formulated scalp oil) directly to your parts using a nozzle-tip bottle. Alternatively, you can use a leave-in conditioning spray to lightly mist your scalp and braids to combat dryness. If you experience itching, a spray containing tea tree oil or peppermint oil can provide soothing relief. To cleanse your scalp between washes, you can use a cloth with witch hazel or a no-rinse scalp cleanser.Refreshing Your Braids
Over time, you may notice some frizz developing along the length of your braids. To refresh them, you can apply a generous amount of a foaming mousse. Smooth the mousse down the braids from root to tip, then tie your hair down with a scarf for about 30 minutes or until the mousse is dry. This will help tame flyaways, redefine the braids, and restore their initial sheen. You can also carefully trim any stray hairs with a small pair of scissors. This simple refresh can make your style look brand new.Common Mistakes to Avoid with Knotless Braids
While knotless braids are a healthier alternative, improper installation or maintenance can still lead to hair damage. Being aware of common pitfalls is key to ensuring a positive and truly protective experience. One of the most significant errors is installing the braids too tightly. Although knotless braids are inherently less tense, a stylist can still braid too tightly at the root, pulling the hair and causing inflammation of the follicles (folliculitis), bumps, and potential breakage. The style should feel comfortable from the moment you leave the chair. If you feel pain or see excessive redness, it's a sign the braids are too tight.
Another frequent mistake is neglecting scalp care. It's easy to forget about the hair underneath, but your scalp still produces sebum and sheds skin cells. Failing to cleanse and moisturize your scalp can lead to dryness, itchiness, and product buildup that clogs follicles and hinders growth. On the other hand, using too much product, especially heavy oils, butters, or gels, can have the opposite effect, creating a greasy, flaky mess that is difficult to clean. A light-handed approach with the right products is essential.
Finally, one of the most damaging mistakes is leaving the braids in for too long. While it’s tempting to extend a beautiful style, keeping braids in for more than 8-10 weeks is generally not recommended. As your new growth comes in, the weight of the braid is transferred to a smaller, more delicate section of hair, increasing the risk of breakage. Furthermore, shed hairs that are normally released daily get trapped in the braid. Leaving them in too long can lead to severe matting and tangling at the roots, making the takedown process a nightmare that can cause significant hair loss.
Pro Tips for the Perfect Knotless Braid Installation
To elevate your knotless braid experience from good to great, here are some professional tips to keep in mind, whether you're communicating with a stylist or simply want to be more informed about the process:

- Communicate Clearly with Your Stylist: Before the braiding begins, have a clear conversation about the desired size (small, medium, large, jumbo), length (shoulder, mid-back, waist), and parting style. Showing inspiration photos is always helpful.
- Prioritize a Tension-Free Installation: Emphasize that your priority is hair health and you want a completely tension-free installation. A good stylist will understand and adjust their technique accordingly. Your braids should never cause headaches or bumps.
- Don't Neglect Your Edges: Ask the stylist to be extra gentle around your hairline. The edges are the most fragile part of your hair. Consider leaving them out entirely or having them braided very loosely to avoid any stress.
- Choose Pre-Stretched Hair: Always opt for high-quality, pre-stretched braiding hair. It creates a more natural-looking, tapered end and makes the installation process smoother and faster.
- Seal with Hot Water, Not a Flame: Insist on having the ends sealed with hot water. Using a lighter to burn the ends is an outdated and unsafe method that can damage the hair and poses a safety risk.
- Book a Professional: While DIY is tempting, knotless braids require a high level of skill to execute properly. Investing in a professional, experienced braider ensures clean parts, consistent sizing, and healthy installation, giving you the best possible results.
Frequently Asked Questions (FAQ) About Knotless Braids
1. Are knotless braids better for your hair than traditional box braids?
Yes, generally speaking, knotless braids are considered a healthier option. The feed-in method eliminates the tight knot at the base, drastically reducing tension on the scalp and hair follicles. This minimizes the risk of traction alopecia, breakage, and scalp soreness, making them a superior choice for hair preservation.
2. Can I get knotless braids on short hair?
It is possible, but your hair should be at least 2-3 inches long for the stylist to have enough hair to grip and begin the braid securely. The shorter your hair, the more skill is required from the stylist to ensure the extensions are secure and blend seamlessly. For very short hair, smaller braids tend to hold better.3. How much do knotless braids typically cost?
Knotless braids are generally more expensive than traditional box braids. The price reflects the higher level of skill and the significantly longer installation time required for the meticulous feed-in technique. Costs can vary widely based on your location, the stylist's experience, and the desired size and length of the braids, but you can expect to pay anywhere from $175 to $400+.4. Do knotless braids hurt?
No, when installed correctly, knotless braids should not hurt. They are renowned for being painless and comfortable from the very beginning. If you experience any pain, headaches, or see bumps forming on your scalp, it is a clear sign that the braids have been installed too tightly and you should communicate with your stylist immediately.5. How do I wash my hair with knotless braids?
Focus on washing your scalp. Dilute a moisturizing shampoo with water in a nozzle-tip applicator bottle. Apply the mixture directly to your scalp and gently massage with the pads of your fingers. Allow the suds to run down the length of the braids and rinse thoroughly to avoid buildup. Follow up by lightly applying a diluted conditioner and rinsing. Squeeze out excess water gently with a towel and let them air-dry or use a blow dryer on a low, cool setting.6. What's the main difference in appearance between knotless and traditional box braids?
The most noticeable visual difference is at the root. Traditional box braids have a small but visible knot where the extension hair is anchored. Knotless braids have a much flatter, smoother appearance at the scalp, making it look as though the braid is growing directly from your natural hair. This creates a more seamless and natural aesthetic.Conclusion: Embrace the Healthy, Stylish Choice
Knotless braids have rightfully earned their place as a top-tier protective style. By combining timeless beauty with a modern, health-conscious technique, they offer a solution that doesn't force you to choose between style and the well-being of your hair. From the painless, tension-free installation to the natural, flat-laying finish, the benefits are clear. They provide the ultimate versatility, allowing you to style your hair freely from day one while giving your natural strands a much-needed break.
By following this step-by-step guide, you are now equipped with the knowledge to prepare for, maintain, and truly enjoy your knotless braids. Remember that the foundation of a great protective style is a healthy hair care routine before, during, and after. For the best results, always seek out a skilled and experienced professional who prioritizes the health of your hair. Embrace this innovative braiding technique and enjoy the confidence that comes with a beautiful, comfortable, and truly protective hairstyle.


