Knotless Braids: The Secret to a Flawless, Natural-Looking Braid | Your Ultimate Guide
The Evolution of Braiding: An Introduction to Knotless Braids
In the world of protective styling, innovation is constant, always seeking the perfect balance between beauty, versatility, and hair health. For years, traditional box braids have been a beloved staple, but a newer technique has taken the hair community by storm, promising all the benefits of classic braids without the drawbacks. Enter knotless braids, the revolutionary method that is redefining comfort and style. This guide is your deep dive into the secret behind this flawless, natural-looking braid, exploring why it's more than just a trend—it's a significant advancement in hair care.

Unlike their traditional counterparts that start with a small, tight knot at the base, knotless braids begin with your natural hair and gradually feed in braiding extensions. This seemingly simple change makes a world of difference. The result is a lighter, more flexible braid that lays flat against the scalp, eliminating the tension and pulling that can lead to discomfort and even traction alopecia. If you've ever craved the elegance of long braids but shied away from the initial tightness and scalp stress, knotless braids are the answer you've been waiting for. They offer a seamless transition from your roots, creating a look so natural it appears as if the braids are growing directly from your scalp.
This comprehensive guide will walk you through everything you need to know about this game-changing style. We'll explore the incredible benefits, compare them directly to traditional box braids, detail the preparation and installation process, and provide expert tips on maintenance to keep your style looking pristine. Whether you're a seasoned braid enthusiast or considering a protective style for the first time, prepare to discover why knotless braids are the superior choice for a healthy scalp and a flawlessly chic look.
What Exactly Are Knotless Braids?
To truly appreciate the innovation of knotless braids, it's essential to understand the technique itself. The name says it all: the process eliminates the traditional knot used to anchor the extension to the base of the hair. Instead of creating a bulky attachment point, professional stylists employ a sophisticated feed-in method. The braid starts with just your natural hair, and small pieces of braiding hair are gradually and seamlessly added as the stylist braids down the hair shaft. This technique requires precision and skill, as the stylist must maintain consistent tension and evenly distribute the extension hair for a smooth, uniform finish.
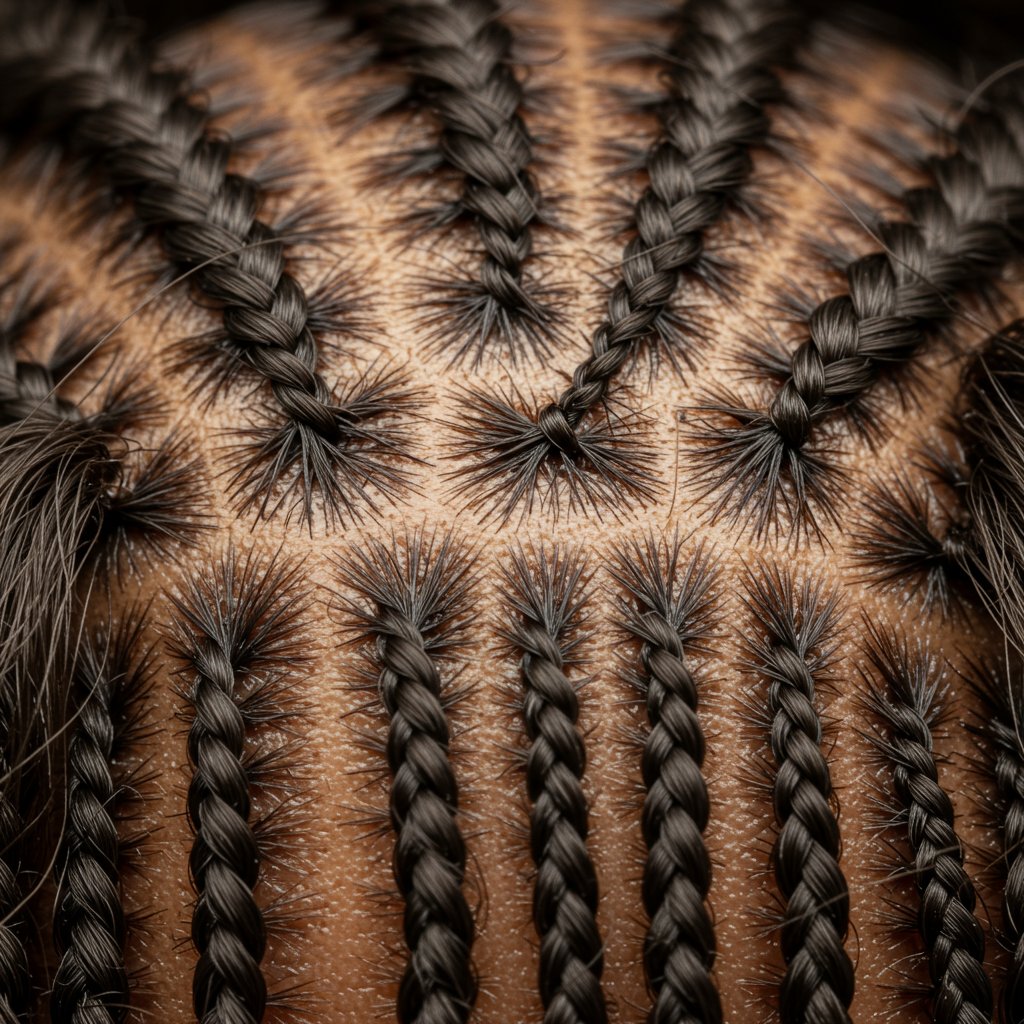
The absence of the initial knot is the core difference and the source of all its benefits. This knot-free beginning creates a flat, smooth base that integrates perfectly with your scalp. It allows the braid to move and flow with the natural direction of your hair from the very first day. The gradual addition of hair also ensures that the weight of the extension is distributed more evenly along the braid, rather than being concentrated at the root. This meticulous process not only results in a more comfortable and lightweight style but also significantly reduces the risk of hair breakage and scalp irritation.
Think of it as building the braid from the ground up, rather than attaching a pre-formed base. This organic approach is what gives knotless braids their signature natural appearance. The seamless transition from your own hair to the extension is virtually undetectable, providing a high-end, polished look that is both elegant and understated. It’s a testament to the artistry of modern braiding, where the health of the client's hair and scalp is just as important as the final aesthetic.
The Unbeatable Benefits: Why Everyone is Choosing Knotless
The surging popularity of knotless braids isn't just about aesthetics; it's rooted in a collection of tangible benefits that prioritize hair health and comfort. Stylists and clients alike are embracing this technique as the new standard for protective styling.
Pain-Free & Tension-Free: The Scalp's Best Friend
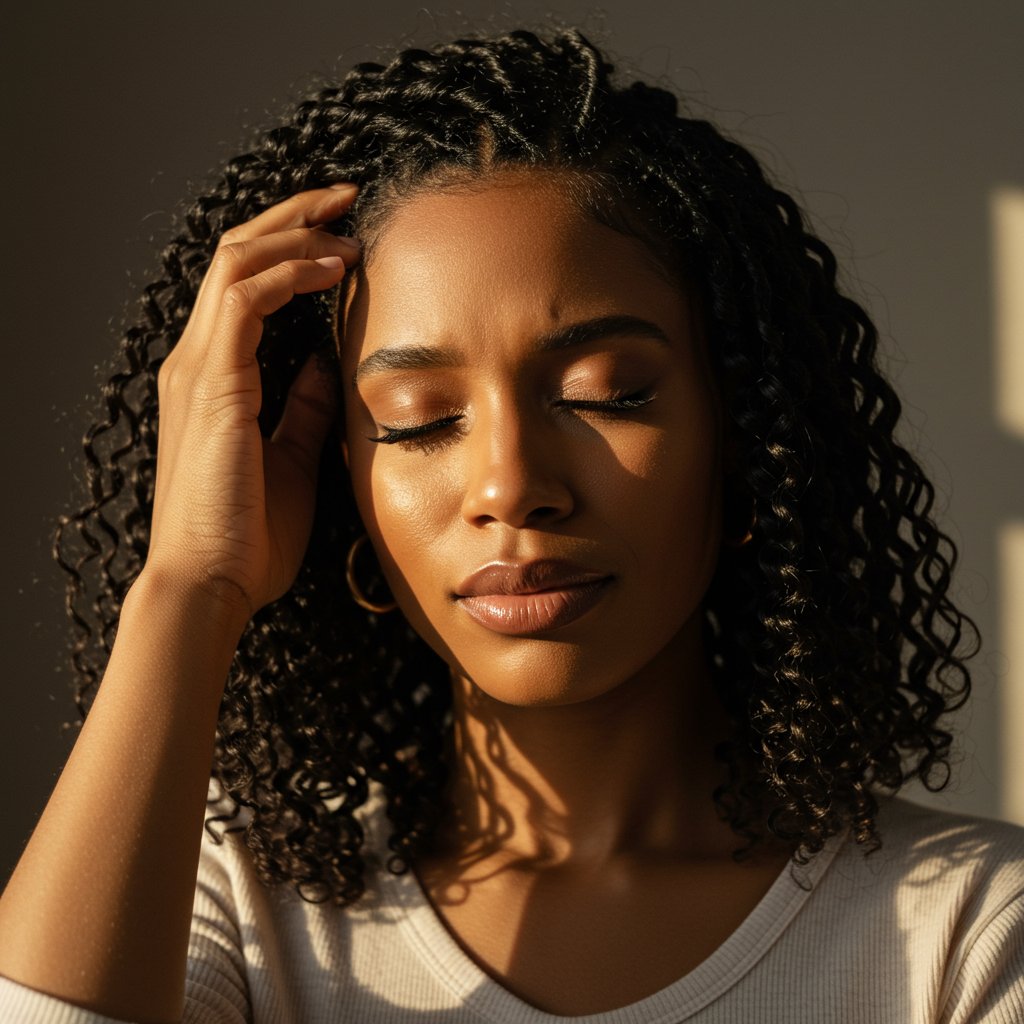
The most celebrated advantage of knotless braids is the dramatic reduction in scalp tension. Traditional box braids often come with a painful “breaking in” period of several days, where the tight knots can cause headaches, soreness, and bumps. Knotless braids eliminate this issue entirely. Because they start with your natural hair and lay flat, there is no pulling or uncomfortable tightness. This makes the entire experience, from installation to daily wear, significantly more pleasant and is a game-changer for those with sensitive scalps.The Ultimate Natural Look: Flat, Flexible, and Flawless
If you want braids that look like they're growing right out of your scalp, knotless is the way to go. The lack of a bulky knot at the base allows the braids to lay down smoothly and move freely from day one. This flexibility means you can style your hair in a high ponytail, bun, or any updo immediately after your appointment without any stiffness or resistance. The seamless integration of the braiding hair creates a sleek, sophisticated finish that is unmatched by other braiding methods.Promoting Hair Health: Less Breakage, More Growth
Protective styles are meant to protect, and knotless braids excel in this department. The intense pulling from traditional knots can weaken the hair follicle over time, leading to breakage and, in severe cases, traction alopecia. By removing this primary stressor, knotless braids provide a genuinely protective environment for your natural hair to thrive. With less tension on your roots and edges, your hair is free to grow stronger and healthier underneath the braids, making it an excellent choice for length retention goals.Knotless vs. Traditional Box Braids: A Side-by-Side Comparison
While both knotless and traditional box braids are fantastic protective styles, understanding their key differences can help you decide which is right for you. The choice often comes down to prioritizing comfort and hair health versus installation time and cost.
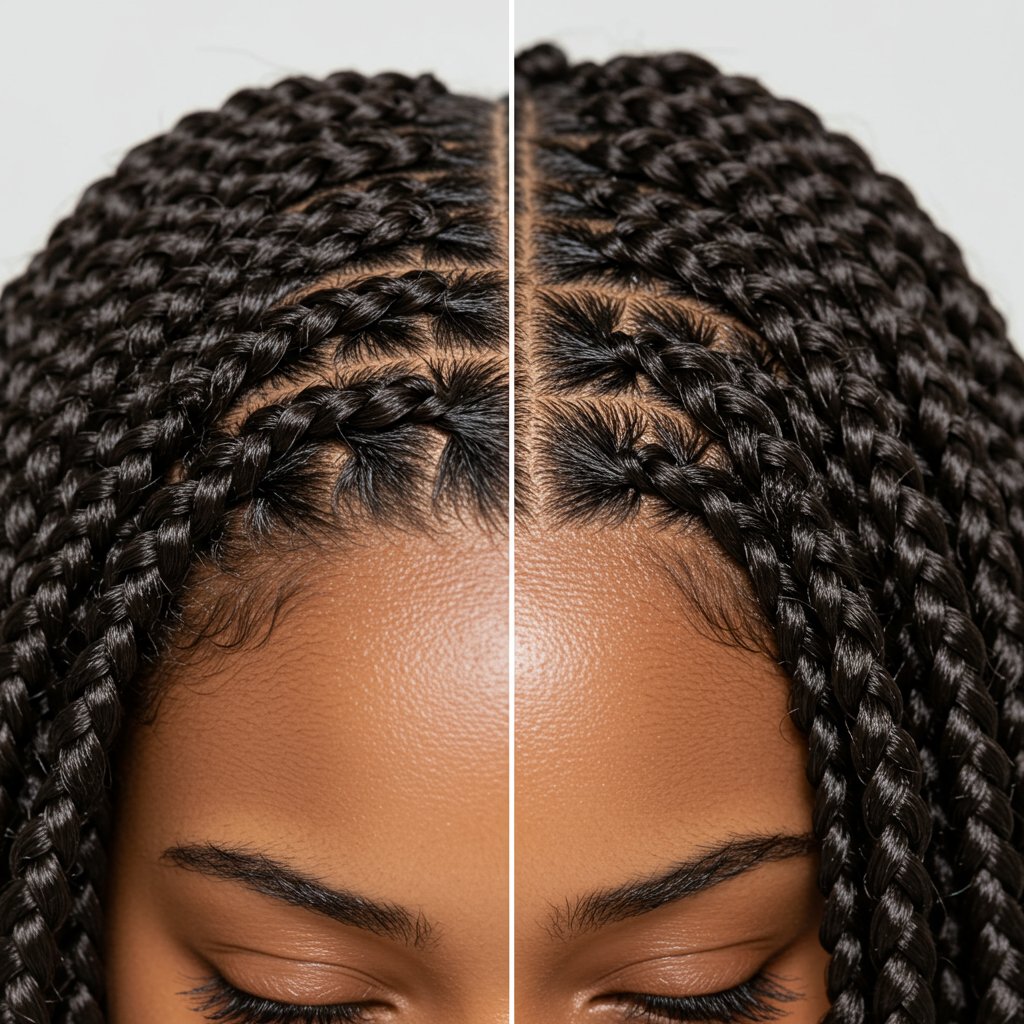
- Traditional Box Braids: The stylist creates a knot at the base of the scalp by wrapping the extension hair tightly around a section of natural hair before starting the three-strand braid. This creates a secure anchor but also a point of high tension.
- Knotless Braids: The stylist begins braiding with the client's natural hair and then gradually feeds in small pieces of extension hair. This feed-in technique eliminates the anchor knot entirely.
- Traditional Box Braids: Have a more pronounced, boxy look at the root due to the knot. They can be stiff for the first few days, making immediate updos uncomfortable.
- Knotless Braids: Offer a flat, seamless appearance at the root that looks incredibly natural. They are flexible and stylable from the moment you leave the salon chair.
- Traditional Box Braids: High tension at the root. Can cause soreness, headaches, and scalp irritation, especially for those with sensitivity.
- Knotless Braids: Minimal to no tension. They are lightweight and comfortable from the start, making them ideal for tender-headed individuals.
- Traditional Box Braids: The process is generally faster because anchoring the knot is a quicker technique than the meticulous feed-in method.
- Knotless Braids: The installation takes longer due to the precision required to feed in the hair smoothly. This increased time and skill level often translates to a higher price point, but most clients find the investment in comfort and hair health to be well worth it.
Preparing for Your Knotless Braid Appointment
Proper preparation is key to ensuring a smooth installation process and maximizing the longevity of your knotless braids. Arriving at the salon with your hair ready will not only save time but also contribute to the overall health and beauty of your final style.
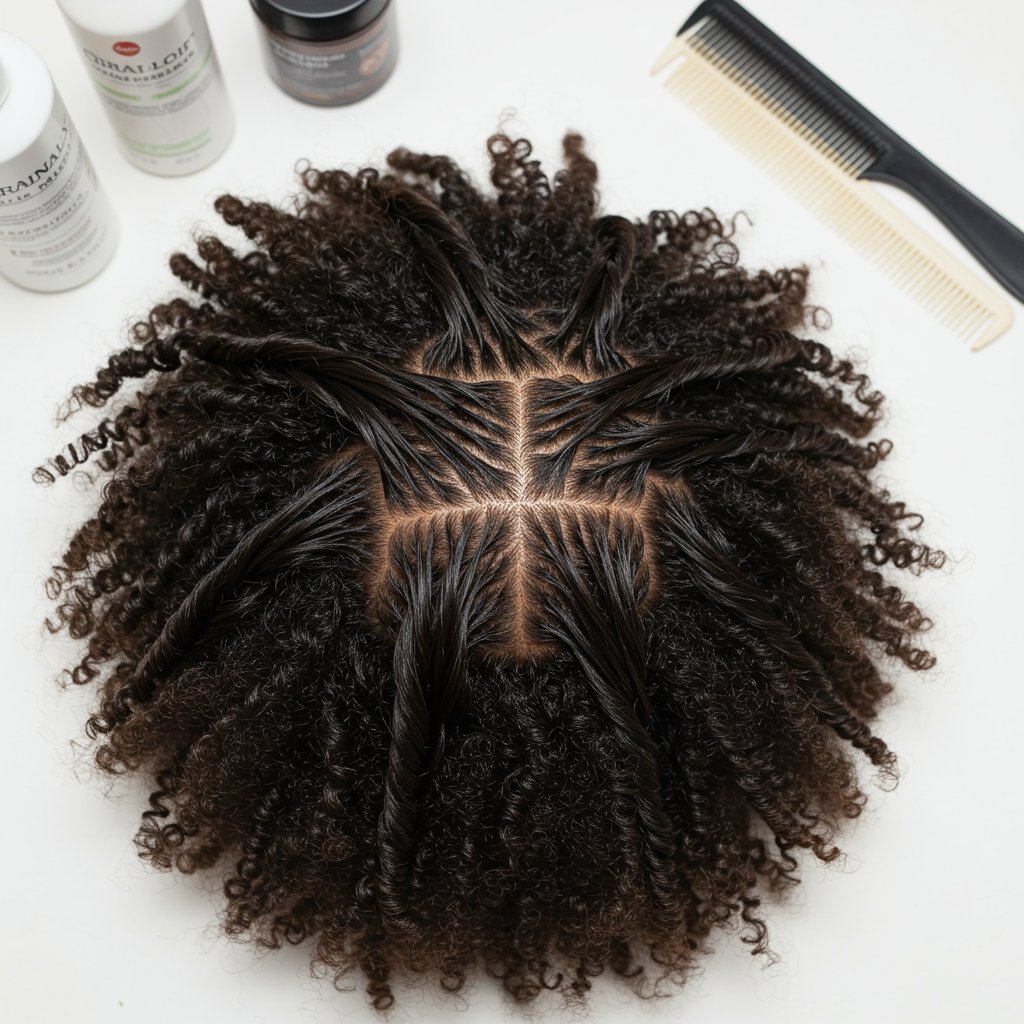
Step 1: Deep Cleansing and Conditioning
Start with a clean slate. A week or a few days before your appointment, wash your hair with a clarifying shampoo to remove any product buildup, dirt, or oils. This ensures that your scalp is clean and can breathe under the braids. Follow up with a deep conditioning treatment or a hair mask. This step is crucial as it infuses your hair with moisture, strengthening it and preparing it for the duration of the protective style. Well-moisturized hair is more pliable and less prone to breakage during the braiding process.Step 2: Detangling and Stretching Your Natural Hair
Thoroughly detangled hair is a stylist's best friend. After conditioning, carefully detangle your hair, working from the ends up to the roots with a wide-tooth comb or your fingers. Once detangled, it's highly recommended to stretch your hair. You can achieve this through methods like blow-drying on a low heat setting, banding, or threading. Stretched hair allows for neater parting, a smoother braiding process, and a more polished final look. It prevents the stylist from having to pull or struggle with tangled or shrunken hair, which further reduces potential tension.Step 3: Choosing the Right Braiding Hair
Consult with your stylist about the best type of hair to purchase for your desired look, but a popular choice for knotless braids is pre-stretched X-pression hair. Pre-stretched hair is already feathered at the ends, which saves the stylist time and helps create a more natural, less blunt finish. The quantity of hair needed will depend on the desired length and thickness of your braids, so always confirm with your salon beforehand. Having the right type and amount of hair ready ensures a seamless appointment.The Installation Process: What to Expect at the Salon
The magic of knotless braids lies in the meticulous installation process. Understanding what happens in the stylist's chair can help you appreciate the artistry involved. The process, while time-consuming, is designed for precision and scalp comfort.
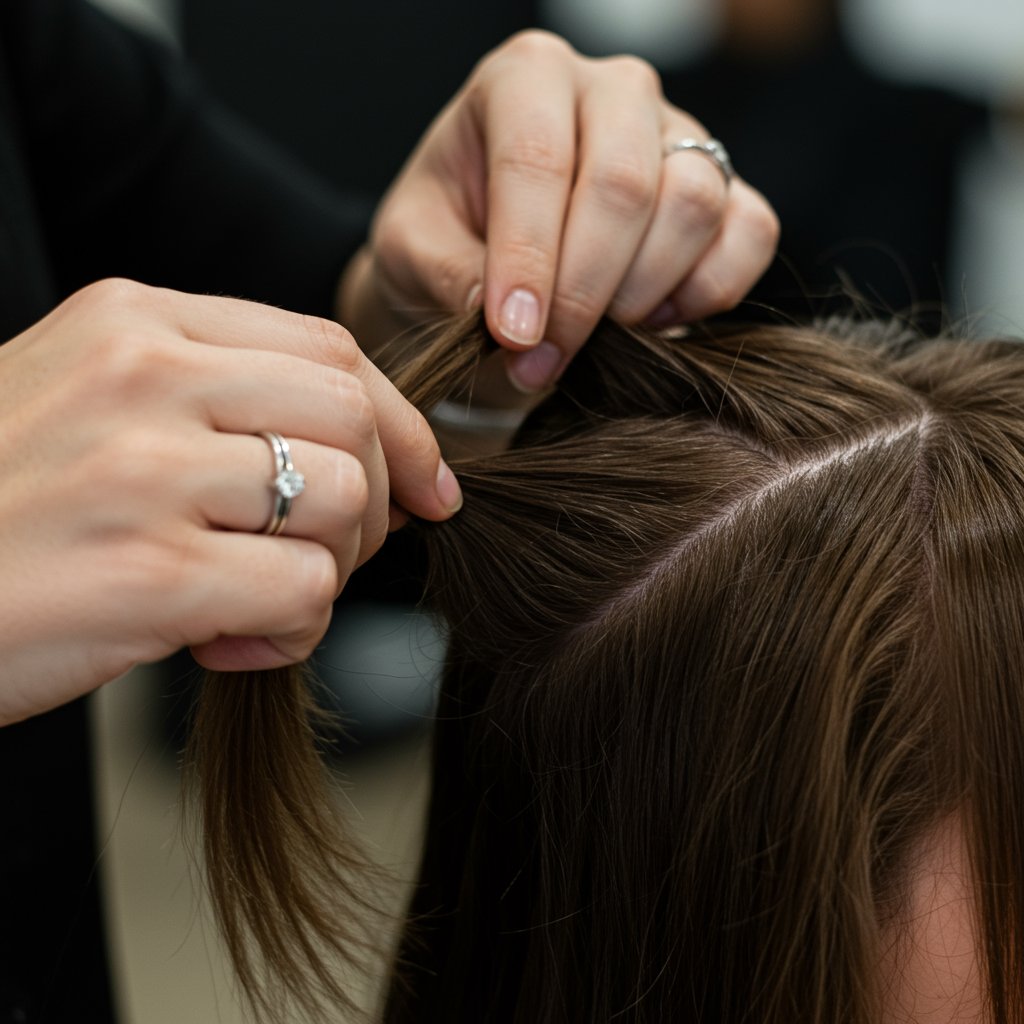
First, your stylist will begin by parting your hair with expert precision. The grid—whether box-shaped, triangular, or free-form—is the foundation of the entire style. Clean, sharp parts are essential for a polished look. Once a section is isolated, the braiding begins. Your stylist will take that small section of your natural hair and start a standard three-strand braid. This is the key first step that distinguishes the knotless technique.
After the first few plaits using only your natural hair, the stylist will begin the feed-in process. With incredible dexterity, they will take a very small piece of the pre-stretched braiding hair and add it into one of the 'legs' of the braid. They will continue braiding down, adding another small piece of hair every few plaits, alternating which side they add it to. This gradual addition builds the braid's thickness and length naturally, without a bulky starting point. The stylist's ability to maintain consistent tension and add hair seamlessly is what creates that flawless, uniform appearance from root to tip. Finally, the ends will be sealed, typically by dipping them in hot water, which secures the braid and gives it a clean finish.
Styling Versatility with Knotless Braids
One of the most exciting aspects of knotless braids is their incredible styling versatility, available from the moment you leave the salon. The flexibility at the root means you can manipulate them into various shapes and styles without the pain or stiffness associated with traditional braids.
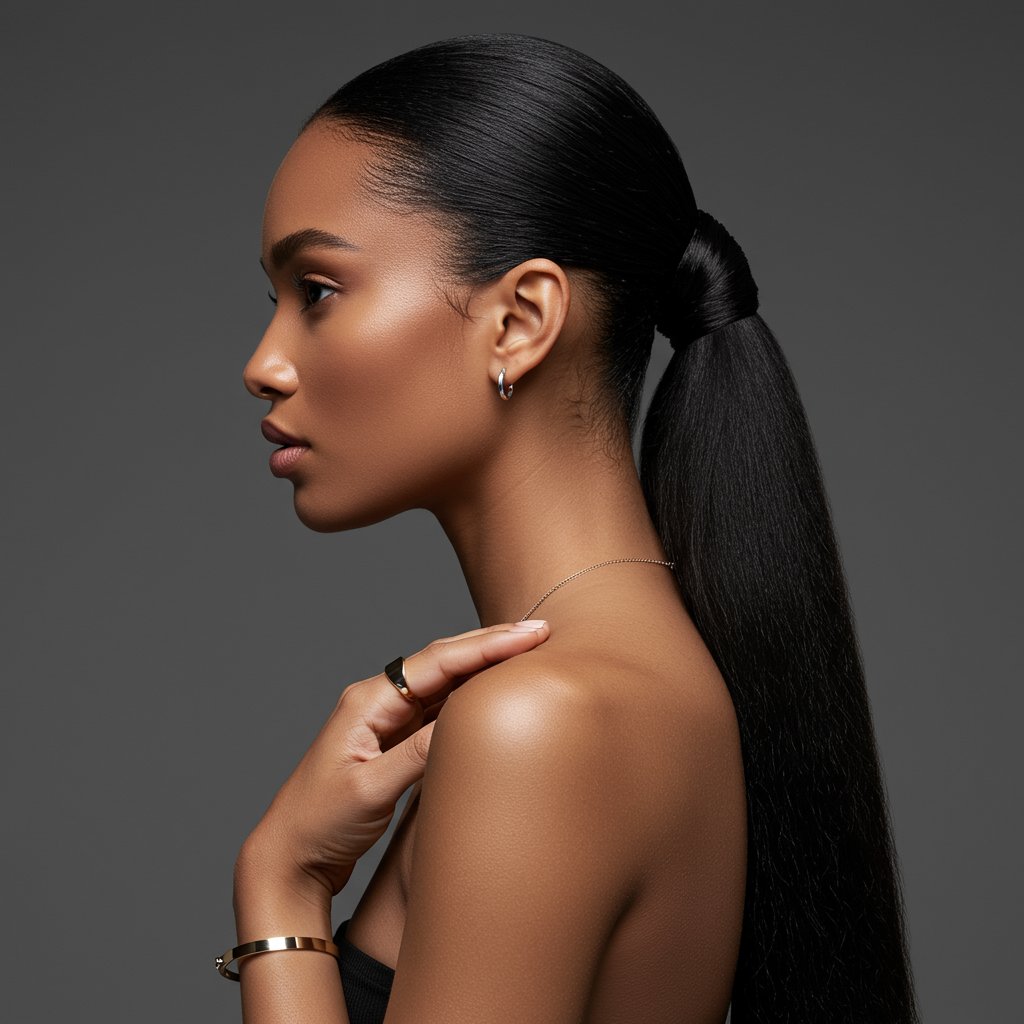
High ponytails and top knots, which can be difficult and painful to achieve with fresh box braids, are effortless with knotless braids. You can sweep your hair up into a sleek, elegant ponytail or a chic, full bun for a sophisticated look that’s perfect for both professional settings and special occasions. Half-up, half-down styles are another beautiful option, allowing you to showcase the length of your braids while keeping hair away from your face. You can secure the top section with a stylish clip or create a small bun for added flair.
Don't be afraid to accessorize. The smooth base of knotless braids is a perfect canvas for hair jewelry like beads, cuffs, and strings. You can add metallic cuffs for a touch of glamour or wooden beads for a more bohemian vibe. For a more intricate look, you can even braid your braids together, creating elegant crowns or side-swept styles. The lightweight nature of knotless braids means that even these more complex styles remain comfortable to wear all day long.
Aftercare and Maintenance: Making Your Braids Last
Investing time and money into a beautiful set of knotless braids means you'll want to keep them looking fresh for as long as possible. Proper aftercare is crucial for extending the life of your style and maintaining the health of your scalp and natural hair.

Nighttime Routine: Protecting Your Investment
Protecting your braids while you sleep is non-negotiable. Friction against cotton pillowcases can cause frizz, flyaways, and can even weaken your natural hair at the root. To prevent this, always wrap your hair at night. A large silk or satin bonnet is an excellent choice as it can accommodate the volume of your braids. Alternatively, you can tie your braids up and wrap them in a large silk or satin scarf. This simple step will keep your braids smooth and neat, significantly extending their lifespan.Cleansing Your Scalp and Braids
Keeping your scalp clean is essential for hair health and to prevent itchiness or buildup. You don't need to do a full, vigorous wash. Instead, focus on the scalp. You can use a spray bottle filled with water and a small amount of sulfate-free shampoo to spritz your scalp. Gently massage your scalp with the pads of your fingers (not your nails) to lift dirt. Rinse carefully by letting water run down the length of the braids. To refresh the braids themselves, you can use a dry shampoo or a braid spray. Aim to cleanse your scalp every 1-2 weeks.Moisturizing for Longevity
While your hair is in a protective style, it still needs moisture. Regularly spritz your hair and scalp with a light, water-based leave-in conditioner or a braid spray. Focus on your natural hair that is visible at the root. You can also apply a light oil, like jojoba or almond oil, to your scalp to seal in moisture and prevent dryness. A well-moisturized scalp is a happy scalp, and hydrated hair is less prone to breakage when you eventually take the braids down.Pro Tips for a Perfect Knotless Braid Experience
- Communicate with Your Stylist: Be clear about the size and length you want. Discuss your hair type and any scalp sensitivities you may have.
- Don't Go Too Small: While micro braids can be beautiful, extremely small knotless braids can put unnecessary strain on individual hair strands. Opt for a size that is substantial enough to support the extension.
- Listen to Your Scalp: Even though they are tension-free, if a particular braid feels too tight, let your stylist know immediately so they can adjust it.
- Prepare for the Time Commitment: Knotless braids take longer than traditional braids. Bring a book, headphones, or a tablet to keep yourself entertained during the appointment.
- Give Your Hair a Break: As with any protective style, it's crucial to give your natural hair a rest period between installations. Aim for at least 2-4 weeks to deep condition and care for your hair before getting your next set.

Frequently Asked Questions (FAQ)
Q1: Are knotless braids really better for your hair?
Yes, generally speaking. The lack of a tight anchor knot at the base significantly reduces tension on the hair follicles and edges. This minimizes the risk of breakage and traction alopecia, making them a healthier long-term option compared to traditional knotted styles.Q2: How long does a knotless braid installation take?
Installation time varies greatly depending on the desired size and length of the braids, as well as the stylist's speed. On average, you can expect the process to take anywhere from 4 to 9 hours. Small, long braids will take considerably longer than medium, shoulder-length ones.Q3: Can I get knotless braids with fine or thin hair?
Absolutely. Knotless braids are often an excellent choice for those with finer hair because they are lightweight and put less stress on the hair strands. It's crucial to choose a professional stylist experienced with your hair type and to opt for a medium or large size to avoid overburdening the hair.Q4: What's the average cost of knotless braids?
Due to the higher level of skill and longer installation time required, knotless braids are typically more expensive than traditional box braids. The cost can range from $150 to over $600, depending on your location, the stylist's expertise, and the length and size of the braids.Q5: How do I know when it's time to take them down?
It's recommended to wear knotless braids for no longer than 4 to 8 weeks. Telltale signs that it's time for removal include significant new growth (more than an inch), excessive frizz at the roots, and product buildup on the scalp. Leaving them in for too long can cause your natural hair to loc and lead to breakage during the takedown process.Conclusion: Embrace the Flawless Freedom of Knotless Braids
Knotless braids have rightfully earned their place as a top-tier protective style. By masterfully blending hair health, comfort, and aesthetics, they offer a sophisticated and modern alternative to traditional methods. The freedom from pain, the immediate styling flexibility, and the incredibly natural appearance make them an investment in both your look and the well-being of your hair.
This technique represents a thoughtful evolution in braiding, one that listens to the needs of the client and prioritizes the integrity of their natural hair. If you're seeking a protective style that will turn heads, feel weightless, and give you peace of mind, there is no better choice. Consult with a skilled, professional stylist to discuss how knotless braids can elevate your style and become your new go-to for flawless, beautiful, and healthy hair.


