Knotless Braids: The Ultimate Guide to This Pain-Free Protective Style | Everything You Need to Know
The Gentle Revolution: An Introduction to Knotless Braids
For decades, braids have been a cornerstone of protective styling, celebrated for their beauty, versatility, and ability to shield natural hair from daily manipulation. However, the traditional application method often came with a significant drawback: tension. The tight anchor knot at the base of traditional box braids could lead to scalp tenderness, headaches, and even traction alopecia. Enter the game-changer: knotless braids. This innovative technique has surged in popularity, offering all the benefits of classic braids without the painful trade-off. By starting with your natural hair and gradually feeding in extensions, knotless braids provide a seamless, lightweight, and incredibly comfortable experience.

This ultimate guide is your definitive resource for everything related to knotless braids. We will delve deep into what makes this style so unique, exploring its myriad benefits that go far beyond comfort. We'll walk you through the essential preparation steps to ensure your hair is in optimal condition, detail the installation process so you know exactly what to expect, and showcase the stunning variety of sizes and styles available. Furthermore, you'll learn the expert-approved aftercare routines to maximize the longevity of your braids while promoting the health of your natural hair underneath. Whether you're a seasoned braid enthusiast or considering a protective style for the first time, this guide will equip you with the knowledge to embrace the pain-free beauty of knotless braids.
What Exactly Are Knotless Braids? Unpacking the Technique
The magic of knotless braids lies entirely in the installation method. Unlike traditional box braids, which begin by creating a small knot at the scalp with the braiding hair, the knotless technique takes a gentler approach. The process starts by braiding your natural hair for a few stitches before incrementally feeding in small pieces of extension hair. This 'feed-in' method is the core difference and the source of all the style's acclaimed benefits. It creates a smooth, flat transition from your scalp to the braid, eliminating the bulky, tension-inducing knot.
This distinction is more than just aesthetic; it has profound implications for scalp health. The absence of a tight anchor knot means there is significantly less pulling on the hair follicle. This drastically reduces the risk of scalp irritation, inflammation, and the dreaded traction alopecia, a form of hair loss caused by constant pulling. The braids lay flat against the head from the moment they are installed, allowing for immediate flexibility and styling versatility. You can pull them up into a ponytail or bun on day one without the usual waiting period for the braids to 'loosen up'. This gentle, seamless integration is what makes knotless braids a superior choice for those prioritizing hair health and comfort.
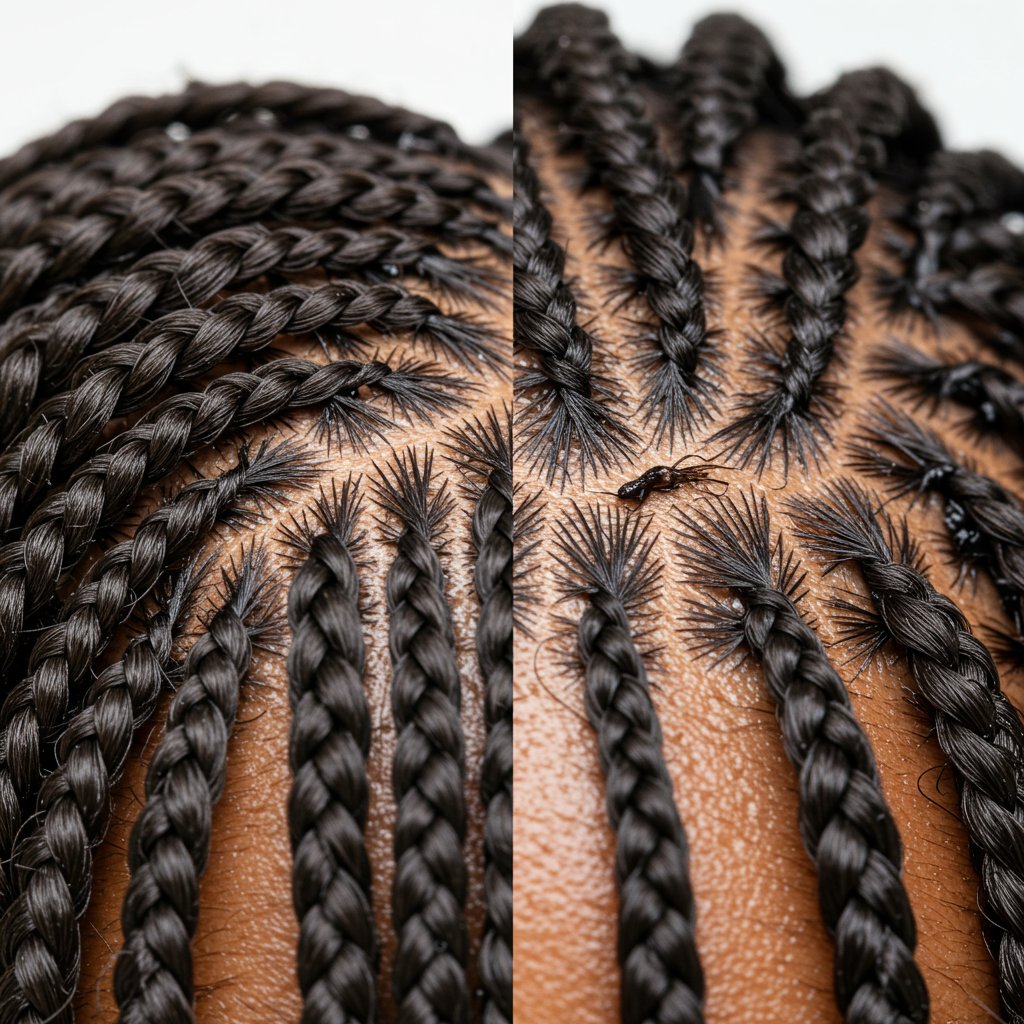
The Anatomy of a Knotless Braid vs. a Traditional Braid
To truly appreciate the difference, let's visualize it. A traditional box braid has a distinct, noticeable knot at the base where the extension hair is looped around the natural hair. This creates a raised, box-like parting. In contrast, a knotless braid appears to grow directly out of the scalp. The parting is flatter, the transition is smoother, and the overall look is more natural. This sleek appearance, combined with the lightweight feel, makes knotless braids a sophisticated and modern evolution of a timeless protective style.
The Top 5 Health and Style Benefits of Choosing Knotless Braids
While the pain-free aspect is the most celebrated benefit, the advantages of knotless braids extend much further. This style offers a holistic approach to protective styling that benefits your hair, your scalp, and your lifestyle.

1. Superior Comfort and Scalp Health
This is the number one reason people make the switch. The feed-in method distributes tension evenly, avoiding the concentrated pulling at the root that causes pain, soreness, and headaches associated with traditional braids. This gentle approach is ideal for those with sensitive scalps and makes the entire experience, from installation to wear, far more pleasant. It's a proactive choice for preventing follicle damage and preserving your hairline.2. Lightweight and Immediately Flexible
The absence of the bulky knot at the base makes each braid significantly lighter. When you have a full head of braids, this weight difference is substantial, reducing strain on your neck and scalp. This lightness, coupled with the flat-laying nature of the braids, provides instant flexibility. High ponytails, elegant updos, and intricate styles are all possible from the moment you leave the salon chair, without the discomfort or stiffness.3. A Seamless and Natural Appearance
Knotless braids offer an unparalleled natural look. Because they start with your own hair, they blend seamlessly, creating the illusion that the braids are growing directly from your scalp. This sleek, flat-at-the-root finish provides a more refined and less bulky appearance than their traditional counterparts, making them suitable for any setting, from the boardroom to the beach.4. Promotes Hair Growth and Length Retention
Protective styles are meant to protect, and knotless braids excel at this. By minimizing tension and reducing the risk of breakage at the root, they create an optimal environment for hair growth. With your natural hair safely tucked away and free from the stress of daily styling, it can thrive. Proper maintenance of knotless braids, including moisturizing your scalp and hair, directly contributes to length retention and overall hair health.5. Unmatched Styling Versatility
The flexibility of knotless braids opens up a world of styling possibilities. Their natural-looking base makes them perfect for half-up, half-down styles, elegant updos, and simple, flowing looks. They can be adorned with beads, cuffs, and strings just like traditional braids, but their ability to be manipulated easily from day one gives them a distinct advantage for those who love to switch up their look.Pre-Installation Prep: Setting the Foundation for Flawless Braids
Achieving beautiful, long-lasting knotless braids begins long before you sit in the stylist's chair. Proper preparation of your natural hair is crucial for a smooth installation and the overall health of your hair during the protective style. Skipping these steps can lead to dryness, breakage, and a less-than-perfect result.
Step 1: Deep Cleansing and Clarifying
Start with a clean slate. Over time, products like oils, creams, and leave-in conditioners can build up on your hair and scalp. A good clarifying shampoo will strip away this residue, allowing your hair to better absorb moisture. Follow up with a moisturizing shampoo to restore hydration. A clean scalp is essential for healthy hair growth underneath the braids, preventing issues like dandruff and itchiness.Step 2: Deep Conditioning and Moisturizing
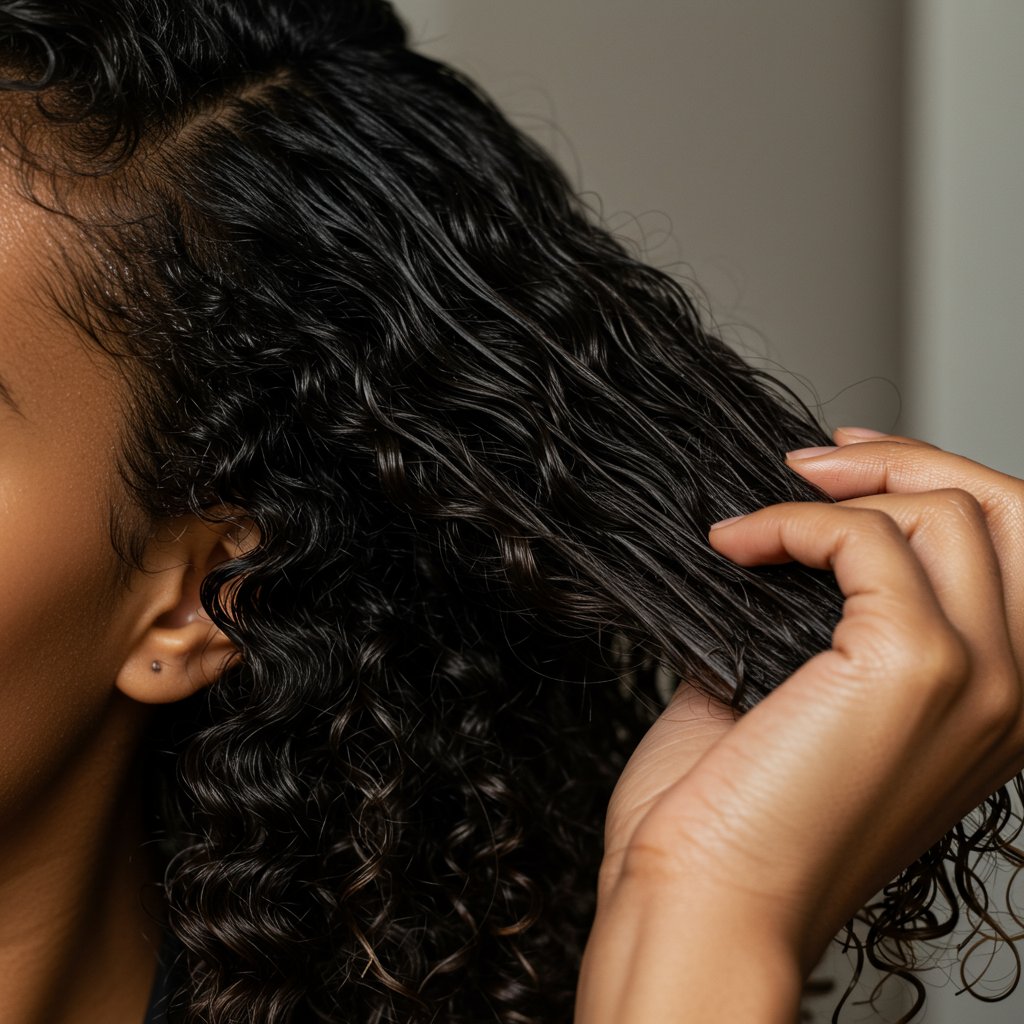
This is arguably the most important step. A protective style will have your natural hair tucked away for several weeks, so it's vital to infuse it with as much moisture as possible beforehand. Use a rich, deep conditioner or hair masque after cleansing. For an extra boost, sit under a hooded dryer or use a thermal cap to help the conditioner penetrate the hair shaft more effectively. This will fortify your strands, making them resilient and less prone to dryness and breakage while braided.Step 3: Thorough Detangling and Stretching
For a sleek and seamless knotless braid installation, your hair needs to be thoroughly detangled and stretched. After conditioning, carefully detangle your hair from ends to roots using a wide-tooth comb or your fingers. To stretch the hair, you can use a blow-dryer on a low to medium heat setting (always with a heat protectant!) or opt for a heatless method like banding or African threading overnight. Stretched hair allows the stylist to grip the hair cleanly, resulting in neater parts and a smoother braid application.The Knotless Braid Installation Process: What to Expect
Understanding the installation process can help you feel more comfortable and prepared for your salon appointment. While the exact time can vary based on the desired size and length, the core technique remains consistent.
The Consultation
A professional stylist will begin with a brief consultation. This is your opportunity to discuss the desired size (small, medium, jumbo), length, and any specific style variations like Boho or Goddess braids. They will also assess the health of your hair and scalp to ensure it's a suitable style for you.Parting the Hair
Precision is key. Your stylist will meticulously part your hair into clean sections according to the desired braid size. For classic knotless braids, these parts are typically box-shaped, but they can also be triangular or free-form for a different aesthetic. A good parting comb and a steady hand are essential for this stage.The Feed-In Technique
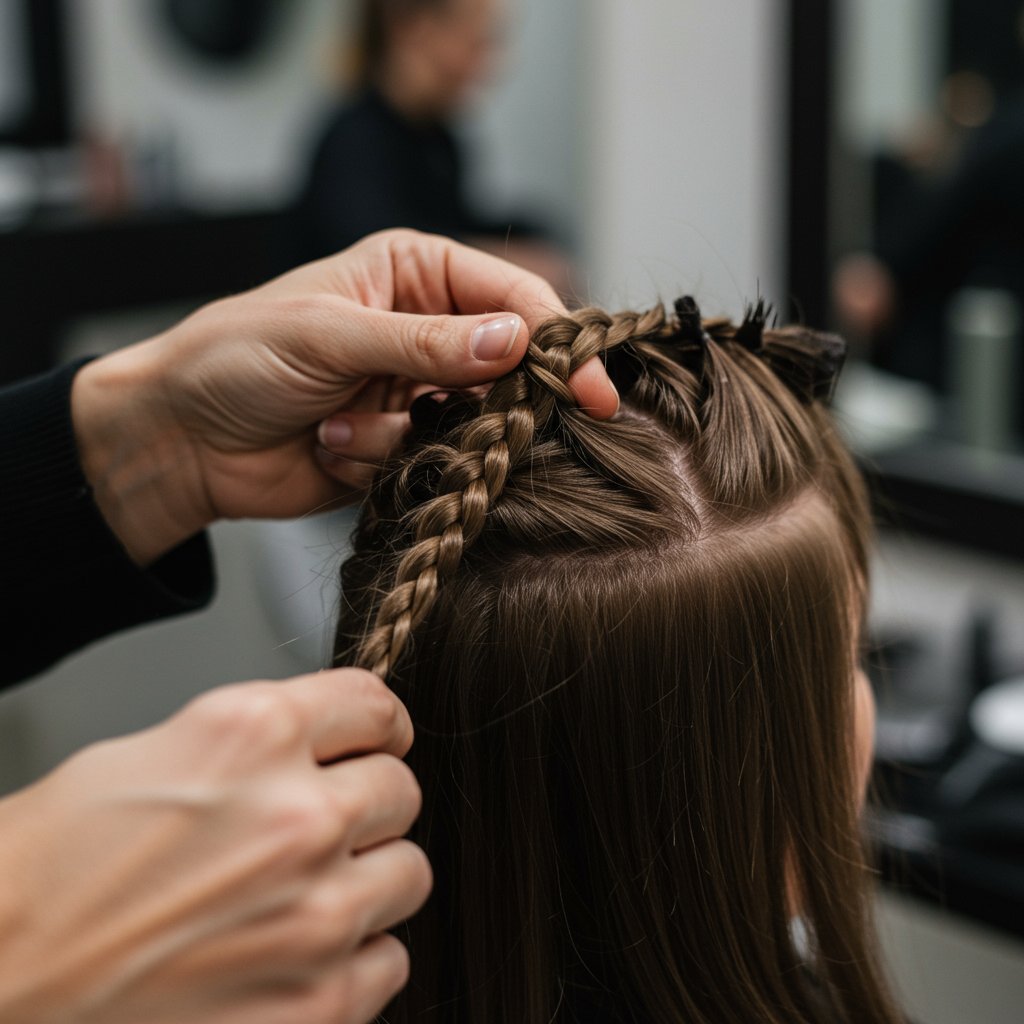
This is where the knotless magic happens. The stylist will take a small section of your natural hair and begin a standard three-strand braid. After a few plaits, they will begin feeding in small pieces of pre-stretched braiding hair, gradually increasing the thickness of the braid. This process is repeated down the length of the braid until the desired thickness and length are achieved, resulting in a smooth, tapered look that is strong yet gentle on the scalp.Securing the Ends
How the ends are secured depends on the type of braiding hair used and your personal preference. Common methods include dipping the ends in hot water to seal them, burning them (a technique that should only be performed by a seasoned professional), or leaving them loose and curly for a Boho look. Some people also opt for small rubber bands, though this is less common.Knotless Braid Sizes and Styles: Finding Your Perfect Look
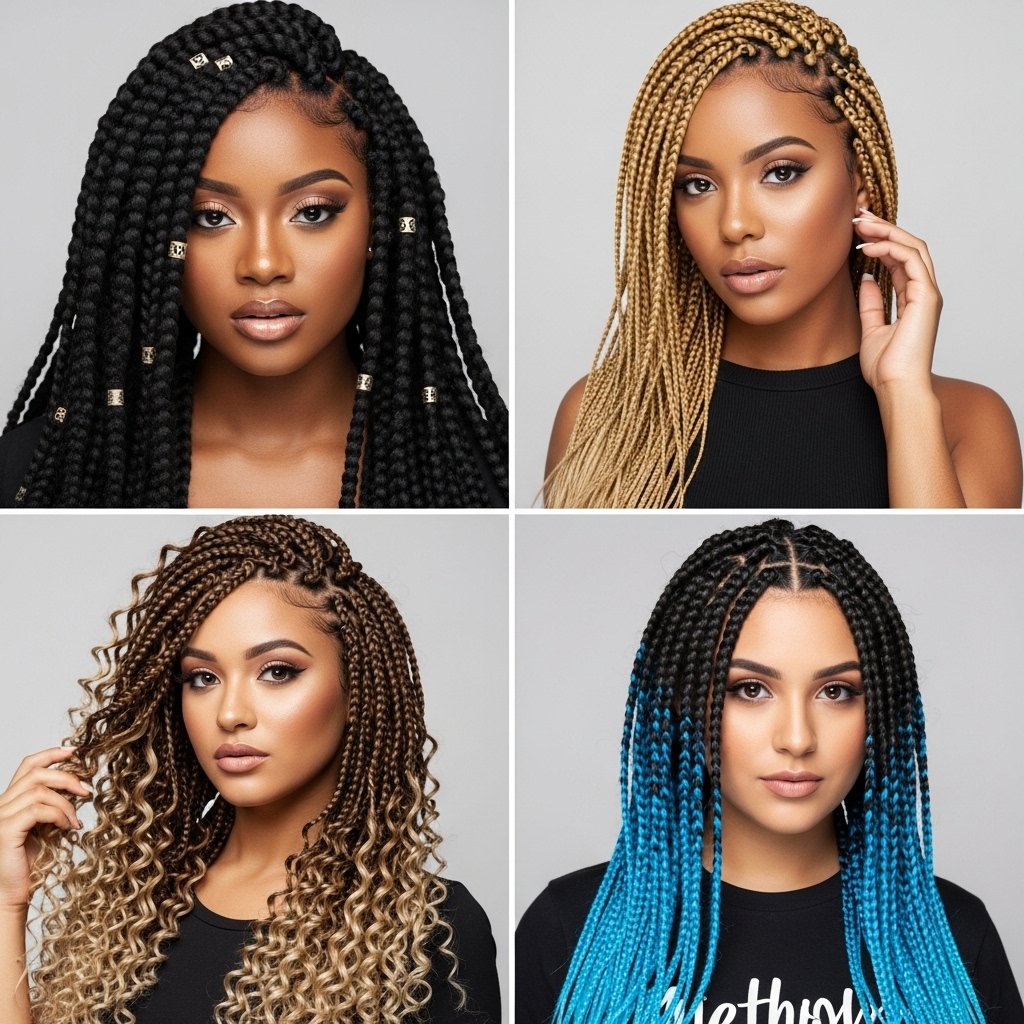
Knotless braids are not a one-size-fits-all style. Their versatility allows for a wide range of aesthetic expressions, from understated and classic to bold and dramatic. The size of the braids is the primary factor influencing the final look, installation time, and maintenance.
Small/Micro Knotless Braids
These tiny, delicate braids offer a very full and long-lasting style. Because there are so many individual braids, they provide incredible movement and look very similar to loose strands of hair from a distance. Pros: Can last up to 8-10 weeks with proper care. Cons: The installation process is very lengthy, often taking 8-12 hours or more, and can be significantly more expensive. They can also be more difficult to take down.Medium Knotless Braids
This is the most popular and balanced option. Medium knotless braids offer a beautiful, full look without the extensive installation time of smaller braids. They are large enough to be relatively quick to install (typically 5-7 hours) but small enough to be incredibly versatile for styling. They are a perfect middle ground for longevity, style, and convenience.Large/Jumbo Knotless Braids
For a bold, statement-making look, jumbo knotless braids are the way to go. The parts are large, and the braids are thick, resulting in a dramatic and chic style. Pros: The installation is much faster, often completed in 3-5 hours. They are also easier and quicker to take down. Cons: They don't typically last as long as smaller sizes (around 4-5 weeks) as new growth is more apparent against the large sections.Boho and Goddess Variations
To add a touch of romance and texture, consider Boho or Goddess knotless braids. This trendy style incorporates strands of curly human or synthetic hair that are left out of the braid at various points. The result is a soft, carefree, and voluminous look that combines the structure of braids with the flow of loose curls.Aftercare and Maintenance: How to Make Your Braids Last
Investing time and money into getting knotless braids means you'll want to keep them looking fresh for as long as possible. A consistent maintenance routine is key to extending the life of your style and, more importantly, protecting the health of your natural hair.

Your Nighttime Routine
Protecting your braids while you sleep is non-negotiable. Friction against cotton pillowcases can cause frizz, dryness, and unnecessary tension on your roots. Always sleep with your braids covered in a satin or silk scarf, bonnet, or by using a satin pillowcase. This helps to retain moisture, reduce frizz, and keep your parts looking neat.Scalp Care is Paramount
A healthy scalp leads to healthy hair. Since you can't wash your hair as frequently, it's important to keep your scalp clean and moisturized. You can use a spray bottle with water and a few drops of a light oil like jojoba or tea tree oil to spritz your scalp every few days. To cleanse without a full wash, apply a small amount of witch hazel or a specialized braid spray to a cotton pad and gently wipe your scalp between the parts. This will remove buildup and soothe any itchiness.Washing Your Braids
Yes, you can and should wash your knotless braids, but not too often—every 2-3 weeks is a good rule of thumb. Dilute your shampoo with water in a nozzle-tip applicator bottle and apply it directly to your scalp. Gently massage with the pads of your fingers (not your nails) to lift dirt. Let the suds run down the length of the braids and squeeze gently; avoid vigorous rubbing. Rinse thoroughly and follow up with a light, leave-in conditioner spray. Always ensure your braids are completely dry to prevent mildew and odor, which can be achieved by air-drying or using a blow dryer on a low, cool setting.Pro Tips for Flawless Knotless Braids
- Choose Quality Hair: Use pre-stretched, high-quality synthetic braiding hair for a smoother finish and to avoid scalp irritation.
- Communicate with Your Stylist: Don't be afraid to speak up if you feel any pulling or discomfort during the installation. The style should be completely painless.
- Don't Go Too Small on Your Edges: Avoid micro-sized braids around your delicate hairline to prevent excessive tension and potential breakage.
- Moisturize the Length: Don't just focus on the scalp. Lightly spritz the length of your braids with a leave-in conditioner or braid spray to keep them looking fresh and hydrated.
- Know When to Let Go: A protective style is only protective if it's not left in for too long. Adhere to the recommended wear time (typically 4-8 weeks) to avoid matting and breakage of your natural hair.

Frequently Asked Questions About Knotless Braids
Q1: Do knotless braids damage your hair?
When installed and maintained correctly, knotless braids are one of the least damaging protective styles. The lack of a tension knot at the base significantly reduces the risk of traction alopecia and breakage. Damage typically occurs only if the braids are installed too tightly, left in for too long, or removed improperly.Q2: How much do knotless braids typically cost?
Cost varies widely based on location, stylist experience, braid size, and length. Because the technique is more intricate and time-consuming, knotless braids are generally more expensive than traditional box braids. Prices can range from $150 to over $600.Q3: What kind of hair is best for knotless braids?
Most stylists prefer to use high-quality, pre-stretched synthetic kanekalon hair, such as X-Pression or RastAfri. Pre-stretched hair is feathered at the ends, which helps create a more natural, tapered look and makes the braiding process smoother.Q4: Can I get knotless braids on short hair?
Yes, you can get knotless braids on short hair, but your hair should be at least 2-3 inches long for the stylist to have enough to grip and begin the braid securely. The feed-in method is actually very effective for shorter hair as it provides a secure hold without adding too much weight or tension.Q5: How do I know when it's time to take them out?
It's time for removal when you have a significant amount of new growth (typically an inch or more), making the braids feel heavy and potentially causing tension on the new growth. Other signs include excessive frizz at the roots, product buildup that can't be washed away, or simply when the style no longer looks fresh. Aim to keep them in for no longer than 8 weeks.The Verdict: Why Knotless Braids Are Worth the Hype
Knotless braids have rightfully earned their place as a top-tier protective style. They offer a brilliant fusion of aesthetics, comfort, and hair health that was previously unmatched. By eliminating the painful, tension-heavy knot, this technique allows individuals to enjoy the beauty and convenience of braids without compromising the well-being of their scalp and hair. From their natural appearance and lightweight feel to their incredible versatility, knotless braids represent a thoughtful evolution in the art of braiding.
Whether you are looking to give your natural hair a break, experiment with a new look, or simply want a protective style that prioritizes health, knotless braids are an outstanding choice. By following the proper preparation, choosing an experienced stylist, and committing to a solid maintenance routine, you can enjoy a stunning and truly pain-free braided style that protects and nurtures your hair, allowing it to flourish. It's more than just a trend; it's a healthier standard for protective styling.


