Mermaid Waves: The Ultimate Tutorial for Long, Flowing Hair
Mermaid Waves: The Ultimate Tutorial for Long, Flowing Hair
Master the Art of Creating Enchanting, Ocean-Inspired Waves That Cascade Like a Mythical Sea Goddess
In the realm of hairstyling, few looks capture the imagination quite like mermaid waves – those lustrous, elongated S-shaped waves that seem to flow and ripple like ocean currents through your hair. This coveted hairstyle has transcended its beachy origins to become a red-carpet favorite and social media sensation, inspiring countless individuals to recreate these ethereal, flowing locks. Whether you're preparing for a special event or simply want to channel your inner sea goddess, this comprehensive guide will teach you everything you need to know about achieving and maintaining spectacular mermaid waves.
What Defines Mermaid Waves? The Anatomy of Ocean-Inspired Hair
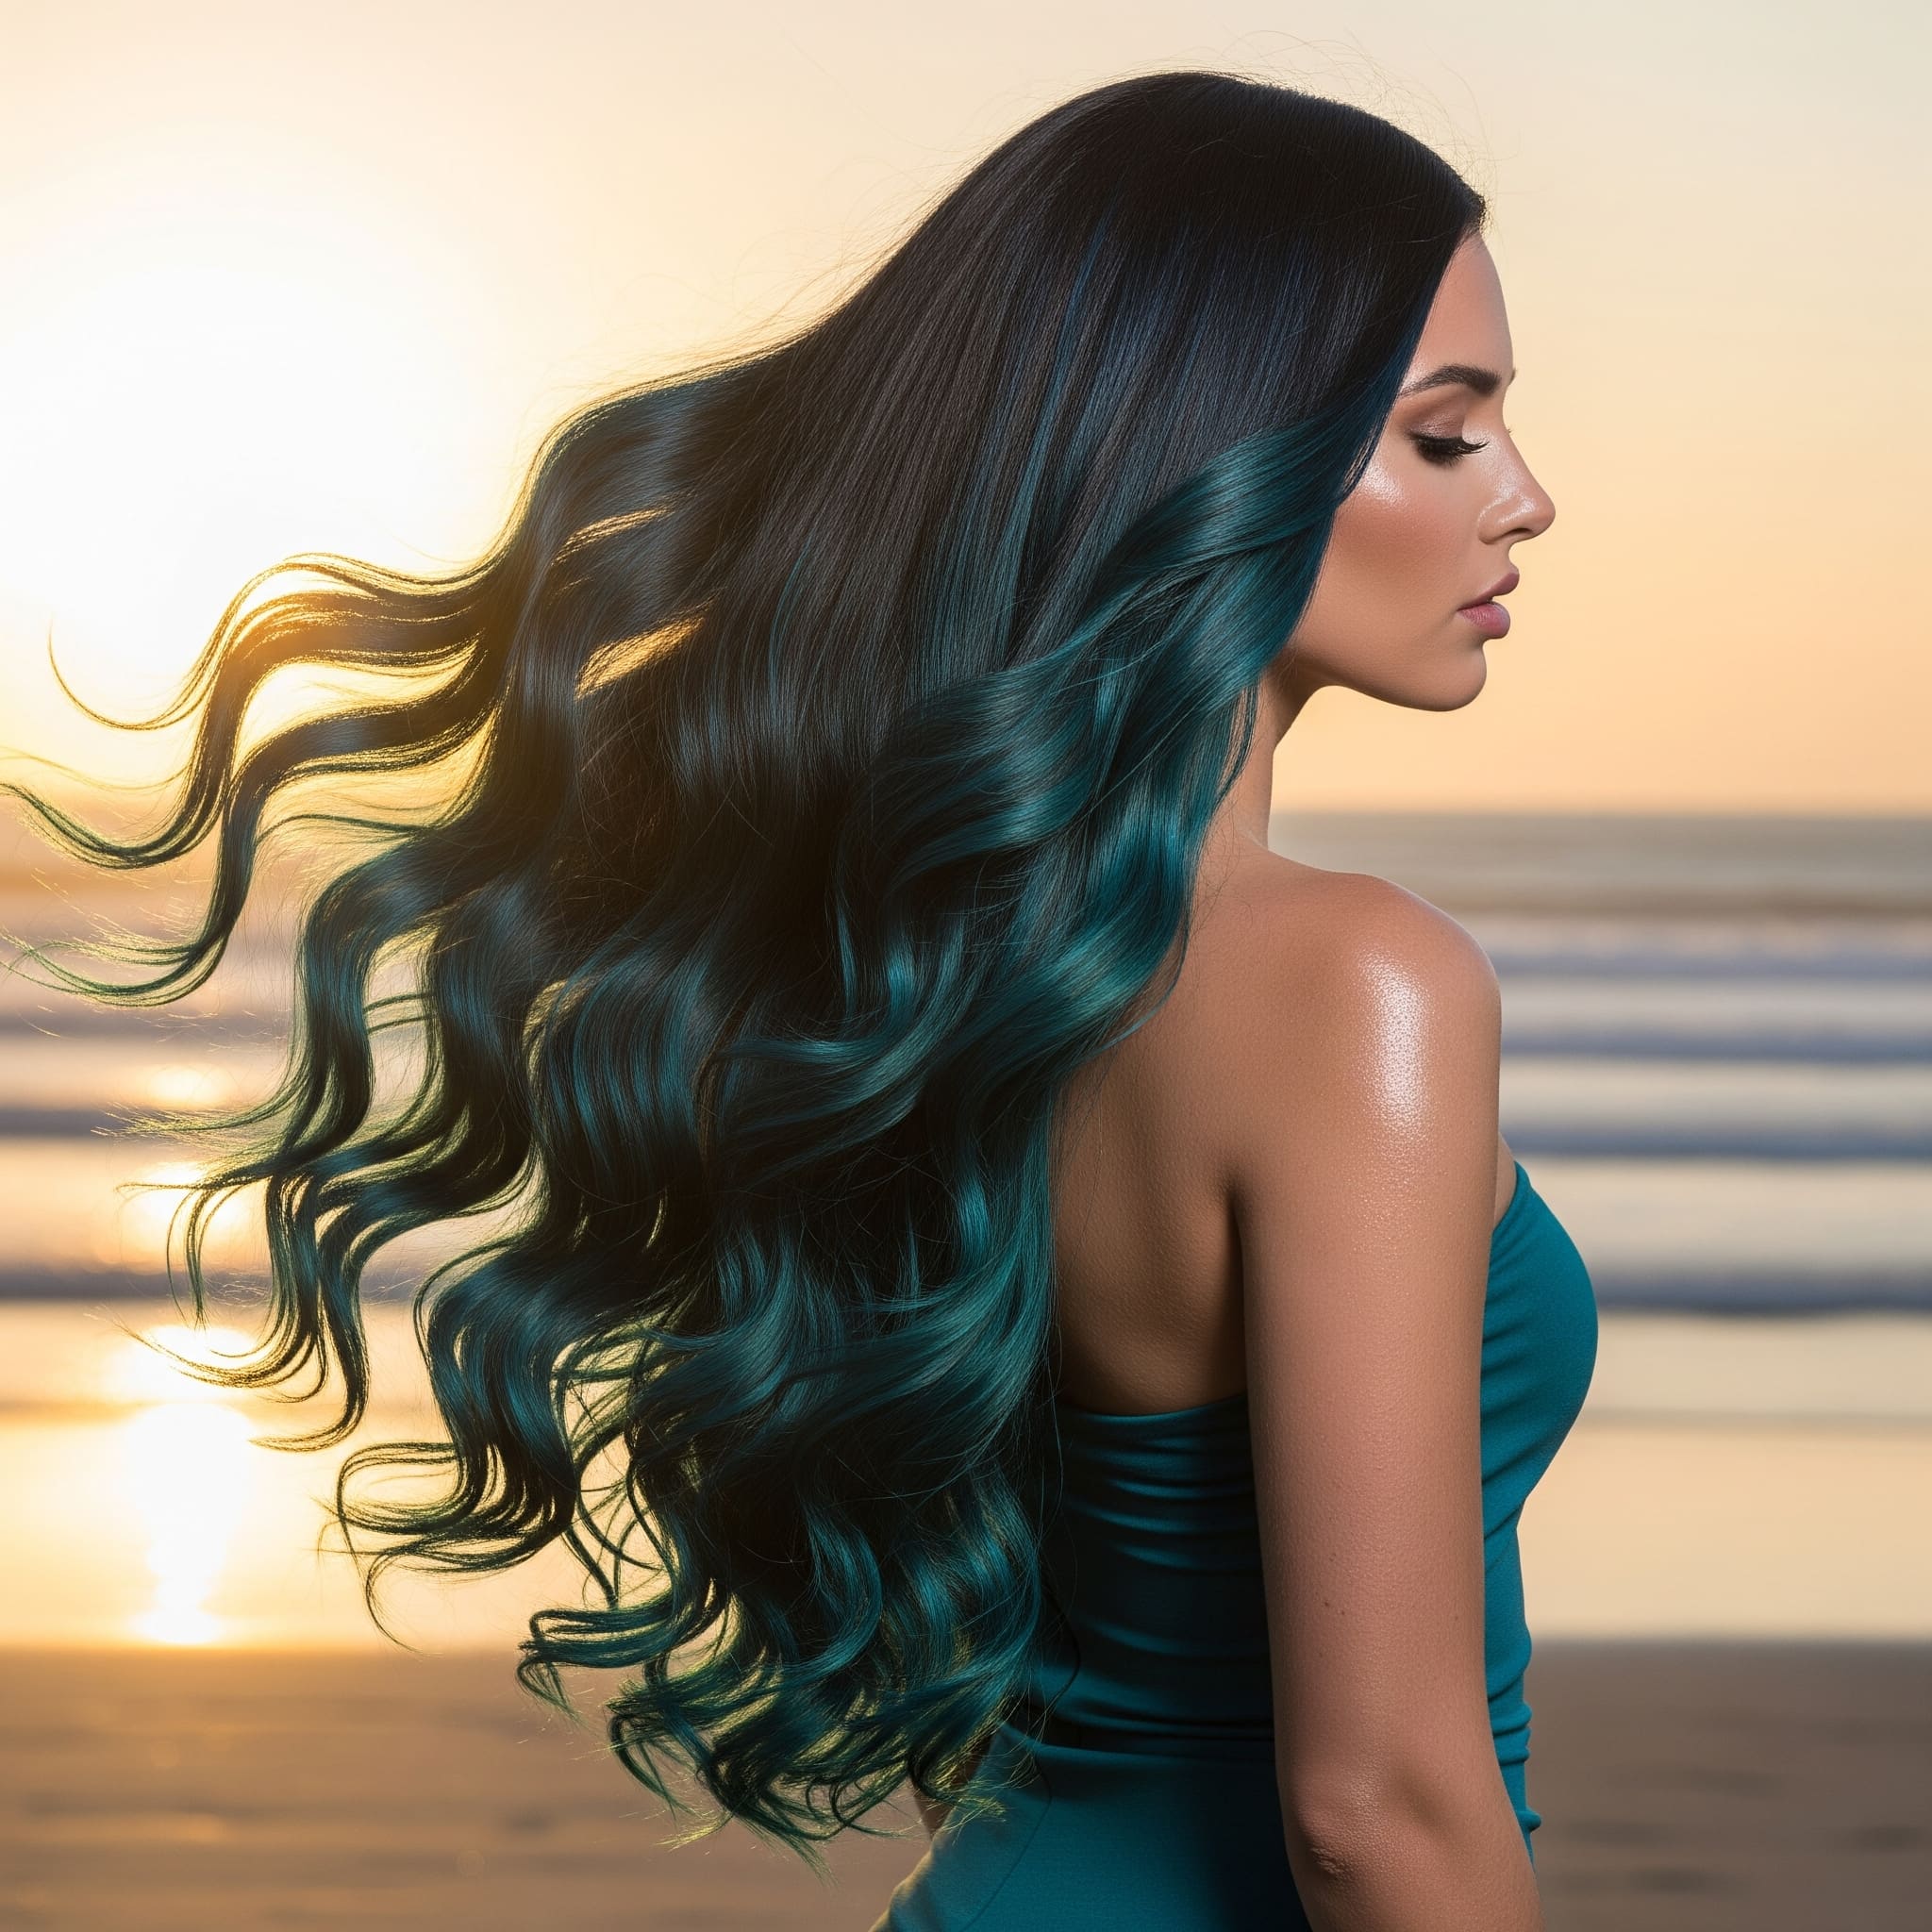
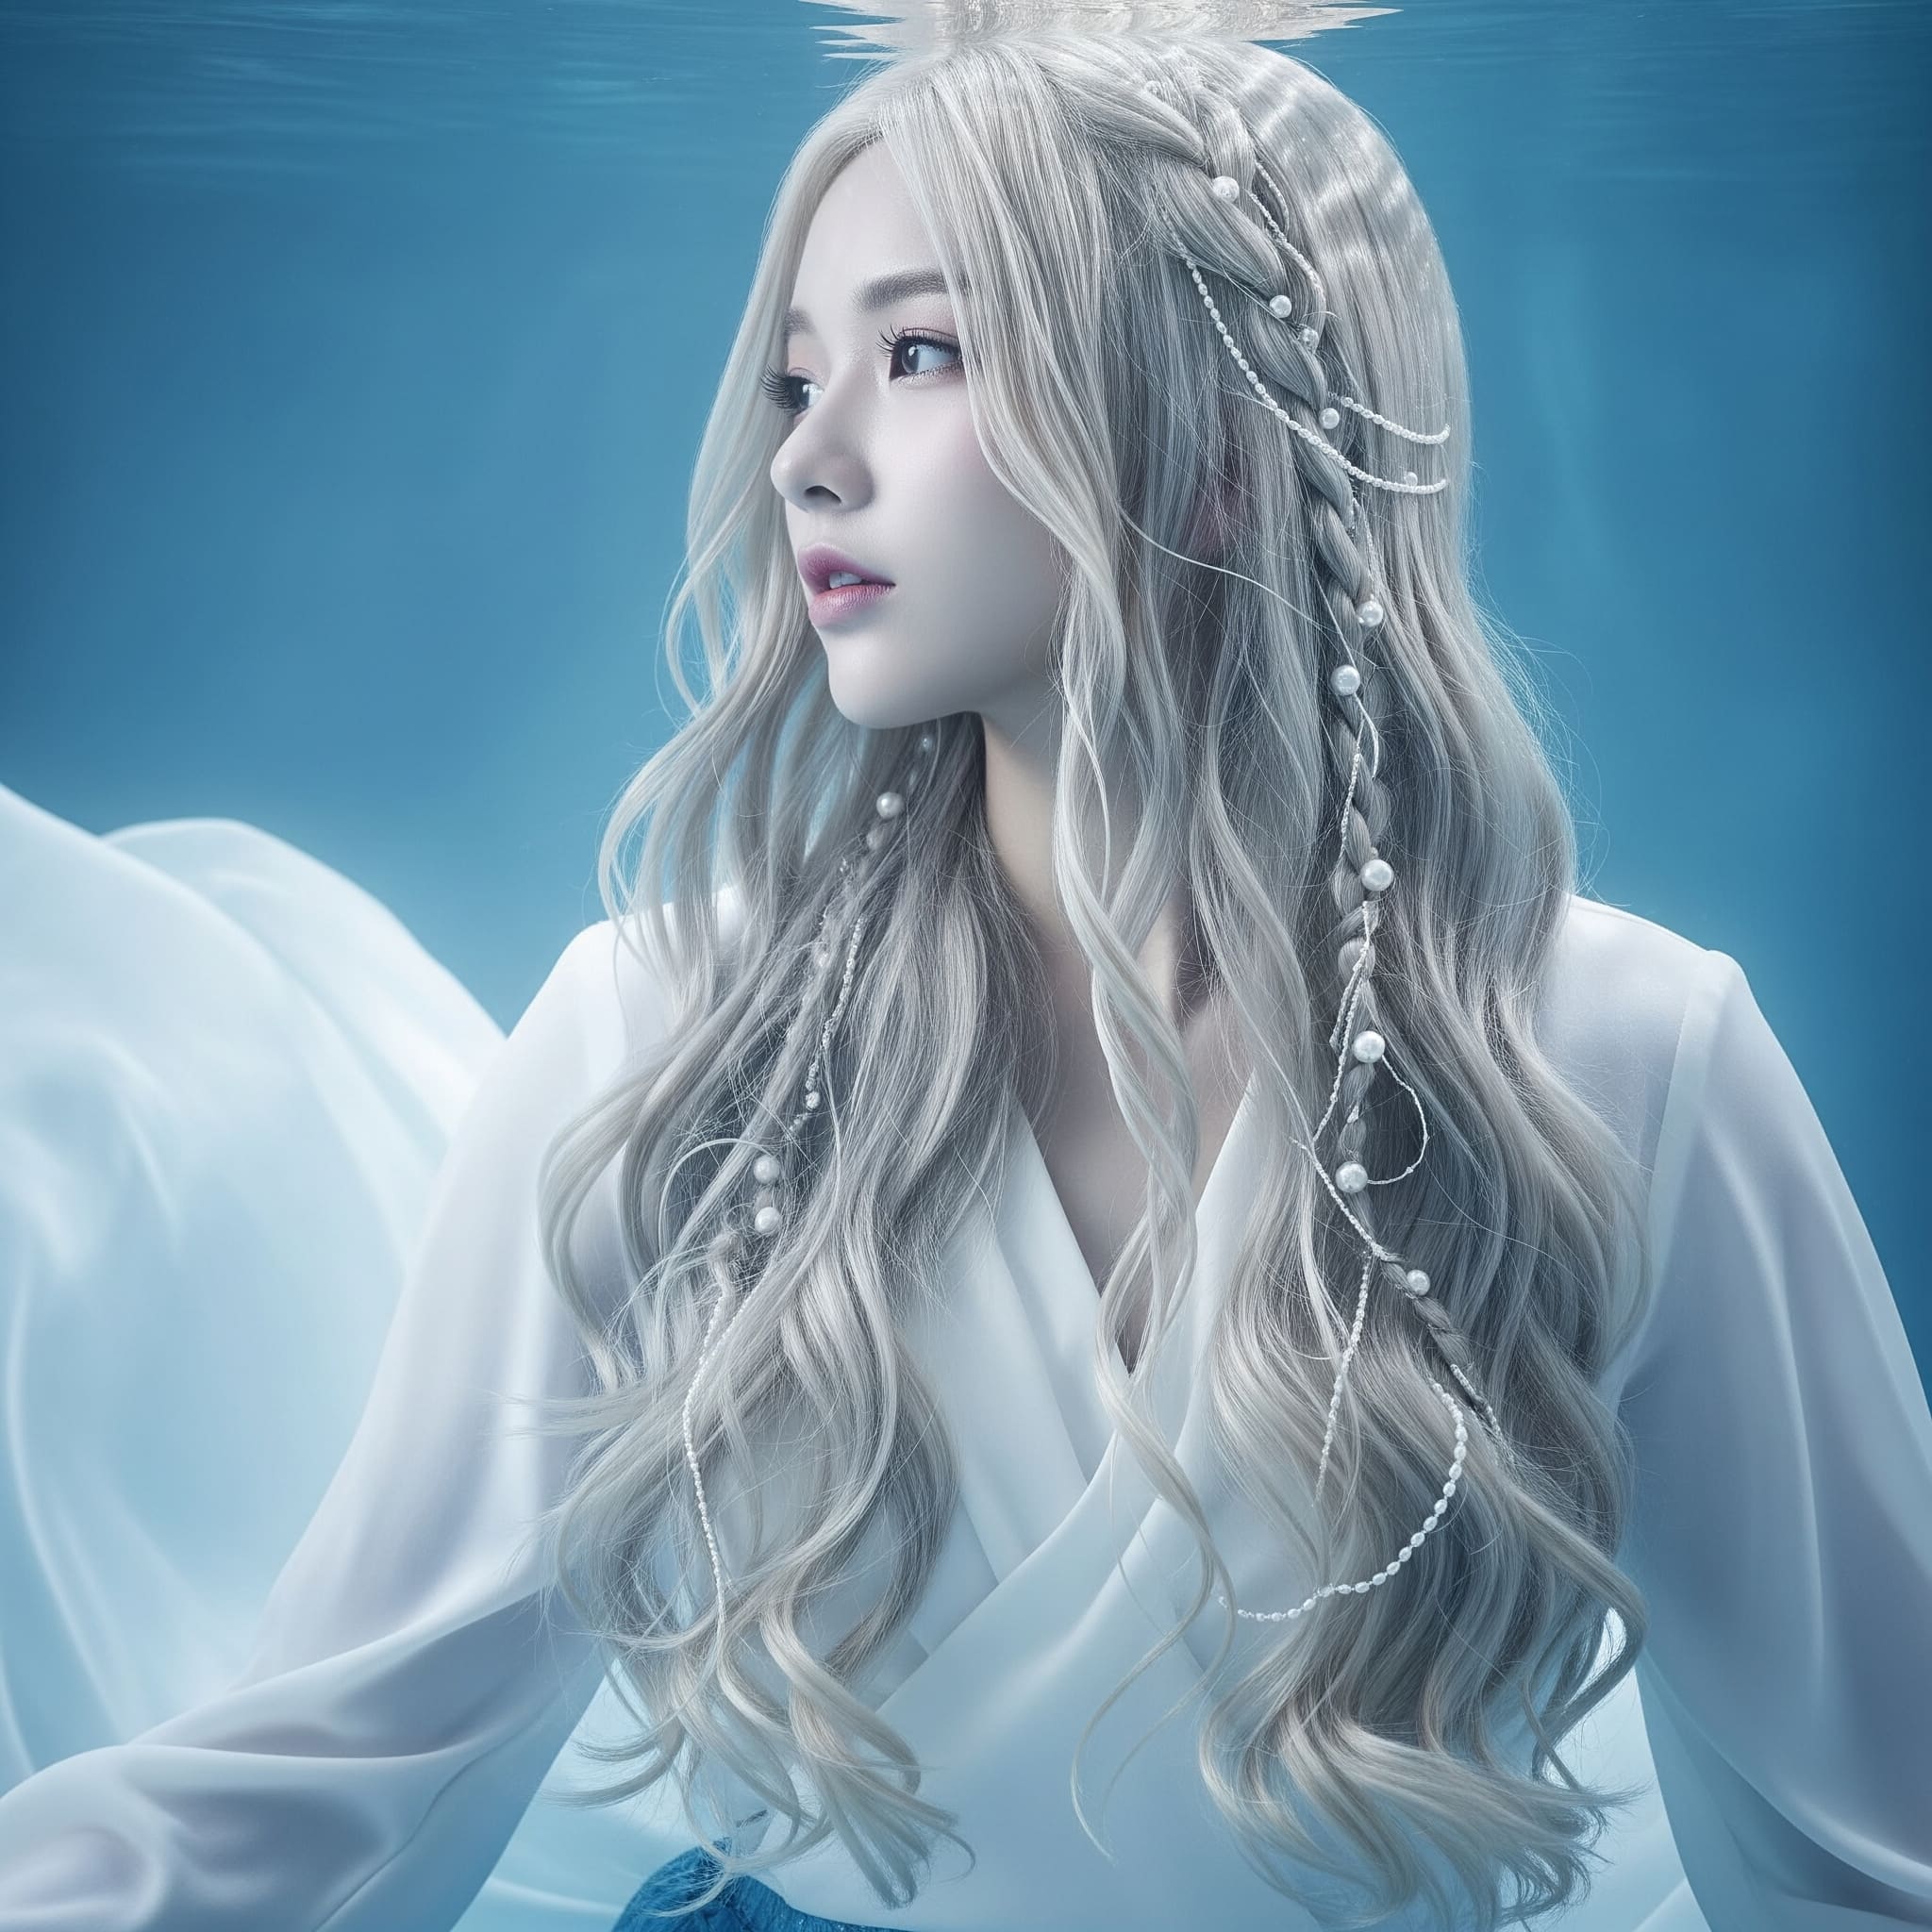
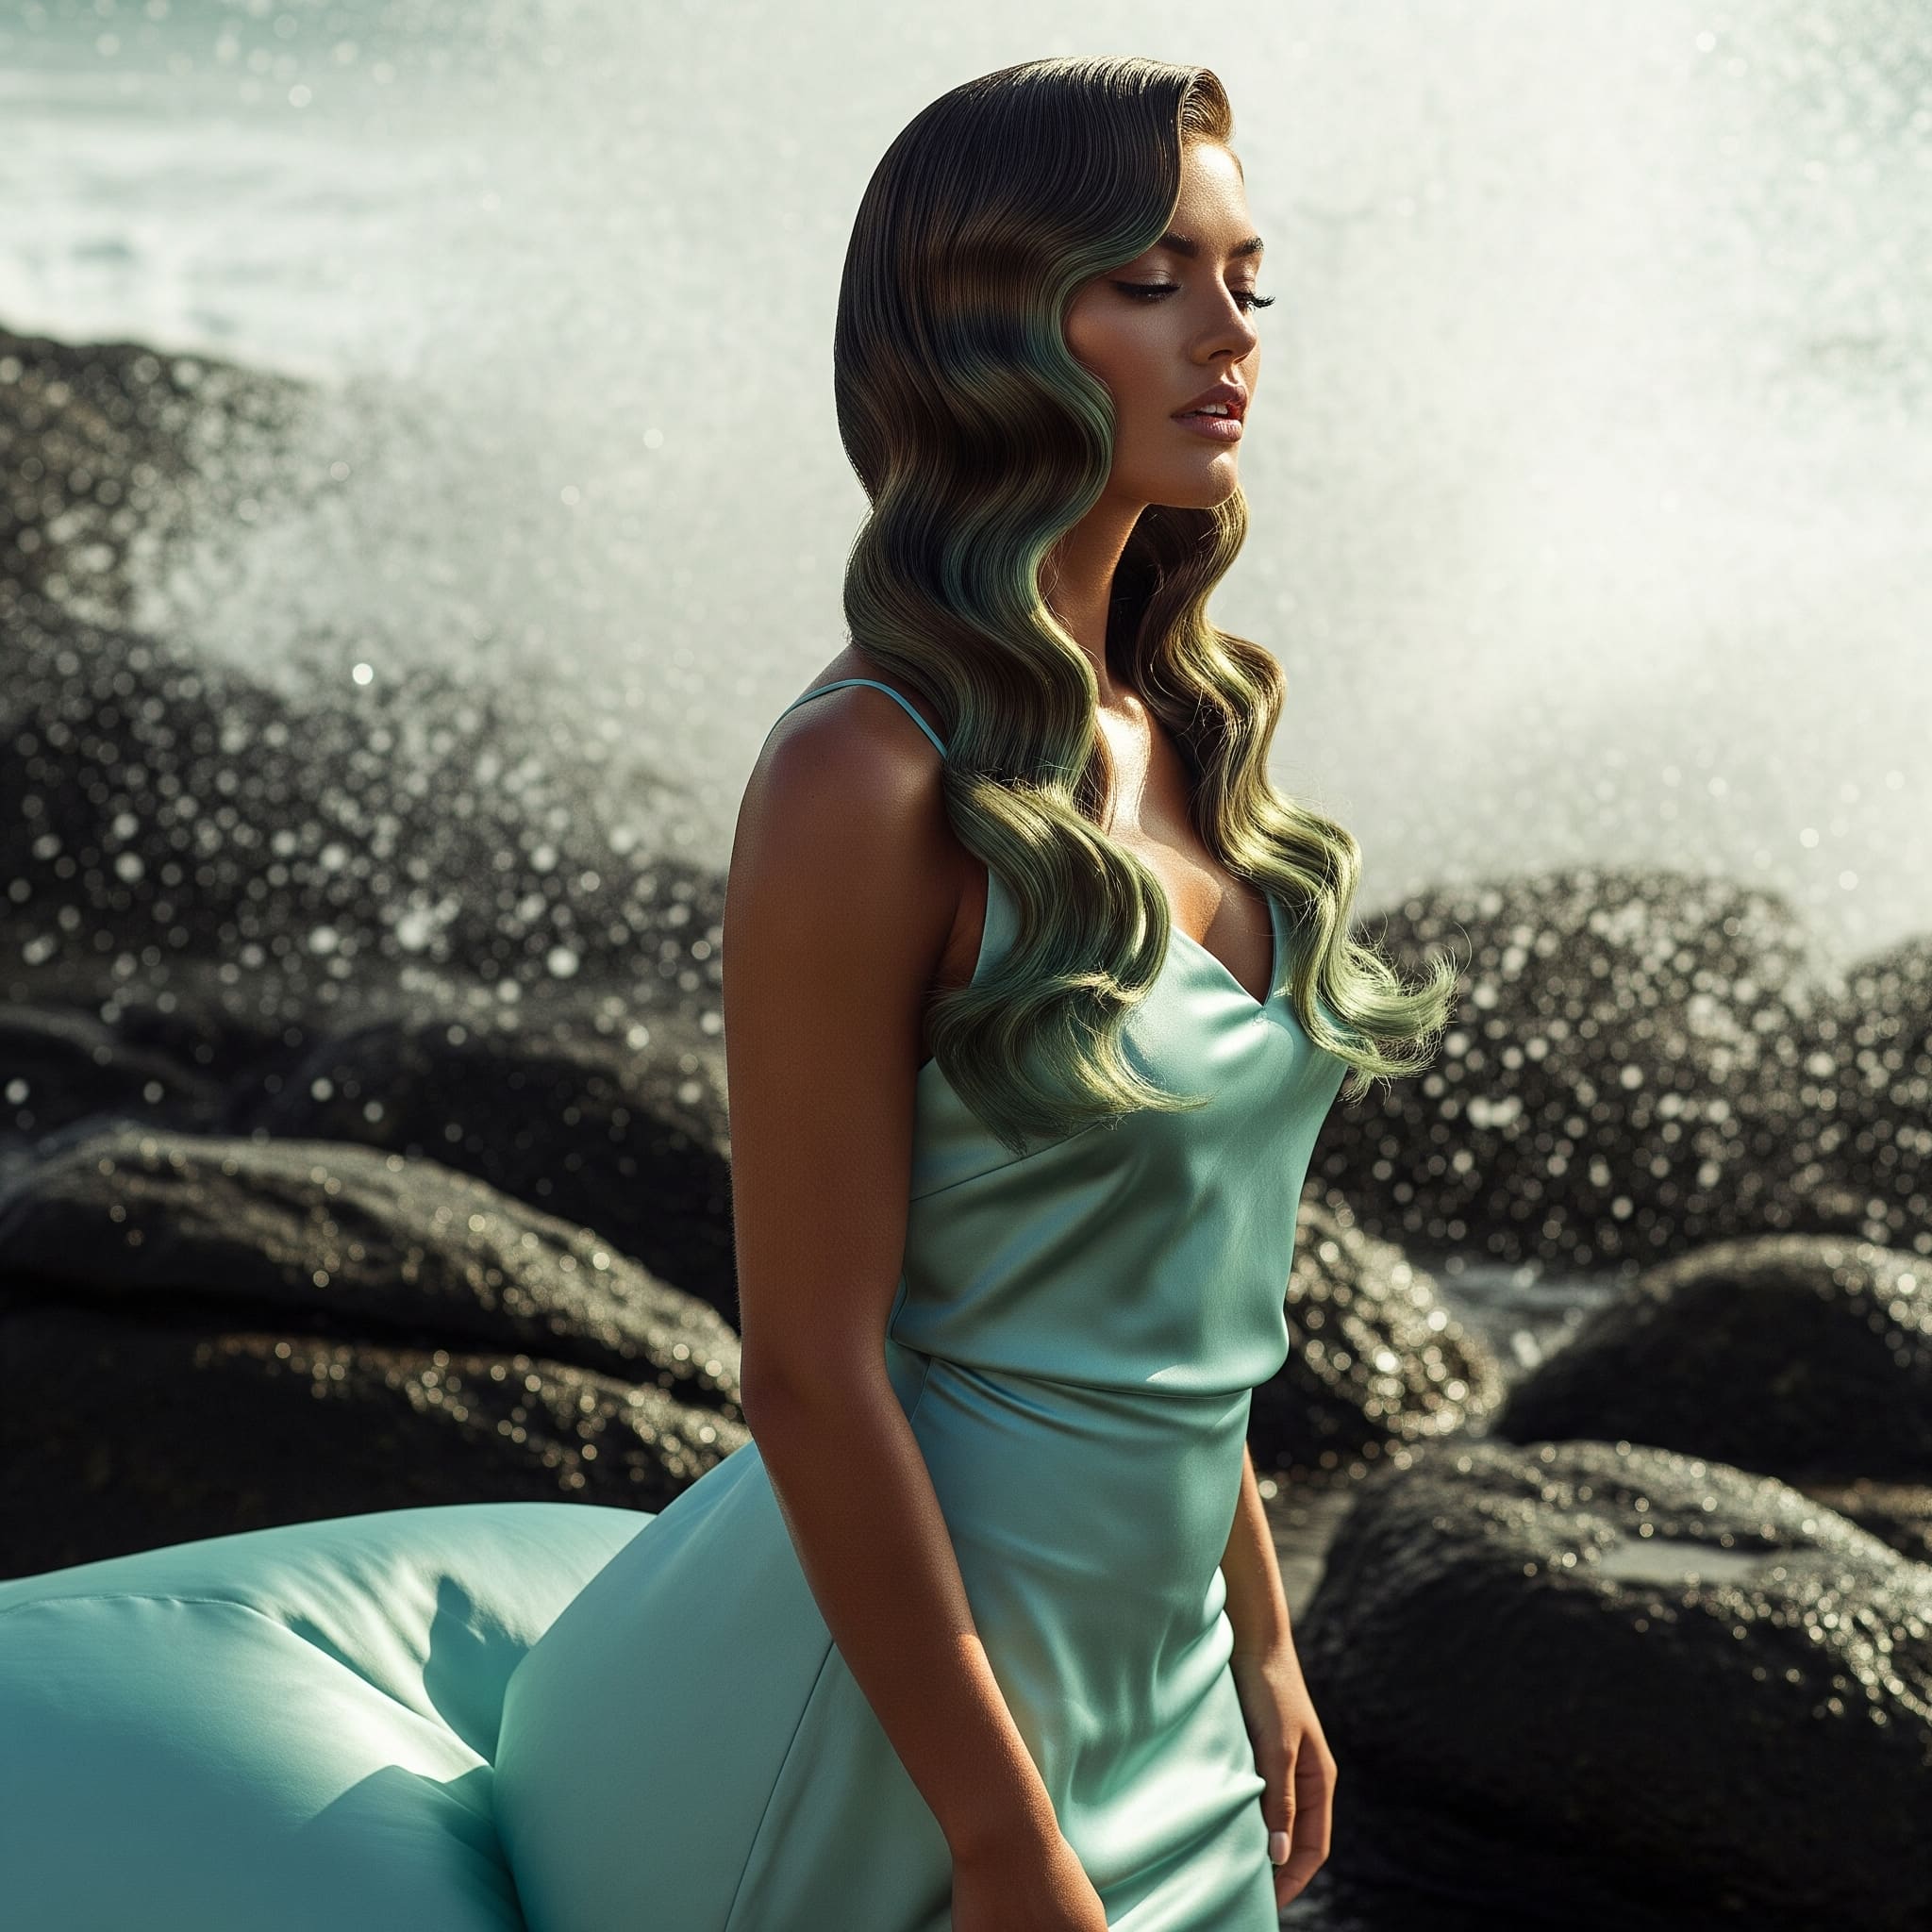
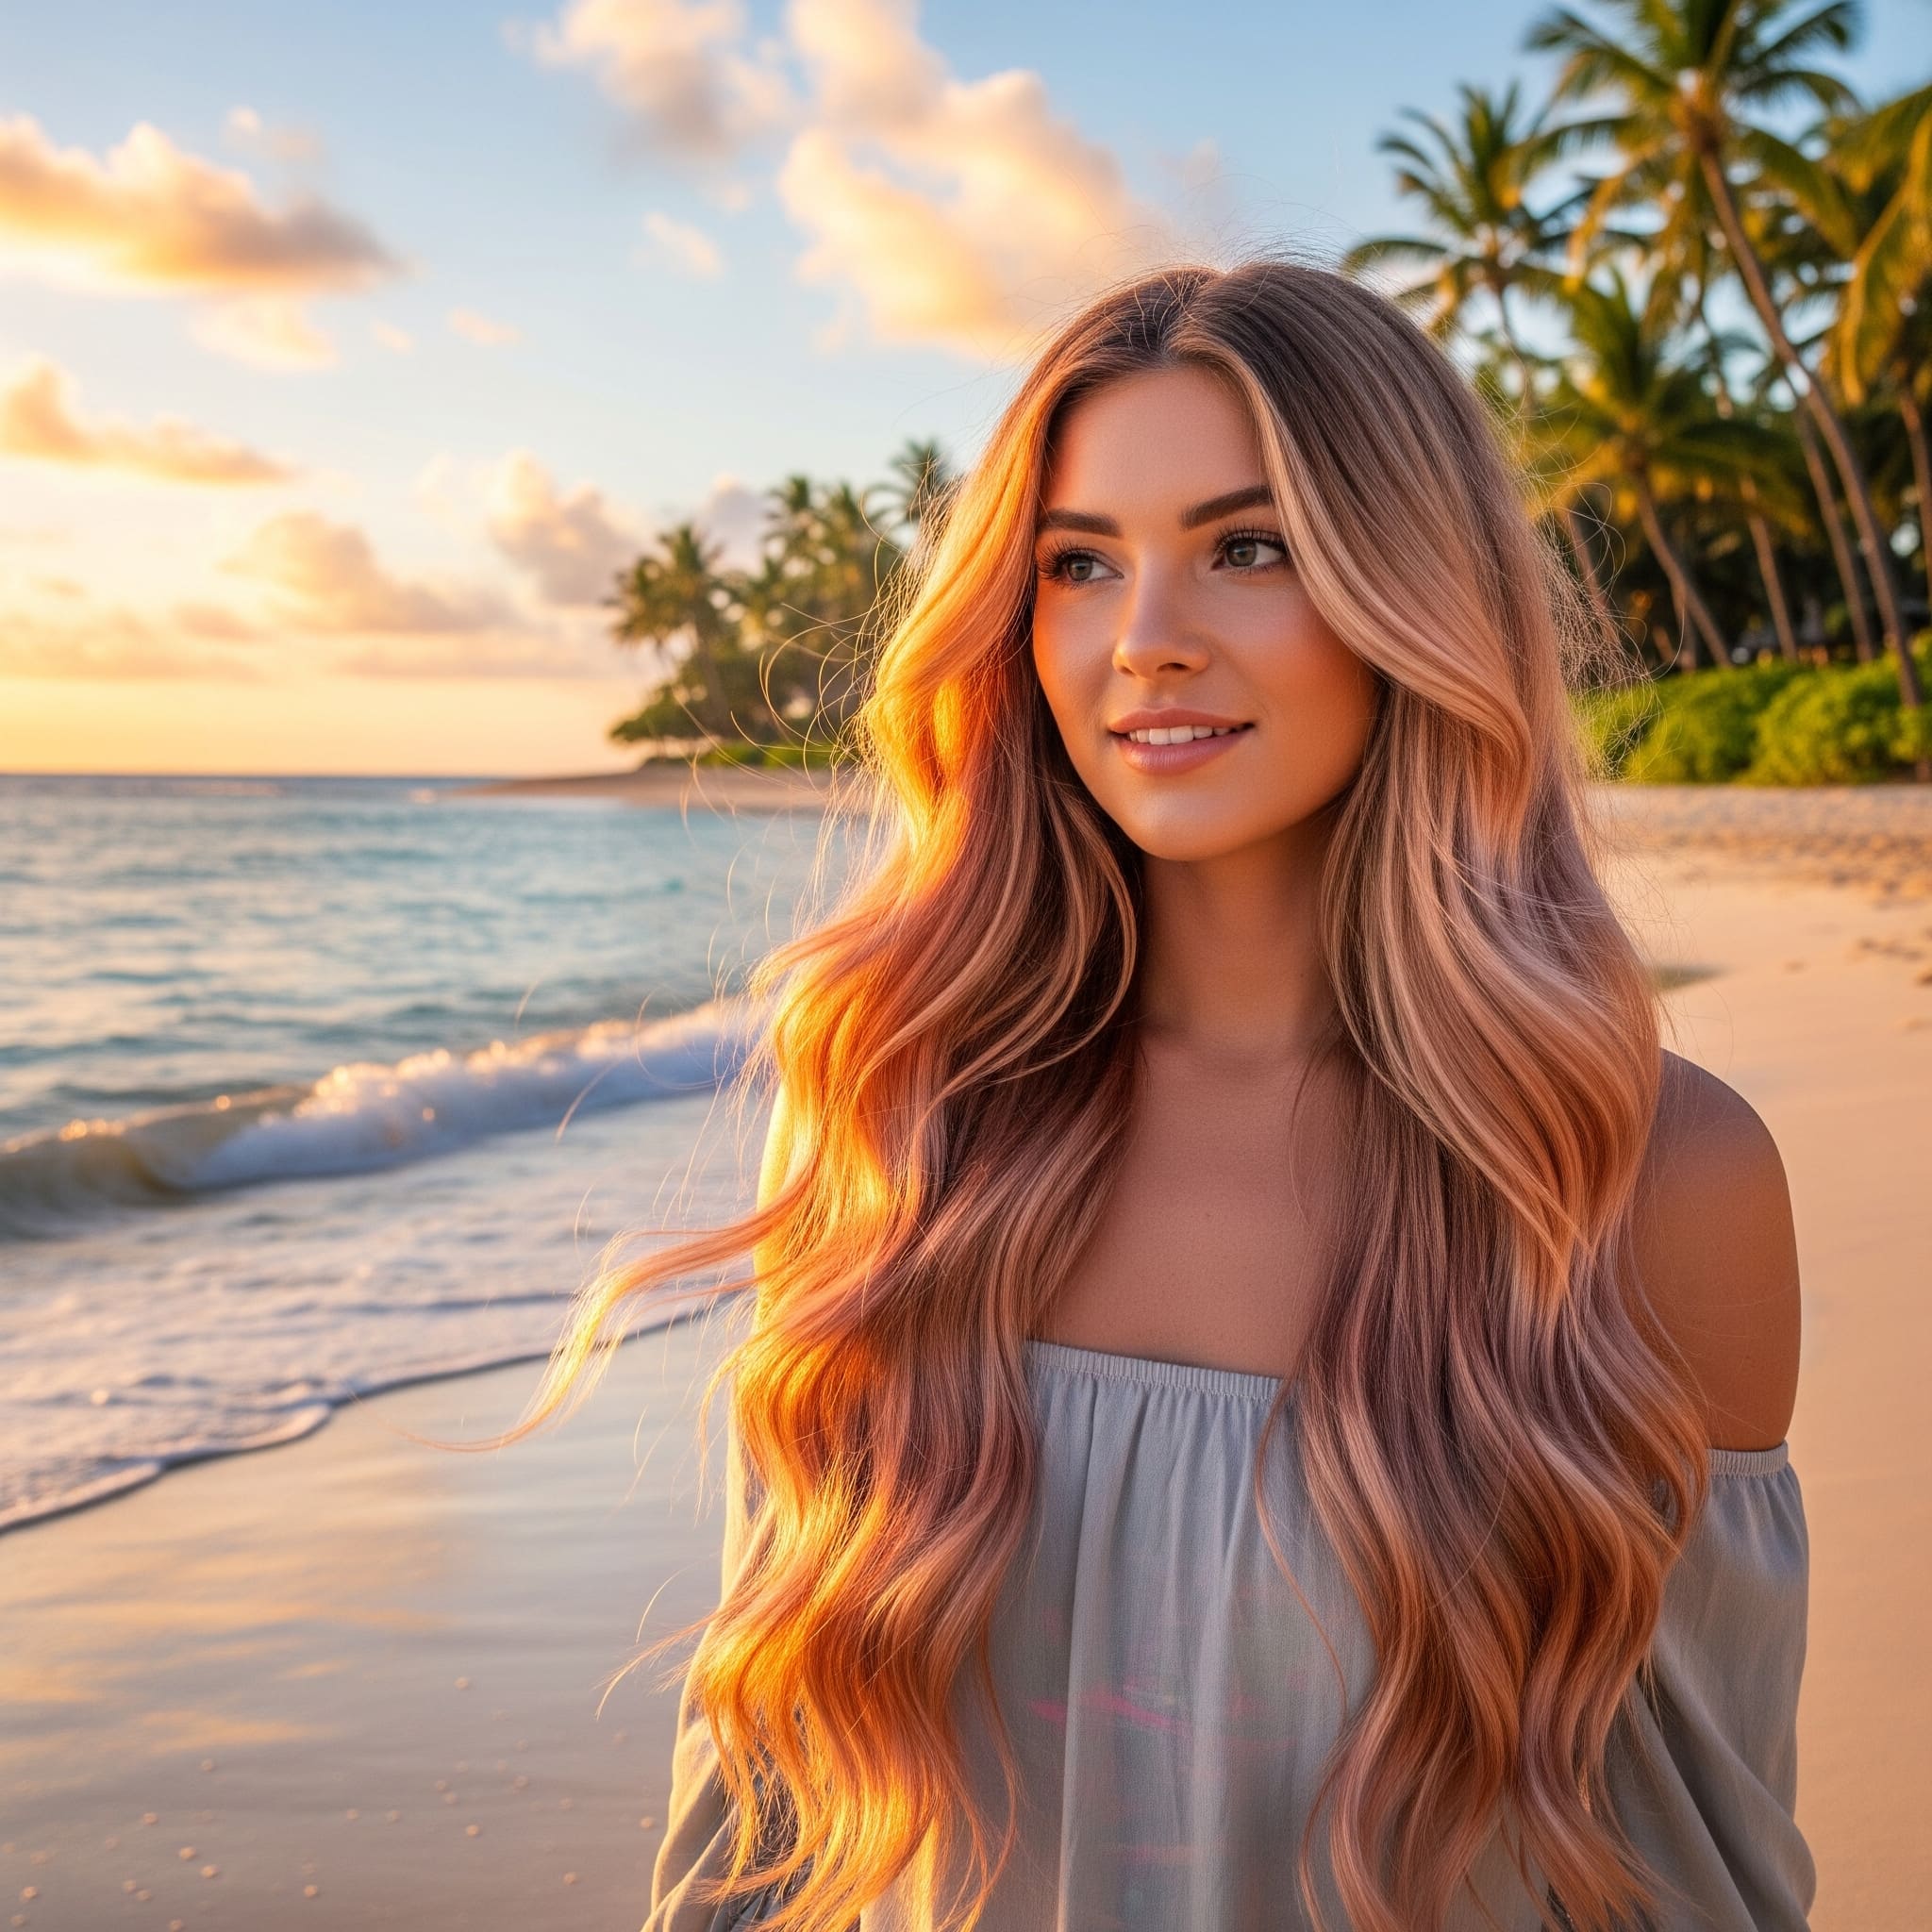
Mermaid waves are distinguished from other wavy hairstyles by their specific characteristics that evoke the mythical beauty of underwater sirens. These waves are notably longer and more stretched out than typical beach waves, creating an elongated S-pattern that flows seamlessly from roots to tips. The style requires substantial length to achieve its signature look – ideally, hair should reach at least past the shoulders, though the most dramatic effects are achieved with hair that extends to the mid-back or beyond.
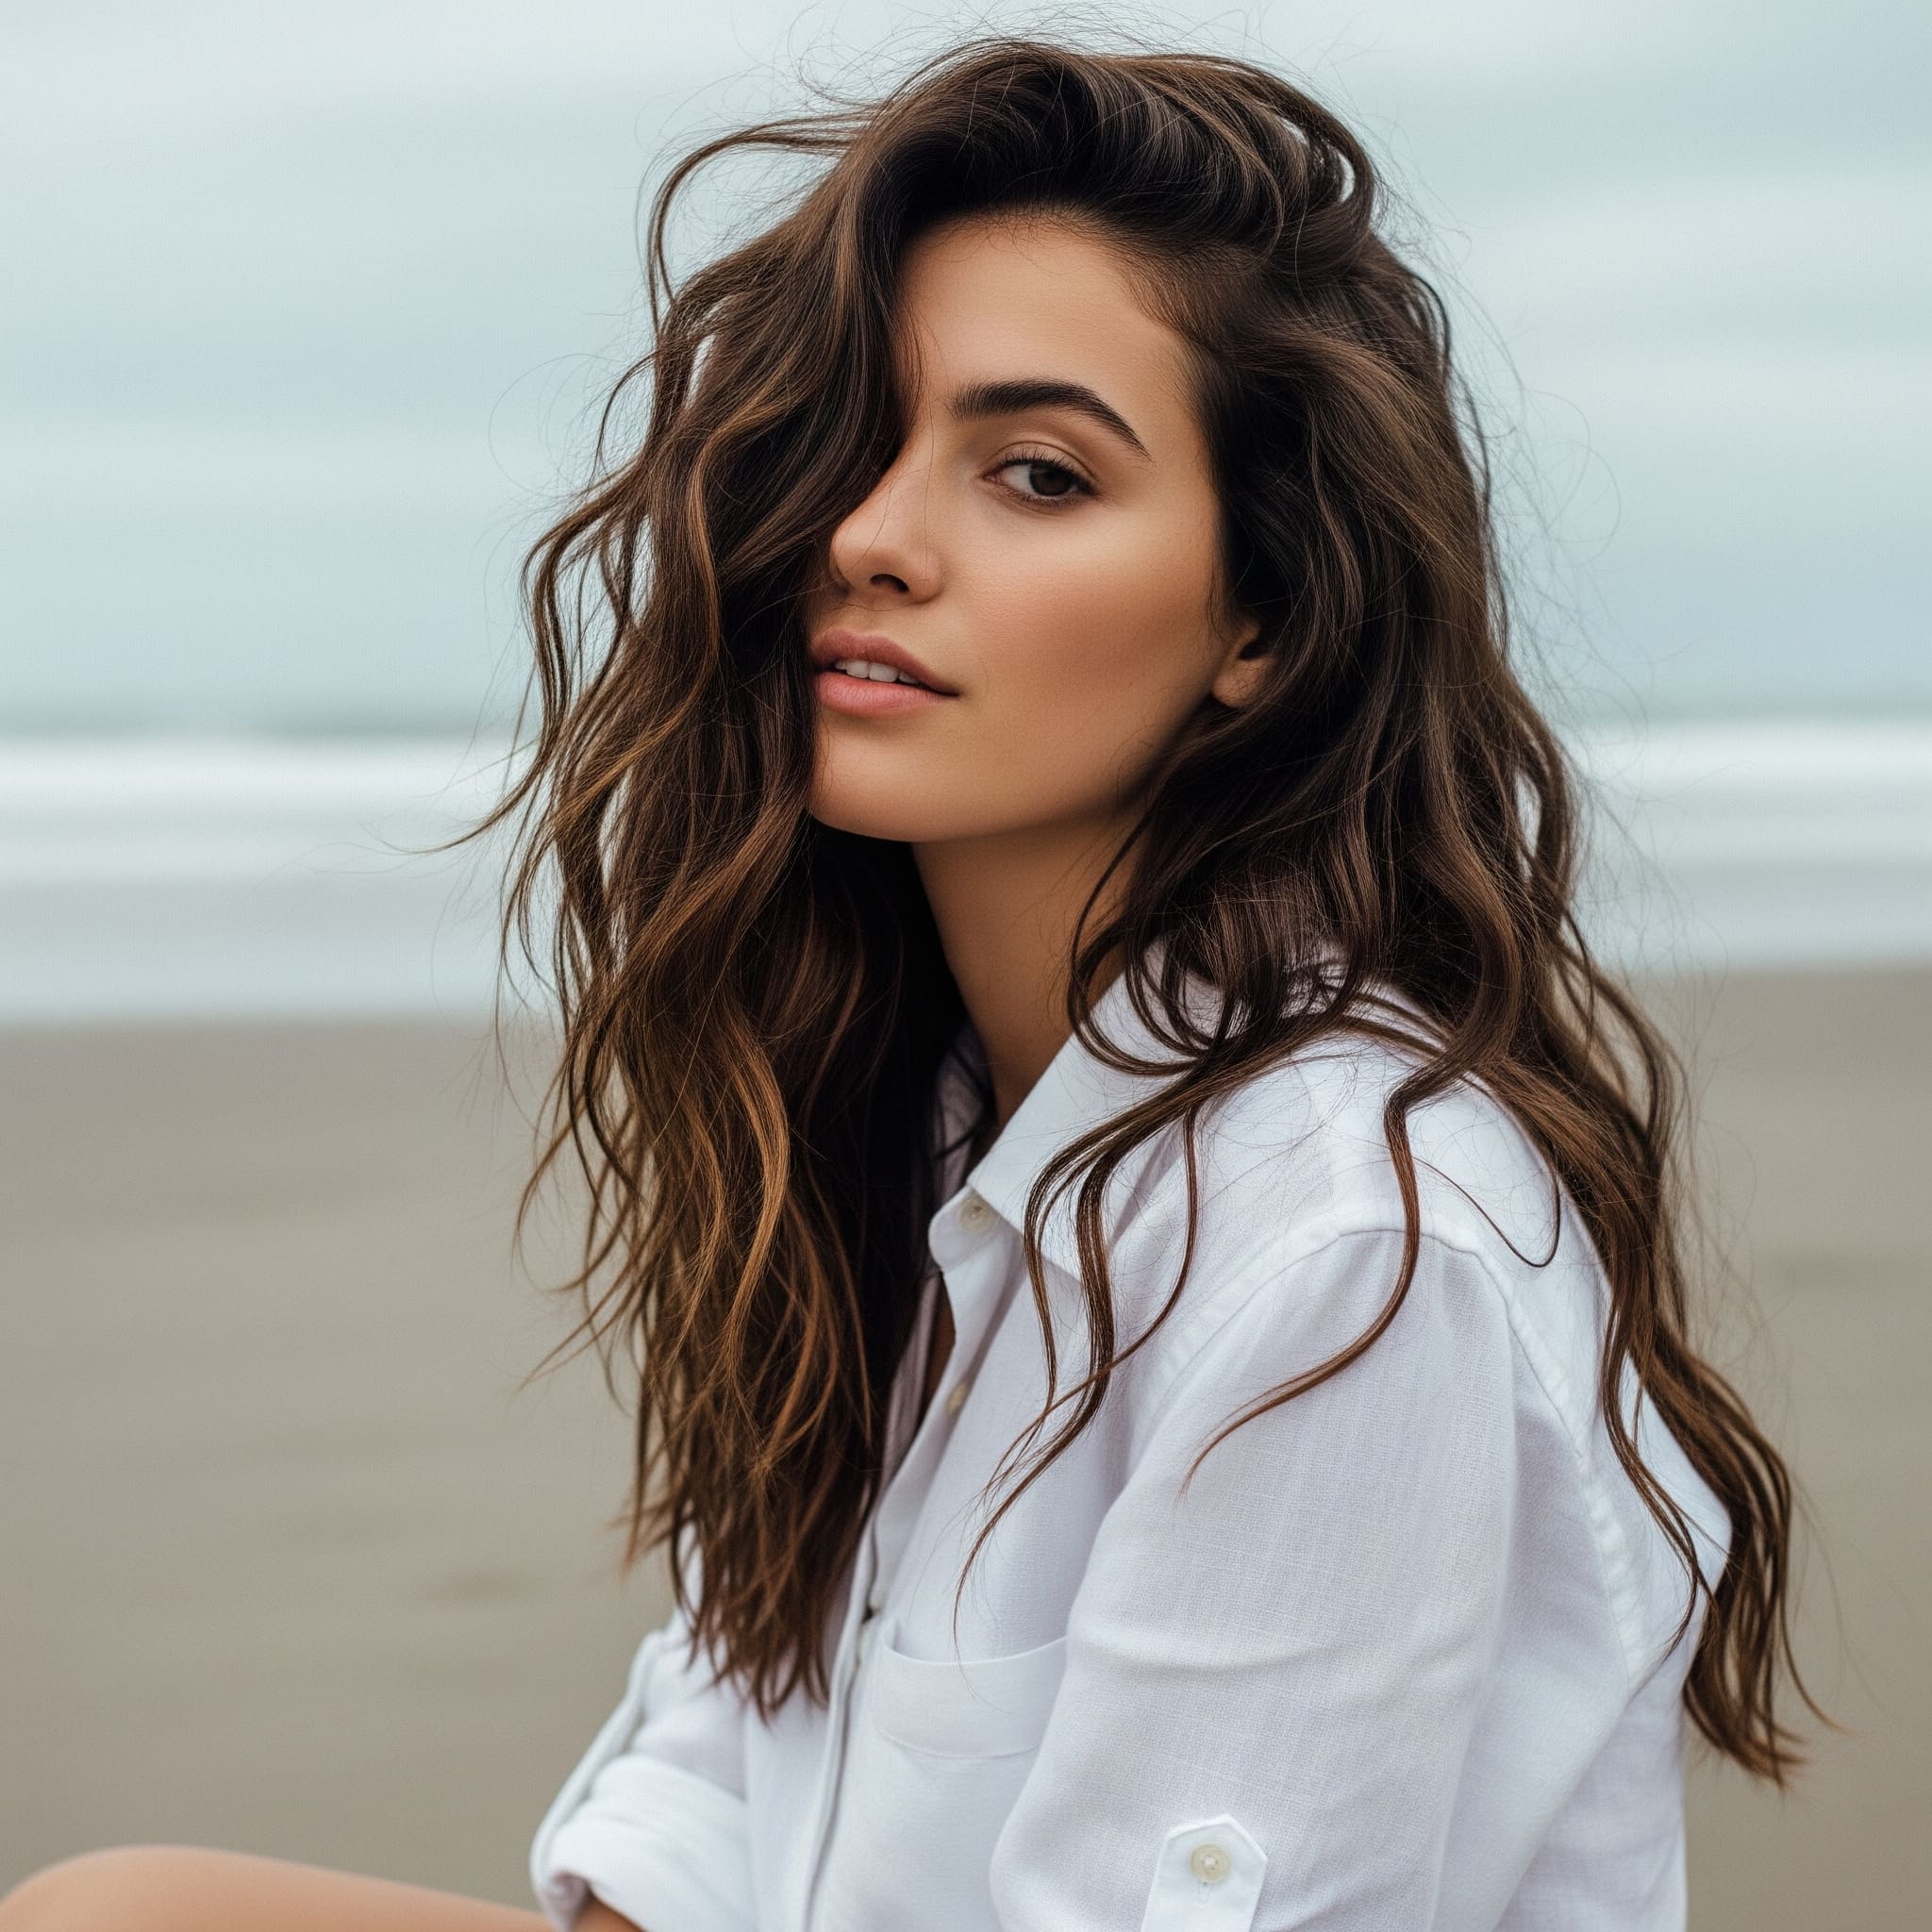
The texture of mermaid waves sets them apart from other curl patterns. Unlike the tighter, more defined spirals of traditional curls or the subtle bends of loose waves, mermaid waves feature a distinctive undulating pattern that mimics the movement of water. Each wave flows into the next, creating a continuous ribbon-like effect that appears both effortless and meticulously crafted. The waves typically begin a few inches from the scalp, allowing for smooth roots that gradually transition into increasingly defined waves toward the ends.
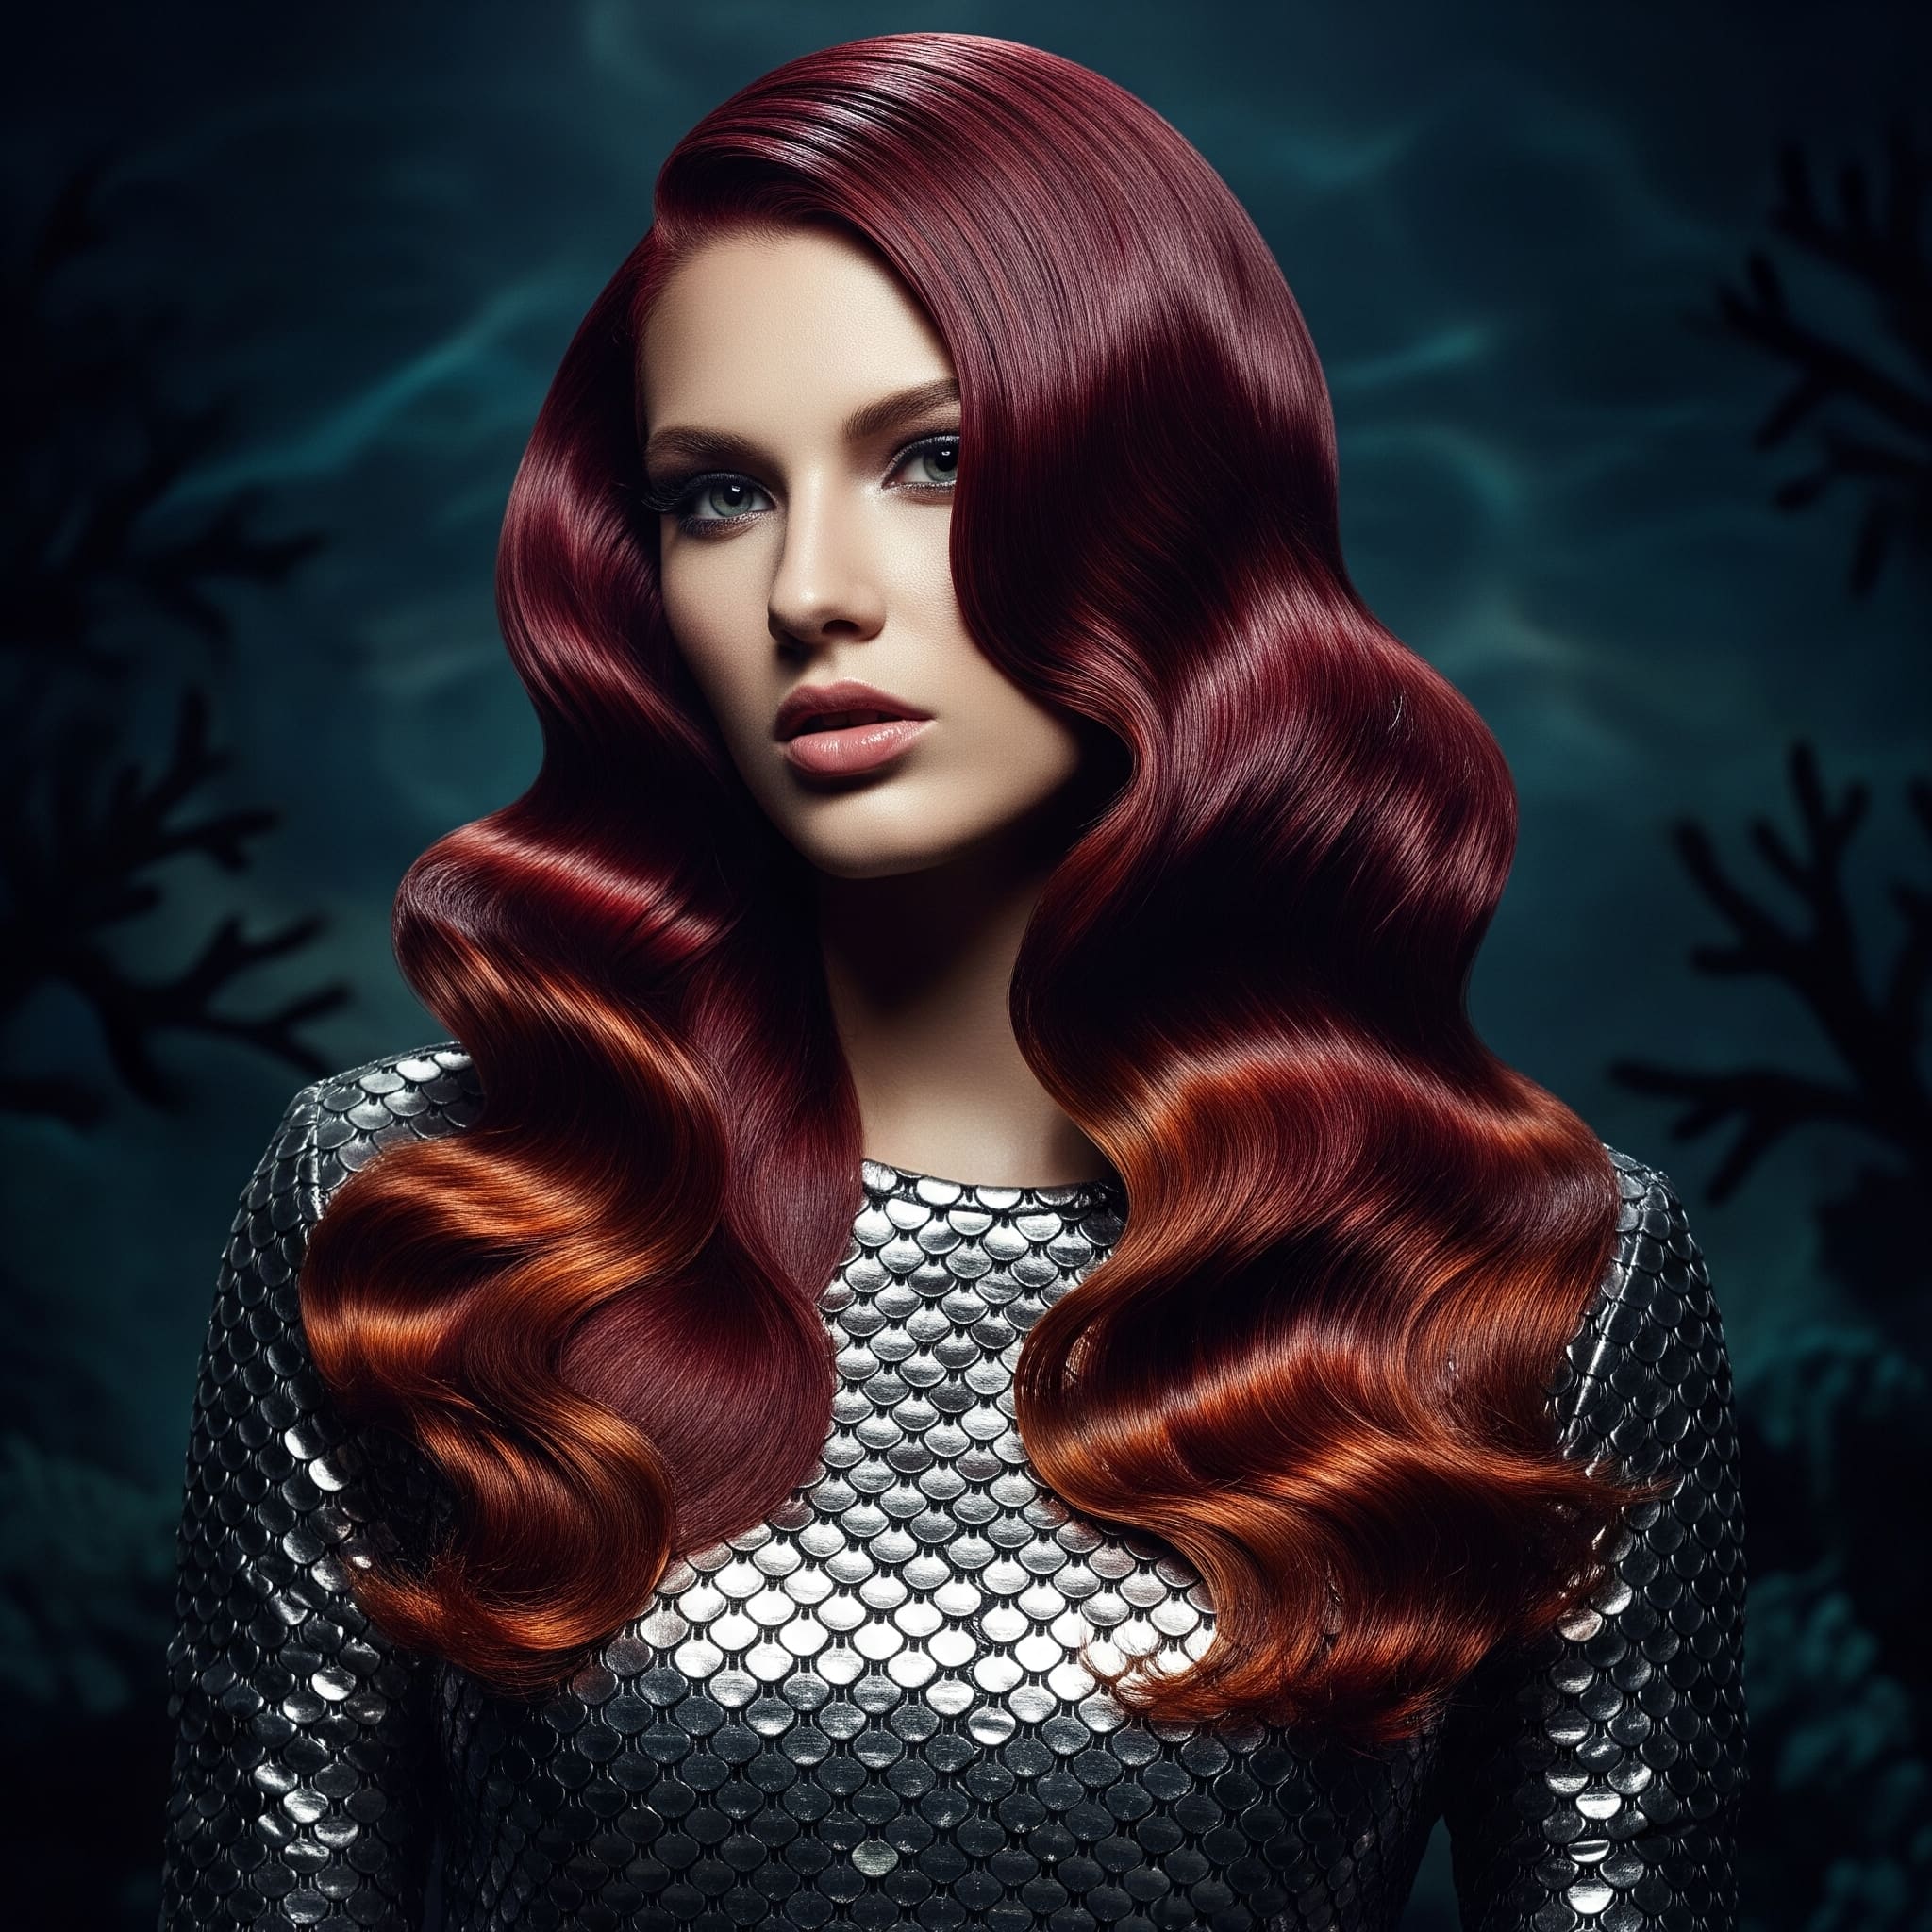
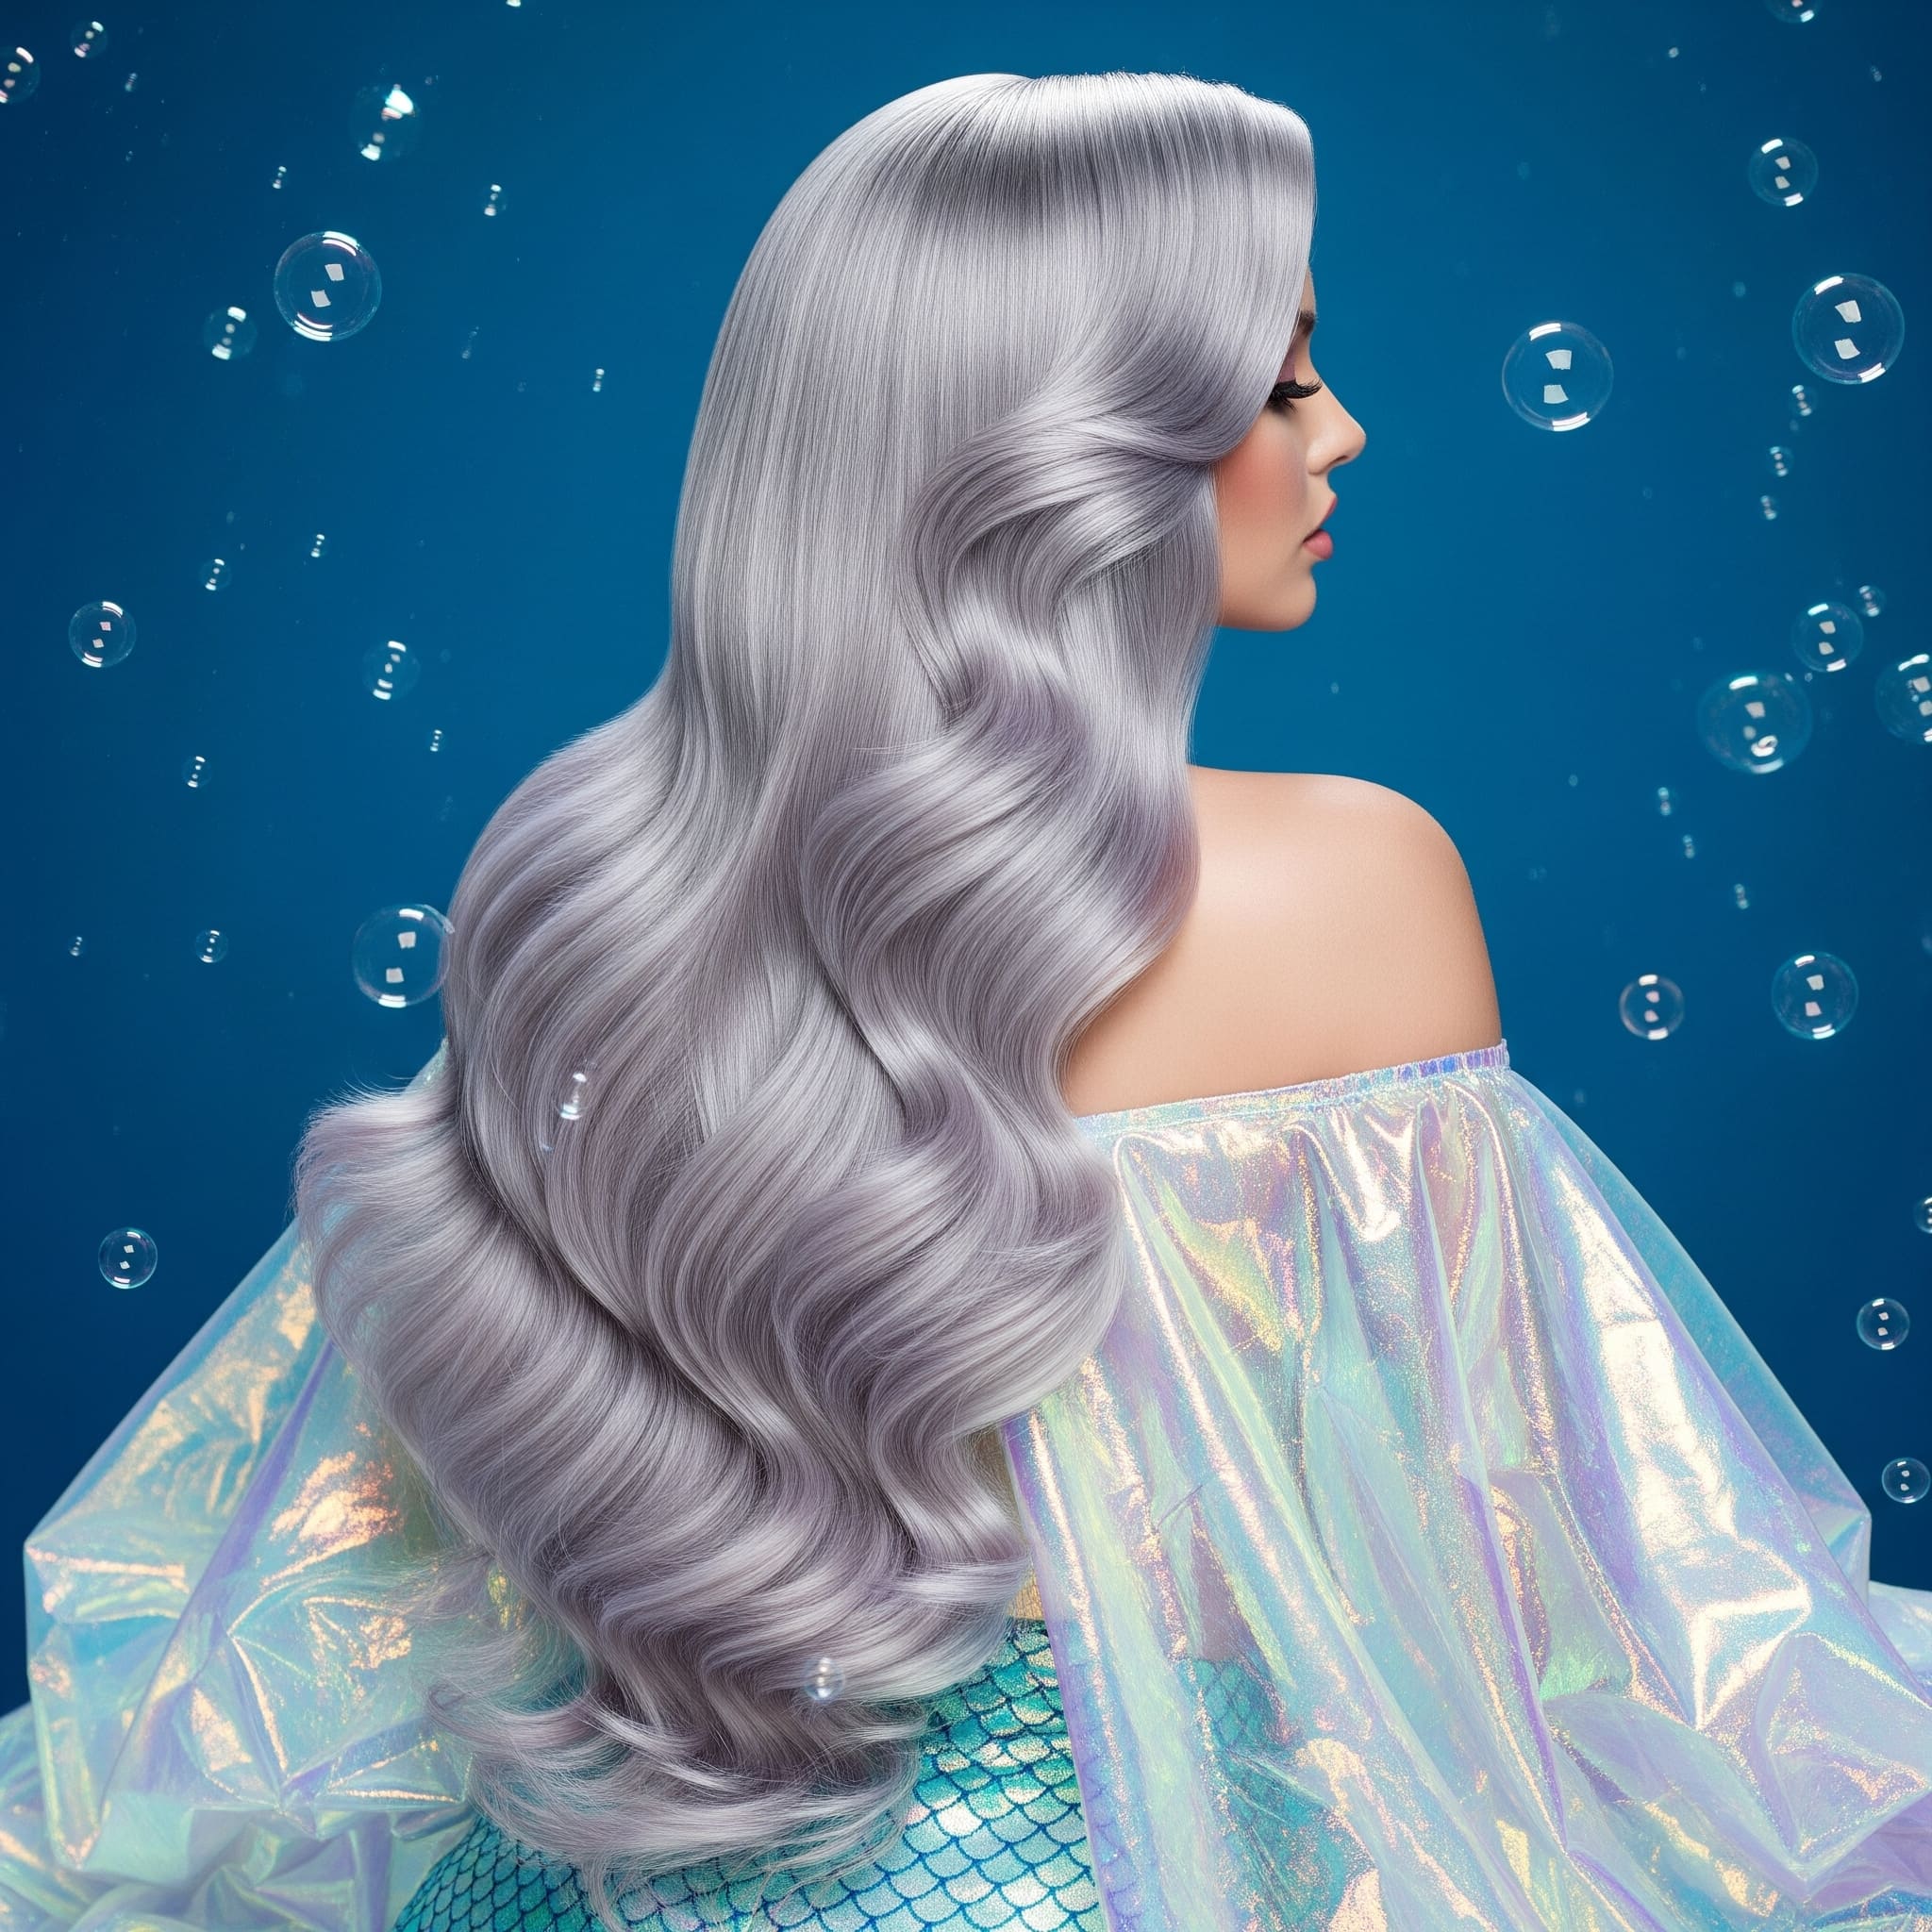
What truly makes mermaid waves magical is their multidimensional appearance. The style often incorporates a glossy, almost wet-look finish that catches and reflects light, creating the illusion of liquid silk. This luminous quality is essential to the mermaid wave aesthetic, distinguishing it from matte or textured wave styles. The waves should appear healthy, hydrated, and full of movement, as if you've just emerged from a crystal-clear lagoon with naturally perfect hair.
The Evolution of Mermaid Waves: From Fantasy to Fashion Phenomenon
The mermaid waves trend has deep roots in both pop culture and fashion history. The style gained significant momentum in the early 2010s, coinciding with a broader cultural fascination with mermaid mythology in media and entertainment. Television shows and movies featuring mermaid characters showcased long, flowing hair that moved with otherworldly grace, inspiring viewers to recreate these fantastical looks in real life.
Social media platforms, particularly Instagram and Pinterest, transformed mermaid waves from a niche interest into a global phenomenon. Beauty influencers and hairstylists began sharing tutorials and transformations, often incorporating unconventional hair colors like ocean blues, seafoam greens, and iridescent purples to enhance the aquatic theme. The hashtag #mermaidhair has generated millions of posts, creating a community of enthusiasts who share tips, techniques, and inspiration for achieving the perfect mermaid wave.
Professional hairstylists have elevated mermaid waves from a whimsical trend to a sophisticated styling option suitable for formal events. Celebrities have embraced the look on red carpets, with stars like Blake Lively, Zendaya, and Margot Robbie showcasing variations of mermaid waves that prove the style's versatility. High-fashion editorials have featured mermaid waves in both natural and fantasy-inspired iterations, cementing the style's place in contemporary beauty culture.
Essential Tools and Products for Creating Professional Mermaid Waves
Achieving salon-quality mermaid waves requires a carefully curated selection of tools and products designed to create and maintain the style's signature flow and shine. The foundation of any successful mermaid wave begins with a high-quality curling iron or wand. For optimal results, choose a barrel size between 1.5 and 2 inches in diameter – larger barrels create the elongated waves characteristic of the mermaid style. Clip-less wands are particularly effective, as they prevent creasing and allow for smoother wave formation.
Heat protection is paramount when creating mermaid waves, as the style requires consistent heat application across long sections of hair. Invest in a professional-grade heat protectant spray that shields hair up to 450°F while adding moisture and shine. Look for formulas containing ingredients like argan oil, keratin, or silk proteins that not only protect but also enhance the hair's natural luster. Apply the protectant generously from mid-length to ends, ensuring complete coverage before any heat styling begins.
The secret to achieving that signature mermaid shine lies in the finishing products. A lightweight hair oil or serum is essential for creating the glossy, wet-look finish that defines mermaid waves. Products containing marine extracts, such as seaweed or algae, not only align with the oceanic theme but also provide minerals and nutrients that enhance hair health and appearance. Sea salt sprays, while typically associated with beachy texture, can be used sparingly to add grip and enhance wave formation without sacrificing smoothness.
For those seeking extra hold and definition, a flexible-hold mousse or wave-enhancing cream applied before styling provides structure without stiffness. These products help the waves maintain their shape throughout the day while allowing for natural movement. A finishing spray with light-reflecting particles adds the final touch, creating that ethereal, underwater shimmer that makes mermaid waves truly magical.
Step-by-Step Tutorial: Creating Perfect Mermaid Waves at Home
Begin your mermaid wave journey with freshly washed hair, using a moisturizing shampoo and conditioner specifically formulated for long hair. The extra hydration is crucial for achieving the smooth, flowing texture that defines mermaid waves. After washing, gently squeeze excess water from your hair and apply a leave-in conditioner from mid-length to ends, followed by your heat protectant spray. This dual layer of protection ensures your hair remains healthy and glossy throughout the styling process.
Blow-dry your hair until it's completely dry, using a paddle brush to maintain smoothness and prevent tangles. For added volume at the roots, flip your head upside down during the final minutes of drying. Once dry, divide your hair into horizontal sections, starting from the bottom. The key to mermaid waves is working with larger sections than you would for traditional curls – approximately 2-3 inch wide sections create the perfect wave size and ensure the flowing, connected appearance characteristic of the style.
Take your curling wand and position it vertically. Starting several inches from your roots, wrap the hair around the barrel, leaving the very ends out for a modern, relaxed finish. The crucial technique for mermaid waves is to hold the iron vertically and wrap the hair flat against the barrel rather than twisting it. This creates a ribbon-like wave rather than a spiral curl. Hold for 8-10 seconds, then carefully release the wave and pull it gently while it's still warm to elongate the pattern.
Continue this process throughout your hair, ensuring all waves flow in the same direction for a cohesive, water-like movement. This unidirectional pattern is what creates the signature mermaid effect – waves that appear to ripple continuously down the length of your hair. Once all sections are complete, allow your hair to cool completely before proceeding to the finishing touches.
The Art of Finishing: Transforming Curls into Flowing Mermaid Waves
The transformation from basic waves to true mermaid waves happens in the finishing process. Once your hair has cooled, use a wide-tooth comb or your fingers to gently brush through the waves, starting from the bottom and working your way up. This technique connects individual waves into one continuous, flowing pattern. Be gentle during this process – aggressive brushing can create frizz and destroy the wave pattern you've carefully created.
Apply a small amount of hair oil or shine serum to your palms and run them lightly over the surface of your waves, focusing on the mid-lengths and ends. This step is crucial for achieving the glossy, wet-look finish that defines mermaid waves. The product should enhance shine without weighing down the hair or making it appear greasy. For an extra touch of mermaid magic, consider using a product with subtle shimmer or iridescent particles that catch the light as your hair moves.
To create additional movement and dimension, gently separate some of the waves with your fingers, creating varying sizes of wave sections. This prevents the style from looking too uniform and adds to the natural, oceanic flow. Pay special attention to the face-framing pieces, ensuring they complement your facial features while maintaining the overall flowing pattern of the style.
The final step involves setting your mermaid waves with a flexible-hold hairspray. Hold the can at least 12 inches from your hair and mist lightly, focusing on areas that tend to lose curl first. For added drama and movement, flip your hair upside down and spray the underside of your waves, then flip back and gently arrange. This technique adds volume and ensures your waves maintain their shape throughout the day.
Maintaining Mermaid Waves: Day-to-Night Care and Preservation
The longevity of your mermaid waves depends significantly on how you care for them after styling. During the day, resist the temptation to constantly touch or play with your hair, as this can disrupt the wave pattern and transfer oils that may weigh down your style. If you need to refresh your waves, a light mist of sea salt spray followed by gentle scrunching can revive their shape and texture without requiring complete restyling.
For overnight preservation, the key is protecting your waves while you sleep. The pineapple method – loosely gathering your hair at the very crown of your head with a silk scrunchie – prevents crushing and maintains wave integrity. Alternatively, loosely braiding your mermaid waves can help preserve the pattern while adding subtle additional texture for the next day. Investing in a silk or satin pillowcase significantly reduces friction and prevents frizz, helping your waves look fresh when you wake up.
When it comes to extending the life of your mermaid waves over multiple days, dry shampoo becomes your best friend. Apply it to your roots before bed on day one to absorb oils overnight and maintain volume. On subsequent days, you can refresh your waves by wrapping small sections around your curling wand for a few seconds, focusing only on pieces that have lost their shape. This targeted approach maintains the overall style without subjecting all of your hair to repeated heat exposure.
Color and Mermaid Waves: Enhancing the Ocean-Inspired Aesthetic
While mermaid waves look stunning in natural hair colors, the style truly comes alive when paired with creative color choices that enhance the aquatic theme. Traditional mermaid-inspired colors include ocean blues, seafoam greens, and purple-pink sunset hues that fade into one another like an underwater rainbow. These fantasy colors emphasize the mythical aspect of mermaid waves and create a bold, artistic statement that's perfect for those who love to express themselves through their hair.
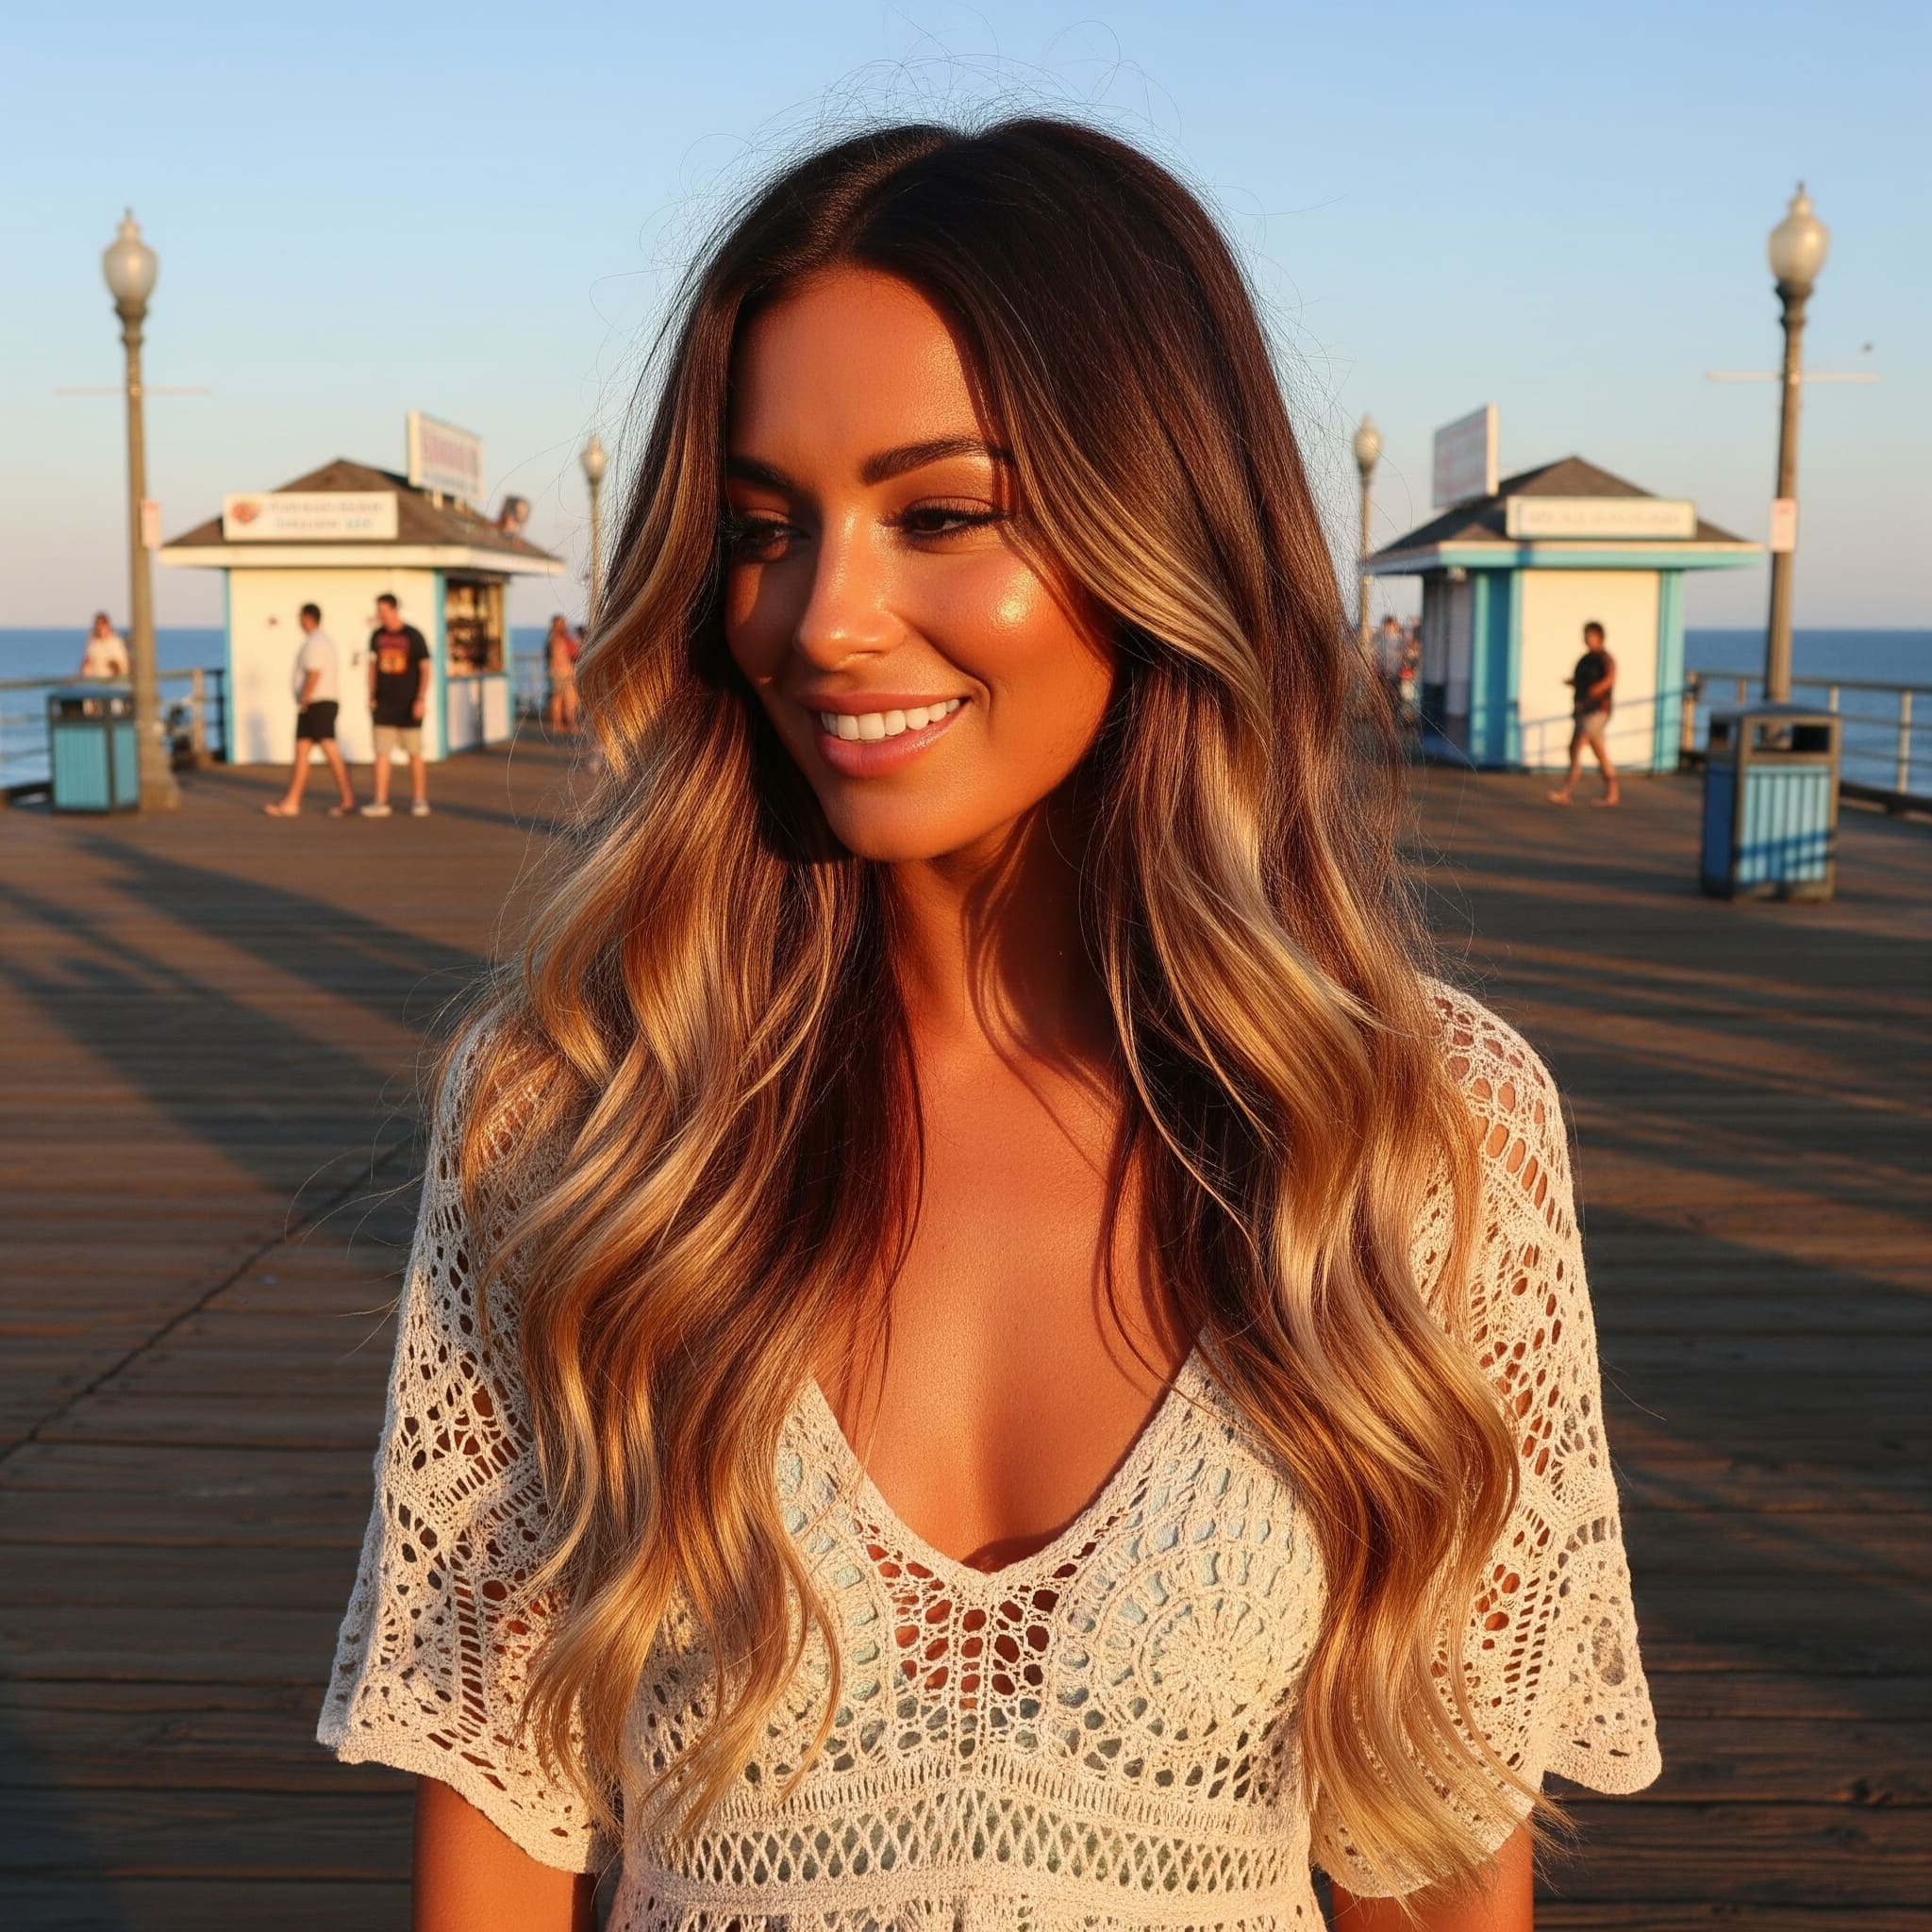
For those preferring a more subtle approach, dimensional color techniques can enhance mermaid waves without venturing into fantasy territory. Balayage and ombre techniques that incorporate multiple tones create depth and movement that accentuates the wave pattern. Consider combinations like dark roots flowing into caramel and honey tones, or rich chocolate bases with subtle burgundy reflects that catch the light as your waves move.
The placement of color is crucial when creating mermaid waves. Strategically placed highlights along the outer curves of your waves create a three-dimensional effect that enhances the S-pattern. This technique, known as wave painting, involves applying color specifically to accentuate the wave formation, resulting in a custom color design that moves beautifully with your styled hair. Whether you choose natural or fantasy colors, this targeted approach ensures your color and style work in perfect harmony.
Adapting Mermaid Waves for Different Hair Types and Textures
While traditionally associated with long, straight-to-wavy hair, mermaid waves can be adapted for various hair types with the right approach. Those with naturally curly hair can achieve mermaid waves by first smoothing their texture with a blow dryer and round brush, then creating waves with a larger barrel iron. This process, while more time-intensive, results in the elongated wave pattern characteristic of the style. Using a smoothing treatment or keratin-infused products can help manage frizz and maintain the sleek finish.
Fine hair presents unique challenges when creating mermaid waves, as the weight of long hair can pull waves flat. Combat this by using volumizing products at the roots and a texturizing spray throughout the lengths before styling. Create waves in smaller sections and use a stronger-hold product to maintain the pattern. Consider adding clip-in extensions for extra length and volume, which can dramatically enhance the mermaid effect while providing more hair to work with.
Thick, coarse hair has the advantage of holding waves well but may require extra effort to achieve the smooth, flowing finish of mermaid waves. Use a smoothing serum before blow-drying and work in very small sections when creating waves to ensure even heat distribution. The weight of thick hair actually works in favor of creating the elongated wave pattern, naturally stretching the waves into the desired mermaid shape. Finish with a gloss spray to enhance shine and tame any flyaways.
Special Occasions and Mermaid Waves: Elevating Your Style
Mermaid waves have become increasingly popular for special events, from beach weddings to formal galas. For bridal styling, mermaid waves offer a romantic, ethereal quality that photographs beautifully and complements various dress styles. Enhance bridal mermaid waves with delicate accessories like pearl pins, crystal headbands, or fresh flowers woven throughout the waves. The flowing nature of the style works particularly well with veils, creating a seamless, fairy-tale aesthetic.
For prom or formal events, mermaid waves can be adapted to suit any dress style or personal preference. Create a more dramatic look by incorporating a deep side part and sweeping waves over one shoulder, showcasing statement earrings and necklines. Add temporary hair tinsel or glitter spray for extra sparkle that catches the light on the dance floor. The versatility of mermaid waves allows them to be dressed up or down depending on the formality of your event.
Red carpet-inspired mermaid waves require extra attention to detail and finishing. Professional stylists often use a combination of techniques, including pin curls at the crown for volume and hand-painted highlights to enhance dimension. For this elevated version, focus on achieving maximum shine and perfect wave uniformity. Consider having your mermaid waves professionally styled for important events to ensure they photograph beautifully and last throughout your celebration.
Troubleshooting Common Mermaid Wave Challenges
Even with careful preparation and technique, creating perfect mermaid waves can present challenges. One common issue is waves that fall flat within hours of styling. This typically results from using products that are too heavy for your hair type or not allowing waves to cool completely before brushing them out. Solution: Use lighter products, ensure your hair is completely dry before styling, and always let waves cool fully in your palm before releasing them.
Frizz and flyaways can disrupt the smooth, flowing appearance essential to mermaid waves. This often occurs in humid conditions or with damaged hair. Combat frizz by using a anti-humidity spray before and after styling, and ensure your hair is well-moisturized with regular deep conditioning treatments. For persistent flyaways, a small amount of hair oil or edge control product applied with a clean mascara wand can smooth problem areas without disturbing the overall wave pattern.
Uneven wave patterns, where some sections are wavier than others, can result from inconsistent sectioning or varying heat exposure. To achieve uniform mermaid waves, maintain consistent section sizes and ensure each piece receives the same amount of heat for the same duration. Use a timer if necessary, and work methodically through your hair. If certain areas of your hair are resistant to curling, you may need to adjust the temperature slightly or use a stronger-hold product in those sections.
Conclusion: Embracing Your Inner Sea Goddess
Mermaid waves represent more than just a hairstyle – they embody a fantasy brought to life, allowing anyone to channel the mythical beauty and grace of oceanic legends. This versatile style has evolved from a whimsical trend to a sophisticated option suitable for any occasion, proving that sometimes our most fantastical inspirations can become everyday reality. With the techniques and knowledge provided in this comprehensive guide, you're equipped to create stunning mermaid waves that capture the essence of flowing water and otherworldly beauty.
The journey to perfect mermaid waves is one of practice and experimentation. Each person's hair responds differently to various techniques and products, making the process of discovery both challenging and rewarding. Remember that the most beautiful mermaid waves are those that work with your natural hair texture and personal style, whether you prefer subtle, natural-looking waves or bold, dramatic cascades that command attention.
As you master the art of mermaid waves, don't be afraid to make the style your own. Experiment with different finishing techniques, play with color if you're feeling adventurous, and adapt the basic method to suit your lifestyle and preferences. The true magic of mermaid waves lies not in achieving perfection, but in creating a style that makes you feel confident, beautiful, and perhaps just a little bit mythical. So dive into the world of mermaid waves, and let your hair flow with the grace and beauty of the sea itself.


