Red-Carpet Ready: How to Achieve Hollywood Glam Waves | The Ultimate Guide
The Allure of Timeless Glamour: An Introduction to Hollywood Waves
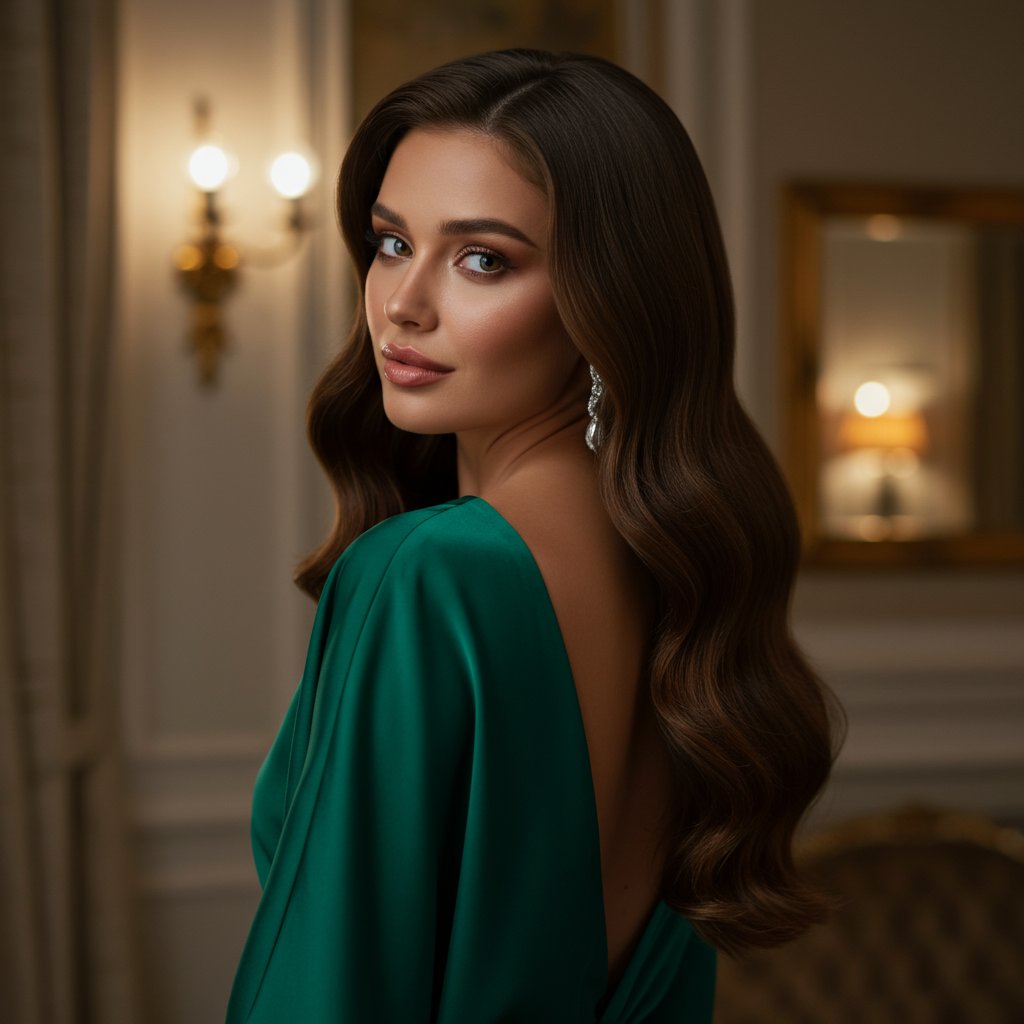
There are hairstyles, and then there are statements. The iconic Hollywood glam wave falls firmly into the latter category. It's a look that whispers of golden-age cinema, red-carpet events, and an unparalleled level of polished sophistication. Unlike fleeting trends, these structured, glossy waves have maintained their status as the pinnacle of elegance for decades. From Veronica Lake to Jessica Chastain, stars have consistently turned to this hairstyle to command attention and exude confidence. But what makes this look so enduringly captivating? It’s the perfect marriage of structure and softness, a cascading, uniform 'S' pattern that flows with liquid-like grace. This comprehensive guide will demystify the process, transforming it from an intimidating salon-only style into an achievable masterpiece. We will break down every essential step, from the foundational prep work to the final, show-stopping brush-out, empowering you to create your own red-carpet ready Hollywood glam waves.
Achieving this look is less about complicated techniques and more about precision, patience, and using the right tools. It's a methodical process where each step builds upon the last to create a cohesive, flawless finish. Forget messy, undone beach waves; this style is their sophisticated older sister, defined by its uniformity, high shine, and deliberate placement. Whether you're preparing for a wedding, a formal gala, or simply want to infuse a dose of extraordinary glamour into your day, mastering the Hollywood wave is a skill that will serve you time and time again. Prepare to dive deep into the specific products, tools, and techniques that separate amateur attempts from professional-quality results. By the end of this guide, you'll have the knowledge and confidence to recreate this timeless hairstyle with stunning success.
The Anatomy of a Perfect Hollywood Wave
Before you pick up a curling iron, it’s crucial to understand what distinguishes true Hollywood glam waves from other curled hairstyles. The defining characteristic is its uniform, sculptural 'S' shape. Unlike spiral curls or tousled beach waves, which often have varied patterns and textures, Hollywood waves are created by brushing out curls that were all set in the same direction. This technique is what encourages the individual curls to merge into one continuous, undulating wave that cascades down the hair. The goal isn't to have separate ringlets, but a single, cohesive wave formation that looks polished and intentional. This structure is what gives the style its vintage, retro feel, harkening back to the meticulously set hair of classic film stars. The waves should line up perfectly, creating distinct ridges and valleys that catch the light beautifully.
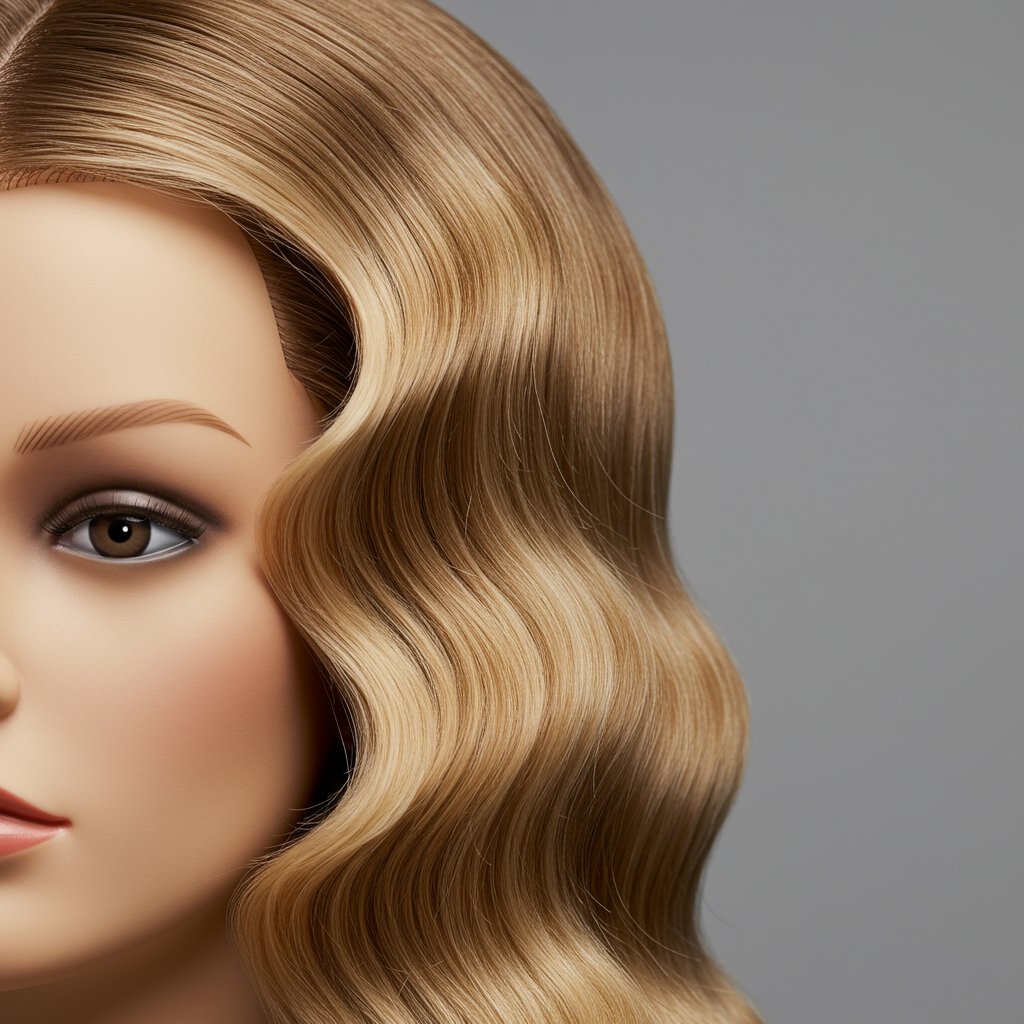
Another key element is the impeccable, high-gloss finish. This isn't a matte or textured look; it's all about shine and health. The surface of the hair should be smooth and reflective, which enhances the dimensionality of the waves. This is achieved not only with finishing products like shine sprays but also through the foundational preparation of the hair and the brushing technique itself. A high-quality boar bristle brush is essential, as it helps to smooth the cuticle of each hair strand while distributing natural oils, resulting in that signature lustrous sheen. The final element is the deep side part, which creates a dramatic, face-framing sweep of hair across the forehead, adding to the overall asymmetry and glamour of the style. Understanding these core components—uniform direction, cohesive structure, and high shine—is the first step toward recreating the look authentically.
The Foundation: Prepping Your Hair for Glamour
Mastering Hollywood glam waves begins long before you plug in your curling iron. The success of this style is built upon a flawless foundation, and that means proper hair preparation is non-negotiable. Start your journey in the shower with a smoothing or volumizing shampoo and conditioner, depending on your hair type. If your hair is prone to frizz, a smoothing formula will help create a sleek canvas. If your hair is fine and struggles to hold a curl, a volumizing duo will provide the necessary grit and body. After washing, gently towel-dry your hair and apply your prep products while it's still damp. This is the most effective time for products to distribute evenly and perform their best.
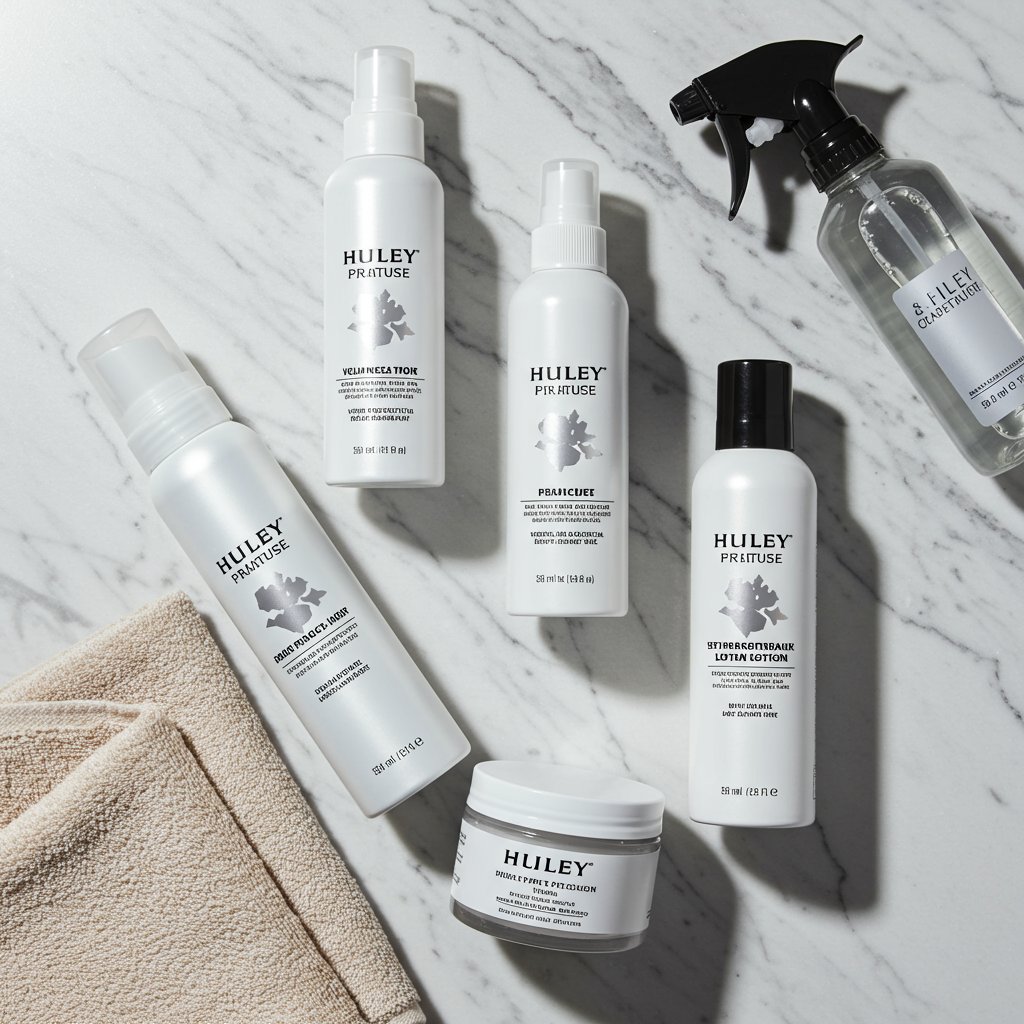
First and foremost, a high-quality heat protectant is essential. You'll be using significant heat, and this step shields your strands from damage, prevents moisture loss, and often helps to lock in the style. Next, work a generous amount of volumizing mousse or a setting lotion through your hair, from roots to ends. This is the secret ingredient for longevity and structure. Mousse provides the 'memory' for the curls to hold their shape long after they've been brushed out. Once your products are applied, it's time to blow-dry. For maximum volume and smoothness, use a round brush, lifting the hair at the roots and directing the airflow down the hair shaft. Ensure your hair is 100% dry before you begin styling. Attempting to curl even slightly damp hair will result in steam damage and a style that won't hold.
The Essential Toolkit: Gathering Your Styling Arsenal
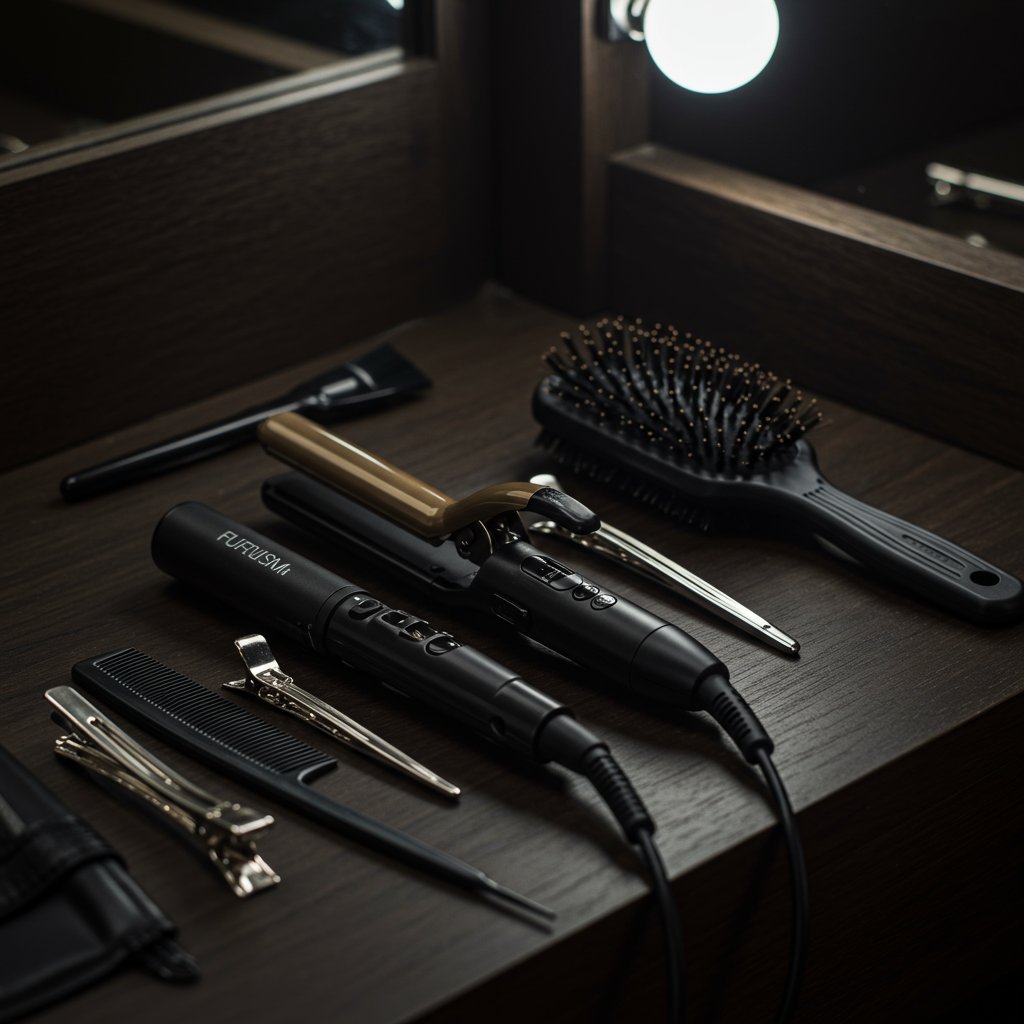
Having the right tools is half the battle when it comes to achieving professional-level Hollywood glam waves. While you don't need a celebrity stylist's entire kit, a few key, high-quality items will make a world of difference in your results. Investing in the right arsenal ensures precision, longevity, and the health of your hair.
Curling Iron or Wand: Size and Material Matter
A 1-inch to 1.5-inch barrel curling iron or wand is the sweet spot for creating classic Hollywood waves. A 1-inch barrel will produce a slightly tighter, more vintage-looking wave, while a 1.25 or 1.5-inch barrel will give you a looser, more modern interpretation. Look for a tool with adjustable heat settings and a ceramic or tourmaline barrel. These materials distribute heat evenly and help to reduce frizz, contributing to that all-important glossy finish. A curling iron with a clamp can offer more control for beginners, while a wand can provide a more seamless curl if you're comfortable with the technique.Sectioning Clips and a Precision Comb
This is a style that demands neatness and control. You cannot achieve the necessary uniformity by randomly grabbing sections of hair. A set of strong duckbill or creaseless clips is vital for sectioning your hair cleanly and keeping un-styled hair out of the way. A rat-tail comb is also indispensable for creating a sharp, deep side part and for portioning out perfectly even sections to curl. Precision in your sectioning is what lays the groundwork for waves that line up flawlessly later on.The Finishing Duo: Boar Bristle Brush and Setting Sprays
The two most important finishing tools are a boar bristle brush and a reliable hairspray. The boar bristle brush is the magic wand in this process. Its natural bristles are gentle on the hair and excel at smoothing the cuticles and blending the individual curls into a cohesive wave pattern without causing frizz. For hold, you'll want both a flexible-hold hairspray for use during styling and a firm-hold finishing spray to lock everything in place at the end. A lightweight shine spray or serum can be the final touch for that red-carpet gleam.The Step-by-Step Styling Process: Creating the Waves
With your hair prepped and your tools at the ready, it's time for the main event. This methodical process requires focus and precision. Move slowly and deliberately for the best results. The key is consistency in every single section.
Step 1: Create a Deep Side Part
Use your rat-tail comb to create a clean, deep side part. The classic Hollywood wave look benefits from the drama of an asymmetrical part. Align the part with the arch of your eyebrow for a flattering, face-framing effect. Once the part is established, comb the hair smoothly on both sides.Step 2: Section Your Hair Meticulously
Starting from the bottom, section your hair into manageable horizontal rows, about 1-2 inches thick. Clip the rest of your hair up and out of the way. Within each row, you will be taking smaller vertical sub-sections to curl, about 1-1.5 inches wide. Clean sections are the foundation of a clean final look.Step 3: The Curling Technique (All in the Same Direction!)
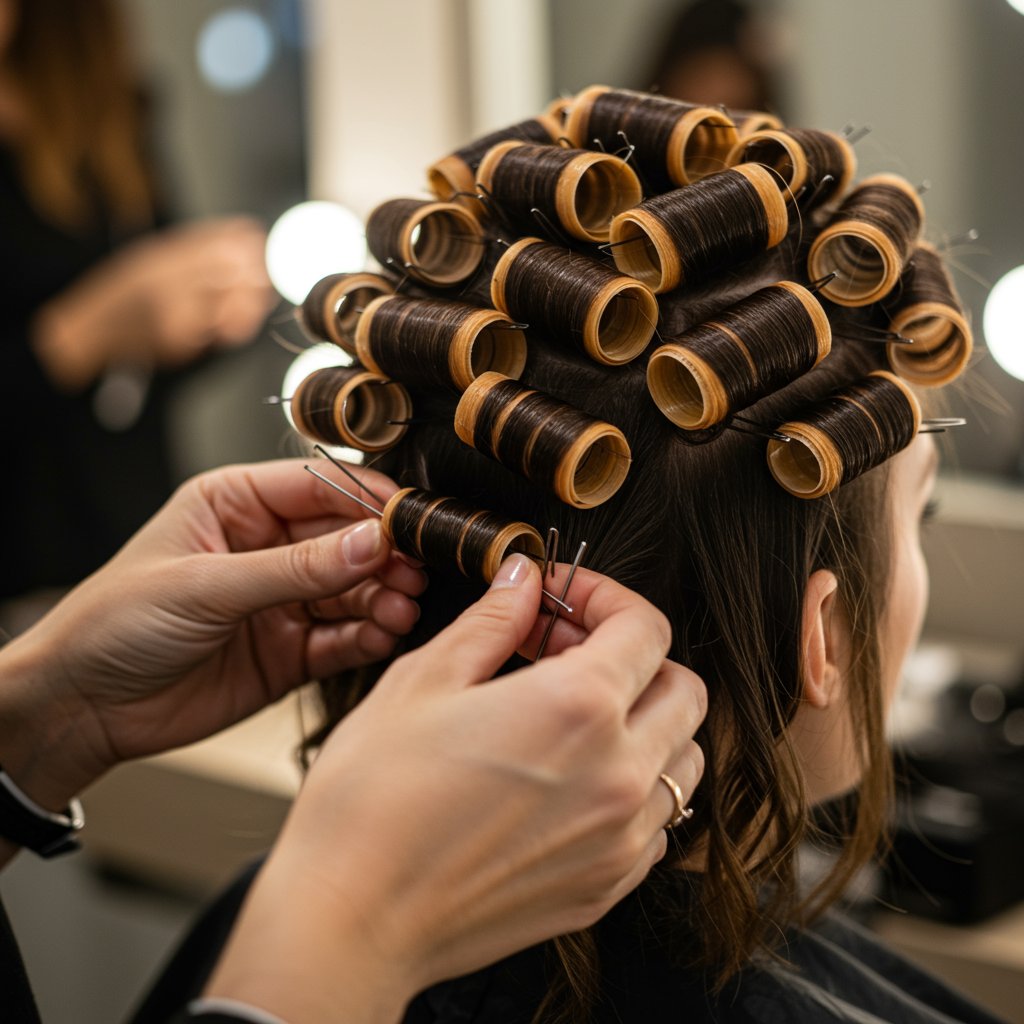
This is the most critical rule of Hollywood waves. Every single piece of hair must be curled in the same direction. Typically, this means curling the hair towards the face on the heavier side of the part, and also towards the face (or under) on the lighter side, so it all flows uniformly. Hold your curling iron vertically. Starting a few inches from the root, wrap the section of hair flat against the barrel. Hold for 10-15 seconds, depending on your hair's thickness and the iron's heat. The key is to keep the hair flat against the barrel, like a ribbon, rather than twisting it.Step 4: Pin and Set the Curls
As you release each curl from the iron, don't let it fall. While it's still hot, carefully catch it and roll it back up into the same shape it had on the barrel. Secure the coiled curl to your scalp using a small pin curl clip or a bobby pin. This step is non-negotiable. Pinning the curls while they are hot and allowing them to cool down completely is what sets the style in place and gives it its incredible longevity. Repeat this process—curl, catch, pin—for your entire head, ensuring every curl is wrapped in the same direction.The Brush-Out: The Magic Moment of Transformation
This is where the true artistry happens and your individual pin curls are transformed into a seamless, glamorous wave. Patience is paramount during the brush-out. Once you've confirmed that every single pinned curl is completely cool to the touch (give it at least 20-30 minutes, or longer if possible), you can begin removing the clips. Your hair will look like a head full of tight, springy ringlets. Don't panic; this is exactly what you want.
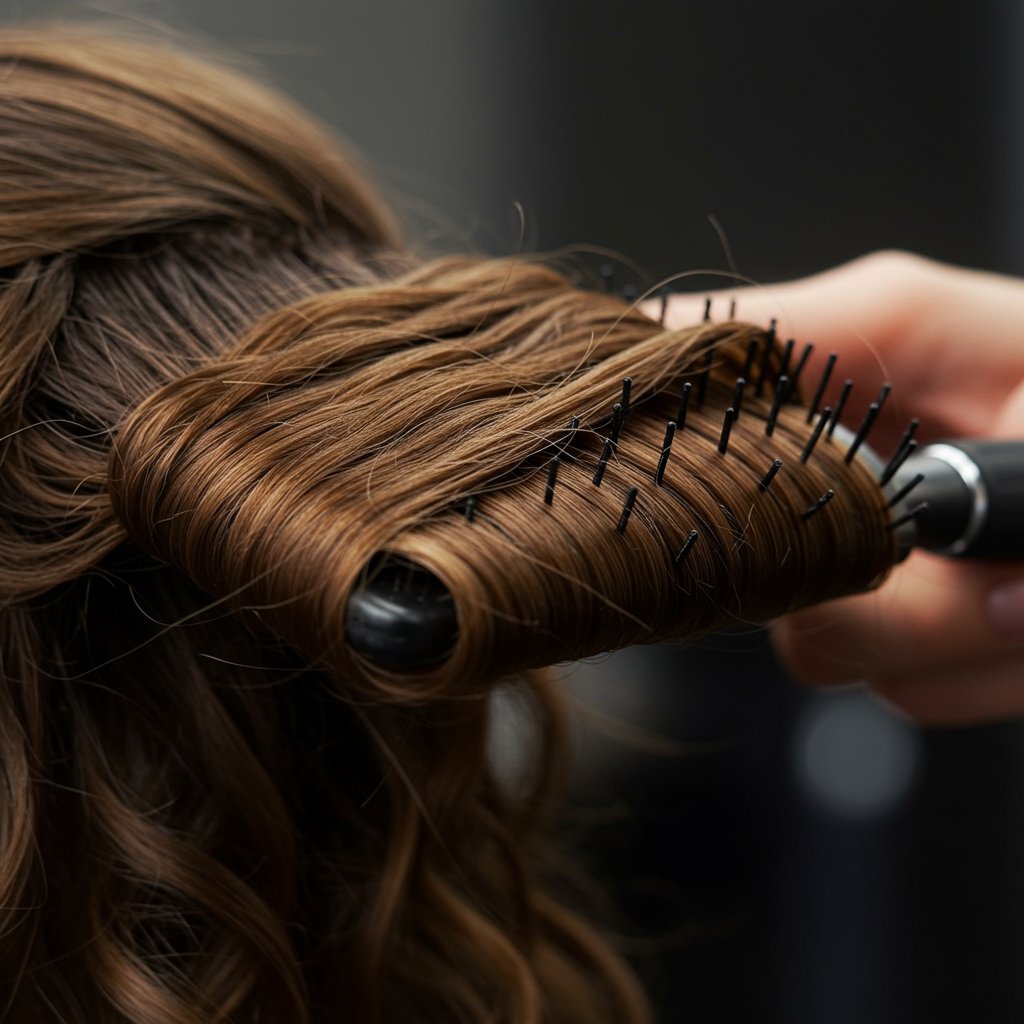
Take your boar bristle brush and begin to gently brush through the curls, starting from the ends and working your way up. This will feel counterintuitive, as if you're destroying all your hard work, but trust the process. As you brush, you will see the individual curls begin to merge and the 'S' wave pattern will start to take shape. Continue brushing slowly and repeatedly. You can use your free hand to follow the brush, smoothing the hair and encouraging it to form into the wave pattern. This process can take several minutes of continuous, gentle brushing. The more you brush, the softer and more cohesive the waves will become.
Once the main wave pattern is established, you can use your comb and some light-hold hairspray to perfect the details. Use the comb to define the ridges of the waves, especially around your face. You can even use your duckbill clips to gently clamp the hair in the 'valleys' of the waves and give them a light mist of hairspray to further define the shape. Let it set for a moment before removing the clips for a sharp, sculpted finish.
Locking it In: Finishing Touches for Lasting Hold
After dedicating so much time and effort to creating your perfect Hollywood glam waves, the final step is to ensure they last through your event. The key is to lock in the style without making it look stiff or crunchy. Once you are satisfied with the shape and smoothness of your waves, it's time for the finishing spray. Select a firm or strong-hold hairspray designed to combat humidity and provide long-lasting memory to the style. Hold the can about 10-12 inches away from your head and mist it evenly over your entire style.
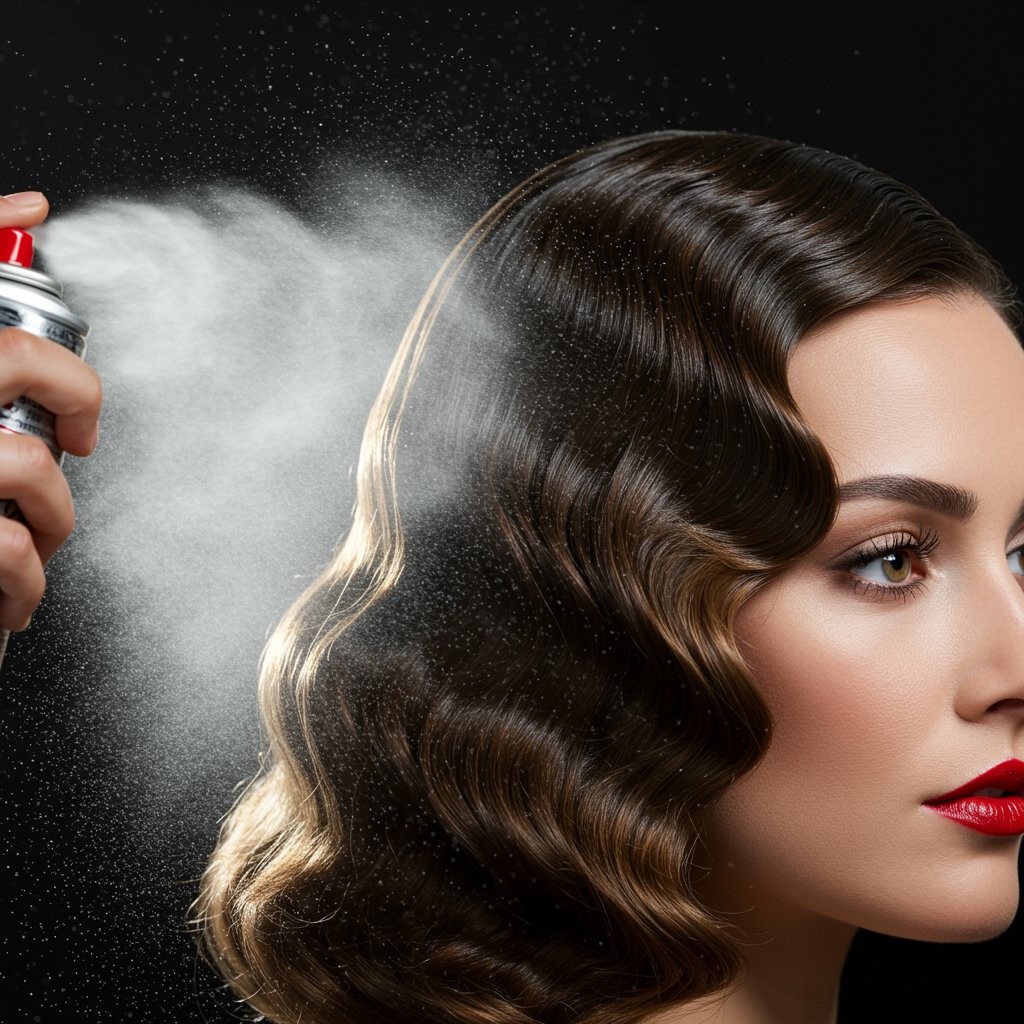
For that signature red-carpet shine, a lightweight shine spray or a drop of anti-frizz serum is the perfect final touch. If using a serum, rub a very small amount between your palms and then lightly glaze it over the surface of your waves, focusing on the mid-lengths and ends. Be careful not to use too much product, as this can weigh the hair down and cause the waves to fall. The goal is to enhance the reflection of light off the smooth, uniform surface you've created. One final pro tip is to lightly spray your boar bristle brush with hairspray and give the waves one last, gentle pass to tame any final flyaways and reinforce the shape.
Frequently Asked Questions (FAQ) about Hollywood Waves
Q1: What's the difference between Hollywood waves and beachy waves?
Hollywood waves are a highly polished, structured style characterized by a uniform 'S' pattern where all the waves line up. They are created by curling all hair in the same direction and then brushing it out into a cohesive shape. Beachy waves are the opposite; they are meant to look undone and textured, often created by alternating curl directions and using texturizing sprays.
Q2: What size curling iron is best for this style?
A 1-inch to 1.5-inch barrel is ideal. A 1-inch barrel creates a tighter, more vintage wave, while a 1.25 or 1.5-inch barrel will result in a softer, more modern, voluminous wave. The choice depends on your hair length and the specific look you're aiming for.Q3: Why are my waves falling flat?
There are a few common culprits. Your hair might not have been 100% dry, you may not have used a styling product like mousse for hold, or—most likely—you didn't let the pin curls cool down completely before brushing them out. The cooling process is what sets the curl's shape for long-lasting hold.Q4: Is this style suitable for fine or thin hair?
Absolutely! For fine hair, it's crucial to use volumizing products during the prep stage, like a good mousse and root-lifting spray. Using a slightly smaller barrel (like a 1-inch iron) will create a tighter curl that has more staying power as it naturally relaxes.Q5: Can I achieve this look on shoulder-length hair?
Yes, you can. The waves will be more compact, but the technique remains the same. This can create a stunning, voluminous vintage lob style. You may want to use a 1-inch curling iron to ensure you can get a few wave rotations in.Q6: How do I prevent frizz when brushing out the curls?
Using a boar bristle brush is key, as it's gentler and smooths the hair cuticle. Brushing slowly and gently is also important. If you are prone to frizz, you can apply a small amount of anti-frizz serum to your hands and lightly smooth it over the hair before you begin the final brush-out.A Timeless Statement of Elegance
The journey to achieving perfect Hollywood glam waves is a testament to the idea that beauty often lies in precision and patience. It's more than just a hairstyle; it's a wearable piece of art that channels a legacy of glamour and sophistication. By understanding the core principles of the style—a solid foundation, the right tools, and a methodical technique—you can unlock the ability to create this stunning look for yourself. From the crucial prep work that gives the style its memory to the magical moment of the brush-out that reveals the cohesive wave, each step plays a vital role in the final, breathtaking result.
Remember that practice is key. Your first attempt may not be flawless, but with each subsequent effort, your muscle memory will improve, and your confidence will grow. Embrace the process, enjoy the transformation, and prepare to turn heads with a hairstyle that is truly timeless. Whether for a special occasion or a moment when you simply want to feel your most elegant, Hollywood glam waves are an unfailing choice that will always make a powerful and beautiful statement.


