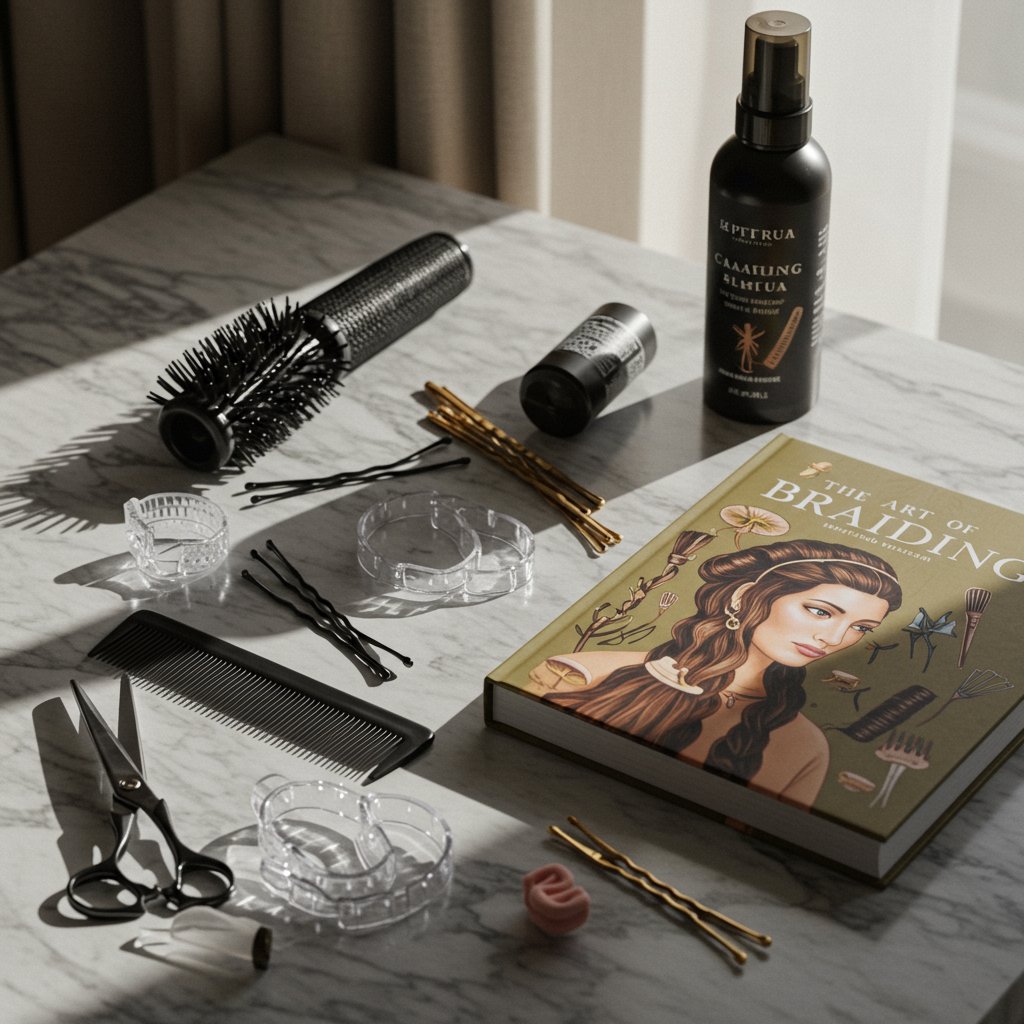
The Braid Book: 10 Creative and Easy Braided Hairstyles | Your Ultimate Guide
Your Ultimate Guide to Creative and Easy Braided Hairstyles
Braids are more than just a hairstyle; they are a timeless art form, a versatile expression of style that transcends cultures and eras. From the simple three-strand braid learned in childhood to intricate, runway-worthy creations, braided hairstyles offer endless possibilities for every hair type, length, and occasion. They can be practical and sporty, romantic and ethereal, or sharp and sophisticated. This comprehensive guide, your very own Braid Book, will walk you through 10 creative and easy braided hairstyles, empowering you to transform your look with confidence and flair.
Whether you're looking for a quick and chic style for a busy weekday, an elegant updo for a special event, or a durable look for a workout, there's a braid for you. We'll delve into step-by-step instructions, offer pro tips for achieving a polished finish, and explore how to adapt these styles to suit your personal aesthetic. Get ready to unlock the potential of your hair and master the art of braiding, moving beyond the basics to create stunning looks that are sure to turn heads. This is your first step towards becoming proficient in beautiful, intricate, and surprisingly simple braided hairstyles.
Timeless Classics Reinvented
Some braided hairstyles are foundational, but that doesn't mean they have to be basic. By mastering the core techniques and adding a modern twist, you can elevate classic braids from simple to stunning. These reinvented classics are perfect for both everyday wear and more formal settings, offering a blend of tradition and contemporary style. They prove that a well-executed braid is always in fashion, providing a polished and put-together look with minimal effort.
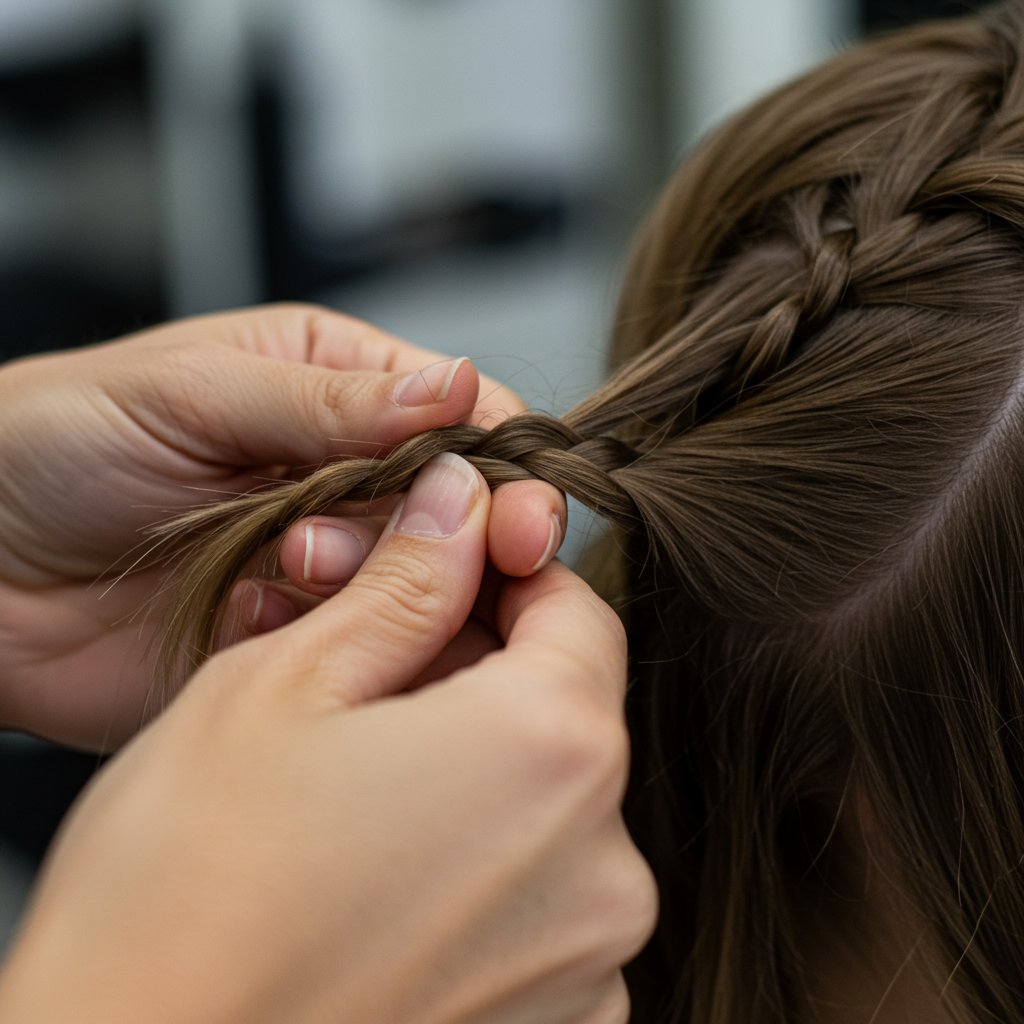
Understanding the mechanics of French and Dutch braids is the key to unlocking a world of more complex styles. Once you can confidently execute these two, you can mix, match, and modify them to create unique looks. The secret is in the details: the tension, the size of the sections you add, and the final 'pancaking' or pulling apart of the strands to create volume and texture. These two styles are the perfect starting point for any braiding journey.
1. The Elevated French Braid
The French braid is the epitome of elegance. Instead of a flat, simple braid, the elevated version focuses on texture and volume. How to: Start with a small section of hair at your crown. Divide it into three strands. Begin a traditional braid by crossing the right strand over the middle, then the left strand over the middle. Before you repeat, gather a small, new section of hair from the right side of your head and add it to the right strand. Now, cross this combined strand over the middle. Repeat on the left side. Continue this pattern down your head, gathering hair as you go. Secure with an elastic. To 'elevate' it, gently pull on the outer edges of each braided section (a technique called 'pancaking') to make it appear fuller and more voluminous.2. The Modern Dutch Braid (Boxer Braid)
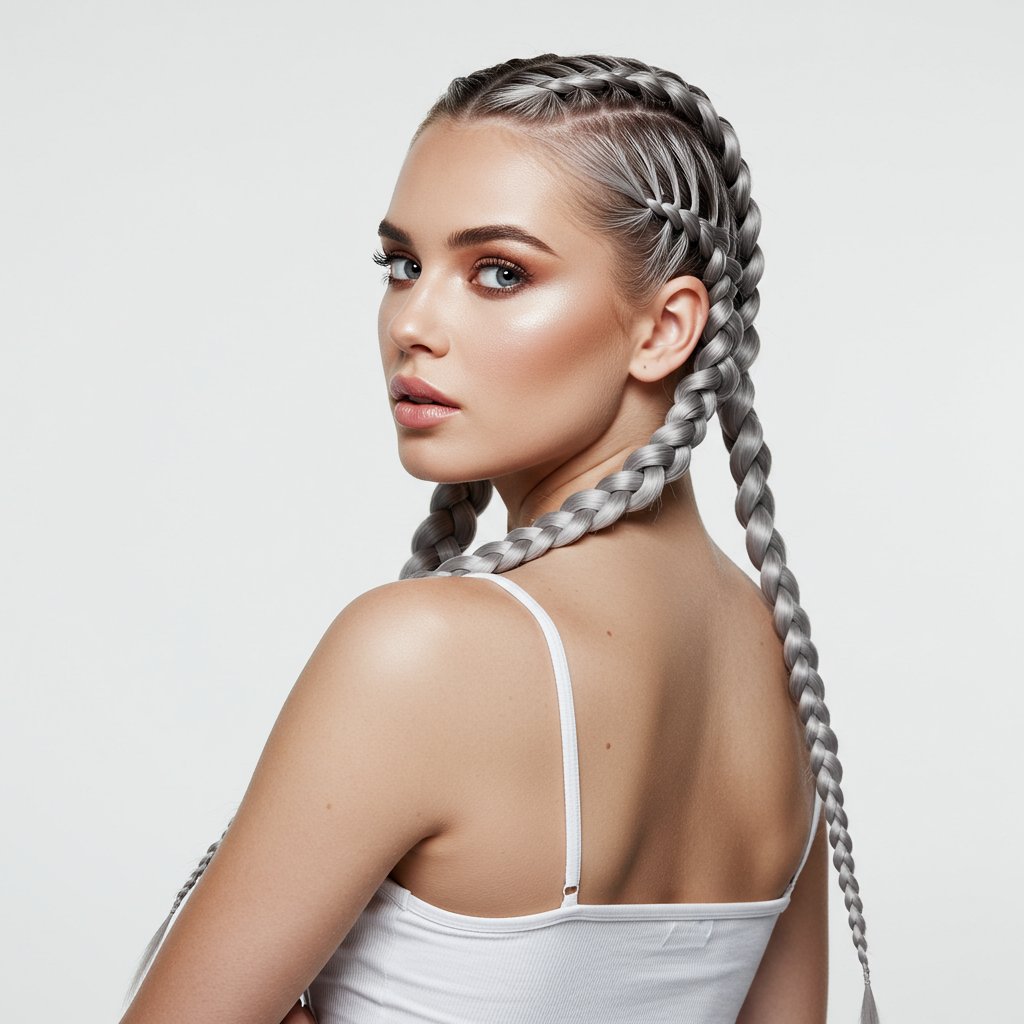
The Dutch braid is the French braid's inverted cousin, creating a braid that sits on top of the hair for a bold, 3D effect. Often seen in a double 'boxer braid' style, it’s both stylish and functional. How to: The technique is identical to the French braid, but with one key difference: you cross the strands under the middle strand instead of over. This is what makes the braid pop. For a modern look, part your hair down the center and create two tight, sleek Dutch braids. This style is fantastic for keeping hair secure during physical activity while remaining incredibly chic.Romantic and Ethereal Braids
For moments that call for a touch of softness and whimsy, romantic braids are the perfect choice. These styles are characterized by their loose, often deconstructed texture, creating an effortlessly beautiful and ethereal vibe. They are ideal for weddings, garden parties, date nights, or any occasion where you want to channel a dreamy, bohemian aesthetic. The key to these looks is embracing imperfection; a few loose tendrils and a soft, touchable finish are part of their charm.
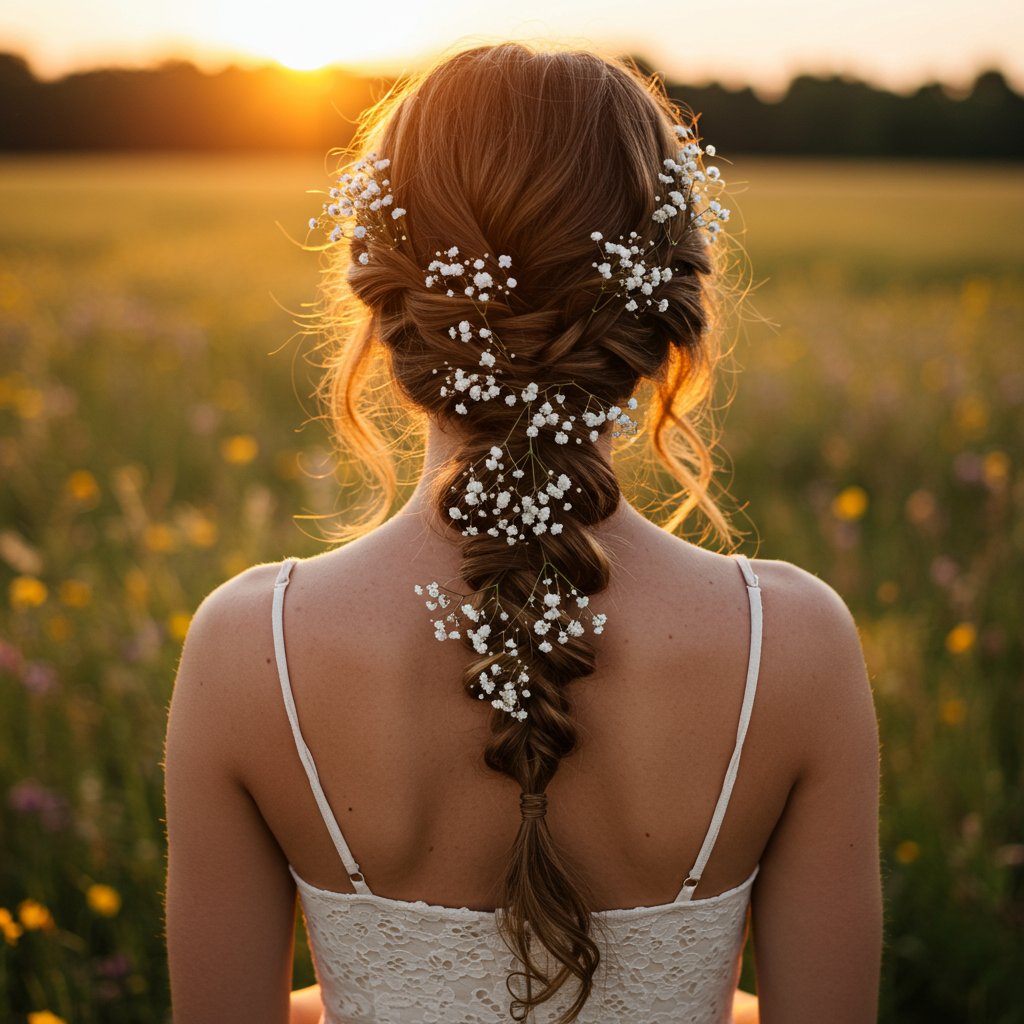
The beauty of romantic braids like the Fishtail and Waterfall lies in their intricate appearance, which belies their relatively simple construction. They look like they took hours at a professional salon but can be mastered with a little practice. These styles work beautifully on medium to long hair and are particularly stunning when adorned with small flowers, delicate ribbons, or jeweled pins, enhancing their fairytale-like quality.
3. The Classic Fishtail Braid
The fishtail braid looks incredibly intricate but is surprisingly simple, using only two strands. It creates a beautiful herringbone pattern. How to: Divide your hair into two large, even sections. Take a thin strand of hair from the outside of the left section. Cross it over the top of the left section and add it to the inside of the right section. Now, repeat on the other side: take a thin strand from the outside of the right section, cross it over the right section, and add it to the inside of the left. Continue this pattern all the way down. The smaller the strands you cross over, the more intricate your fishtail will look.4. The Whimsical Waterfall Braid
This enchanting braid creates a cascading 'waterfall' effect with strands of hair flowing through it. It’s a perfect half-up, half-down style. How to: Start near your hairline on one side. Take a section of hair and divide it into three strands. Begin a French braid, but with a twist. Cross the top strand over the middle, then the bottom strand over the middle. Now, take a new piece of hair to add to your top strand, and cross it over the middle. Here's the key: drop the bottom strand completely. Let it fall. Pick up a new section of hair right behind where you dropped the last one to become your new bottom strand. Cross it over the middle. Repeat this process—adding to the top strand, crossing it over, dropping the bottom strand, and picking up a new one—as you work your way around your head.Bold and Edgy Braided Looks
Braids can also be a powerful statement of confidence and edge. Moving away from soft and romantic, these styles are defined by their sharp lines, tight construction, and commanding presence. They are perfect for making an impact, whether at a concert, a night out, or simply when you want your hair to reflect a bold attitude. These braids are less about gentle cascades and more about structure and form, often drawing inspiration from punk, athletic, and high-fashion aesthetics.
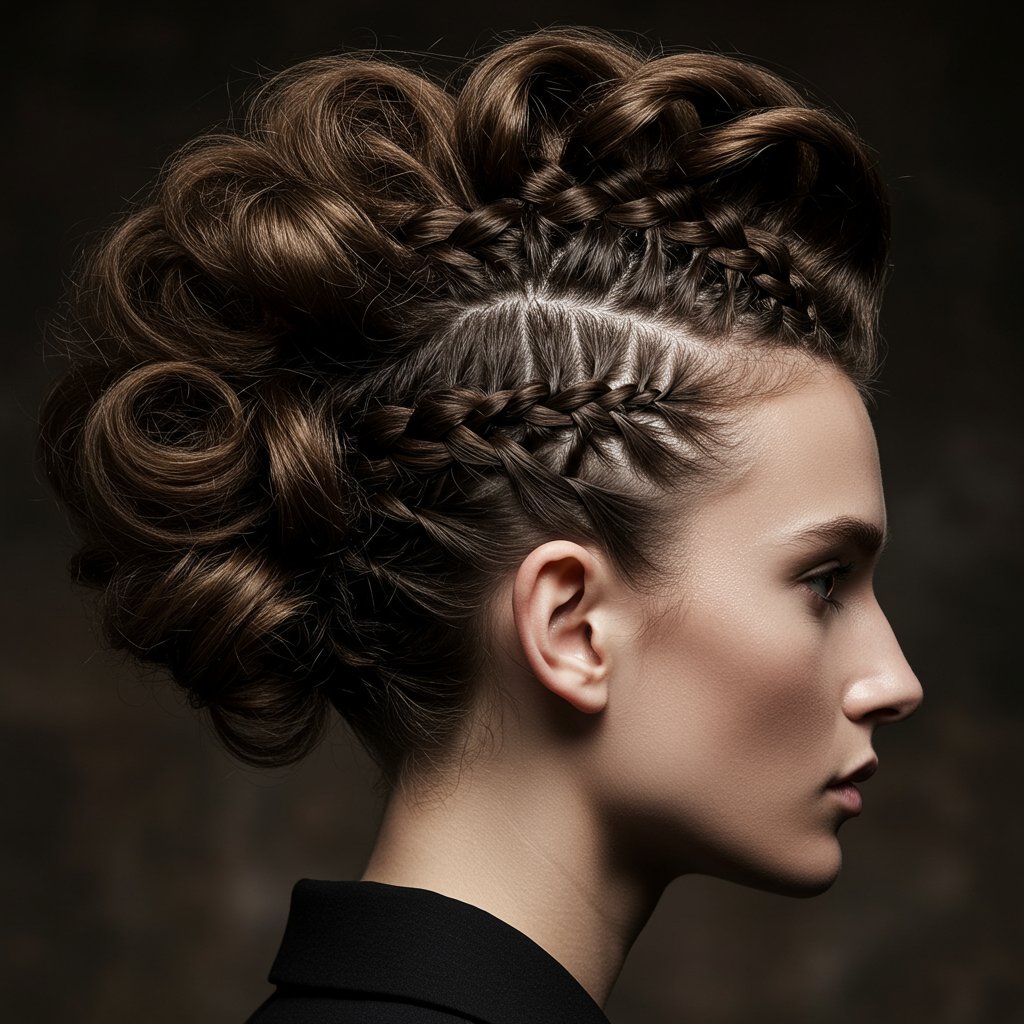
Achieving these looks requires precision and good tension control. Using a pomade or styling gel can help create the clean partings and sleek finish that define these styles. While they may look intimidating, the techniques are often variations of the classics you've already learned. A style like the Faux Hawk Braid, for instance, uses the Dutch braid as its foundation but amplifies its effect through volume and placement, proving that even the most fundamental skills can be used to create something truly dramatic.
5. The Faux Hawk Braid
Get the edgy look of a mohawk without the commitment. This style uses a single, voluminous Dutch braid down the center of your head to mimic a hawk. How to: Section off the top middle part of your hair, from your forehead to the nape of your neck, as wide as you want your 'hawk' to be. Clip the side sections away. Create a tight Dutch braid with the center section. Once the braid is secured, go back and aggressively pancake it, pulling the edges out to create maximum volume and height. For an even edgier look, you can slick back the side sections or braid them into tight cornrows.6. The Pull-Through Braid
This braid is a fantastic illusion. It looks like a complex, thick braid but requires no actual braiding—just a series of ponytails pulled through each other. It’s a great way to make fine hair appear incredibly voluminous. How to: Start by creating two small ponytails, one stacked on top of the other, at the crown of your head. Split the top ponytail into two halves. Pull the bottom ponytail up and through the split, and clip it out of the way on top of your head. Now, release the split top ponytail. Gather some new hair from the sides and add it to these two halves, then join them together with a new elastic, creating a new 'bottom' ponytail. Unclip the ponytail on top of your head, split it, and repeat the process. Continue down the length of your hair.Elegant Updos and Crown Braids
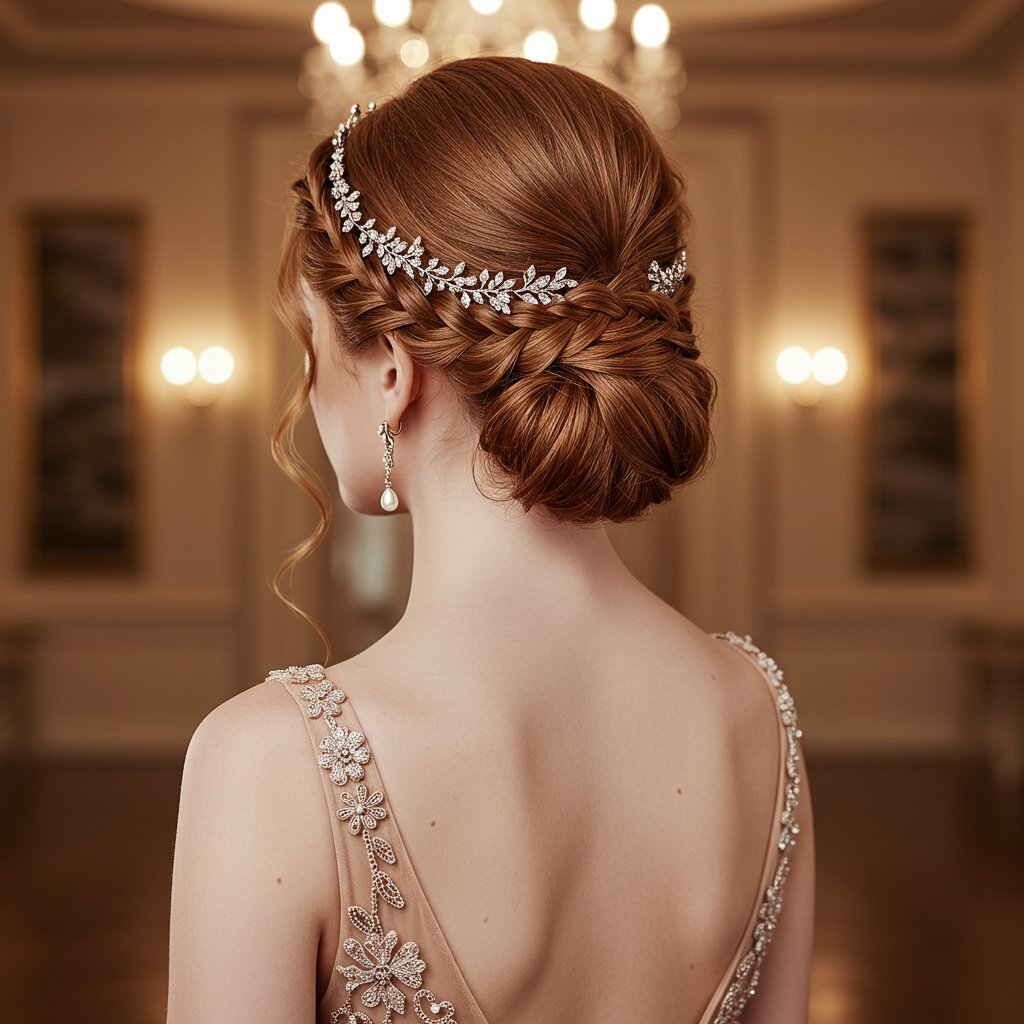
For formal events, weddings, or any occasion that calls for sophistication, a braided updo is an unparalleled choice. These styles gather the hair up and away from the face, creating a look of refined elegance and grace. A crown braid, in particular, acts as a natural, beautiful accessory, framing the face and adding a touch of royalty to your look. These aren't just hairstyles; they are works of art that are both beautiful and practical, keeping your hair perfectly in place throughout a long event.
Creating a braided updo might seem like a task best left to professional stylists, but many stunning looks are surprisingly achievable at home. The key is building a solid foundation, often with well-placed Dutch or French braids, and then artfully pinning and arranging them. Patience and a good supply of bobby pins are your best friends here. The result is a timeless, secure style that feels as good as it looks, allowing you to enjoy your event without worrying about your hair.
7. The Halo or Crown Braid
This angelic style involves one or two long braids wrapped around the head to form a crown. It’s a timeless look for special occasions. How to: Part your hair down the middle and create two low pigtails. Braid each pigtail using a simple three-strand or fishtail braid and secure the ends. Gently pancake the braids to make them look fuller. Then, lift the right braid up and over your head, like a headband, and pin it securely on the other side. Do the same with the left braid, tucking its end underneath the right braid to hide it. Use bobby pins to secure everything in place.8. The Low Braided Bun
This is a chic and sophisticated updo that combines the beauty of a braid with the classic elegance of a low bun. How to: Gather your hair into a low ponytail at the nape of your neck. Braid the ponytail using any style you like—a classic three-strand, fishtail, or rope braid works well. Secure the end. Pancake the braid for volume. Then, wrap the braid around the base of the ponytail to form a bun, tucking the end underneath and securing it firmly with bobby pins. For a softer look, leave a few tendrils out to frame your face.Quick and Chic Everyday Braids
Not every day calls for an elaborate updo. For the daily grind, you need hairstyles that are fast, easy, and effortlessly chic. These quick braids are the perfect solution for busy mornings, adding a touch of polish to your look in just a few minutes. They are lifesavers for second-day hair, taming frizz and flyaways while looking intentional and stylish. These styles prove that you don’t need to spend hours on your hair to look put-together.

Simplicity is the ultimate sophistication, and these braids embody that principle. The Rope Braid and the Simple Side Braid are built on easy-to-learn techniques that require minimal dexterity but deliver maximum impact. They are versatile enough for the office, a casual brunch, or running errands, making them invaluable additions to your daily hair repertoire. Master these, and you'll never have a boring hair day again.
9. The Twisted Rope Braid
Faster than a traditional braid, the rope braid is a sleek, two-strand twist that looks chic and modern. How to: Put your hair in a ponytail. Split the ponytail into two equal sections. Twist both sections in the same direction (e.g., both to the right). It's important they are twisted tightly. Then, cross the two twisted sections over each other in the opposite direction (e.g., to the left). This counter-twist is what locks the braid in place. Continue to the end and secure with an elastic.10. The Simple Embellished Side Braid
Take a basic side braid to the next level. This is less about technique and more about styling. How to: Sweep all of your hair over to one shoulder. Create a loose, slightly messy three-strand or fishtail braid. Secure it a few inches from the end, leaving a good amount of tail. The key here is embellishment. Weave in a silk scarf as you braid, add some metallic hair rings or cuffs after the braid is done, or tie it off with a beautiful ribbon or scrunchie. It's an instant upgrade to a simple style.Pro Tips for Perfect Braids Every Time
Achieving salon-quality braided hairstyles at home is entirely possible with a few insider tricks. The difference between a good braid and a great braid often comes down to preparation and finishing touches. Before you even start braiding, prepping your hair will make the process smoother and the results last longer. Dirty hair, or at least second-day hair, often holds a braid better than freshly washed, silky hair. A light mist of dry shampoo or texturizing spray at the roots can provide the grip needed for your braid to stay in place.
Once your braid is complete, securing it properly is crucial. Use clear elastics for a seamless look, or choose a decorative tie that complements your outfit. To control flyaways and add a polished sheen, warm a small amount of pomade or styling cream in your hands and gently smooth it over the surface of the braid. A final spritz of flexible-hold hairspray will lock everything in place without making your hair feel stiff or crunchy. For voluminous, 'pancaked' braids, always pull the sections apart before applying hairspray to allow for maximum fullness.
Your Braided Hairstyle Questions Answered
How can I make my fine hair look thicker in a braid?
This is a common challenge. The key is 'pancaking'. After you've completed your braid and secured it, gently pull on the outer loops of each braided section. Start at the top and work your way down, pulling horizontally. This loosens the braid and creates the illusion of much thicker, fuller hair. Also, starting with a texturizing powder or spray before you braid will add grit and volume from the start.
What's the best way to sleep with braids to make them last?
To preserve your braided hairstyle overnight, especially styles like boxer braids or cornrows, sleeping on a silk or satin pillowcase is highly recommended. The smooth surface reduces friction, which is the main cause of frizz and flyaways. For extra protection, you can also wrap your hair in a silk scarf or bonnet.Can I do these braids on short or layered hair?
Absolutely, though some modification is needed. For shorter hair, French or Dutch braids that stay close to the scalp work best. You may need to end the braid at the nape of your neck and pin the ends. For layered hair, the challenge is keeping shorter pieces from poking out. Apply a bit of styling paste or pomade to your hands as you braid to help tuck in those layers. Bobby pins are also your best friend for securing any stray pieces.My braids always look frizzy. How can I make them smoother?
Frizz is often caused by flyaways and a lack of moisture. Start by braiding on hair that is fully dry and well-moisturized. Apply a smoothing serum or anti-frizz cream to your hair before you begin. As you braid, keep your sections clean and maintain even tension. If frizz appears after braiding, you can spritz a clean toothbrush with hairspray and gently brush it over the surface of the braid to tame unruly hairs.How do I start a braid on my own head without my arms getting tired?
This takes practice! Try to sit comfortably in front of a mirror. If possible, use a second mirror to see the back of your head. When starting French or Dutch braids, try not to hold your arms straight up. Instead, try to keep your elbows down as much as possible. Take short breaks if you need to. The more you practice, the faster your fingers will get, and the less tired your arms will become.Conclusion: Embrace the Art of Braiding
From the elegant simplicity of a Rope Braid to the intricate beauty of a Waterfall Braid, we've explored a diverse collection of 10 creative and easy braided hairstyles. This guide serves as your personal 'Braid Book,' demonstrating that with a little practice, you can master styles that are perfect for any occasion, mood, or hair type. Braiding is a skill that empowers you to be your own stylist, transforming your hair into a beautiful expression of your personal style.
We encourage you to experiment with these techniques. Mix and match them, add your own creative flair with accessories, and don't be afraid of imperfections—often, a slightly messy braid is the most beautiful. And for those truly special occasions or for more complex styles, remember that the expertise of a professional stylist is invaluable. Professional hair salons have stylists who can create breathtaking braided art and provide personalized advice for your hair type. So go ahead, start practicing, and let your hair become your canvas.


