The French Twist: Timeless Elegance in Five Minutes | A Complete Guide
The French Twist: A Symbol of Enduring Sophistication
In the world of hairstyling, few updos carry the same weight of effortless sophistication and timeless elegance as the French Twist. It's a hairstyle that whispers refinement rather than shouts for attention, making it a perennial favorite for everything from a high-powered board meeting to a glamorous wedding. Its clean lines and graceful silhouette can elevate any look, conveying confidence and poise. The true beauty of the French Twist, however, lies not just in its chic appearance but in its surprising simplicity. With the right technique, this seemingly intricate style can be mastered in as little as five minutes, making it the ultimate secret weapon in any style arsenal.
This comprehensive guide will demystify the classic French Twist, transforming it from an aspirational style into an achievable, everyday option. We will explore its rich history, provide a detailed step-by-step tutorial, and delve into modern variations that keep the look fresh and exciting. You'll learn how to tailor the twist to your specific hair type, troubleshoot common mistakes, and apply professional finishing touches for a look that lasts all day. Whether you're a complete beginner or looking to perfect your technique, consider this your definitive resource for achieving timeless elegance in just five minutes.
The Enduring Legacy of the French Twist
The French Twist didn't just appear overnight; it's a style steeped in history, evolving alongside fashion and culture to become the icon it is today. Its origins can be traced back to the Victorian era's chignons and rolls, but it truly came into its own in the mid-20th century. The post-war era of the 1950s and 60s saw a return to glamour and structured elegance, and the French Twist became a hallmark of the sophisticated woman. It was famously worn by style icons like Audrey Hepburn in Breakfast at Tiffany's, where her elegant updo became as legendary as her little black dress, cementing the hairstyle's place in pop culture history.

More than just a hairstyle, the French Twist became a symbol. For working women, it was a practical yet polished way to keep hair neat and professional. In high society, it was the epitome of refined taste, a go-to for formal events and black-tie galas. Its vertical line creates an illusion of a longer, more graceful neck, and its compact shape ensures it stays immaculate for hours. This blend of practicality and polish is why it has endured through decades of changing trends. From the red carpet to the royal family, the French Twist continues to be a powerful statement of understated, confident style.
Prep Work is Key: Getting Your Hair Ready for the Perfect Twist
Achieving a flawless French Twist that lasts all day begins long before the first pin is placed. Proper preparation creates the ideal foundation, giving your hair the grip and texture it needs to hold the style securely. Attempting this updo on freshly washed, silky-smooth hair is a common recipe for frustration, as the strands will be too slippery to cooperate. The goal is to create a canvas that has some 'grit' and manageability.
The Right Canvas: Hair Condition and Texture
Ideally, start with second-day hair. The natural oils provide a bit of hold that makes the hair easier to shape. If you must work with freshly washed hair, avoid heavy conditioners that can weigh it down. Instead, apply a volumizing mousse or a texturizing spray to damp hair before blow-drying. This will add body and a slightly tacky texture that is perfect for updos. For those with very fine or slippery hair, a light mist of dry shampoo at the roots can work wonders, absorbing excess oil and creating instant volume and grip.Essential Tools and Products
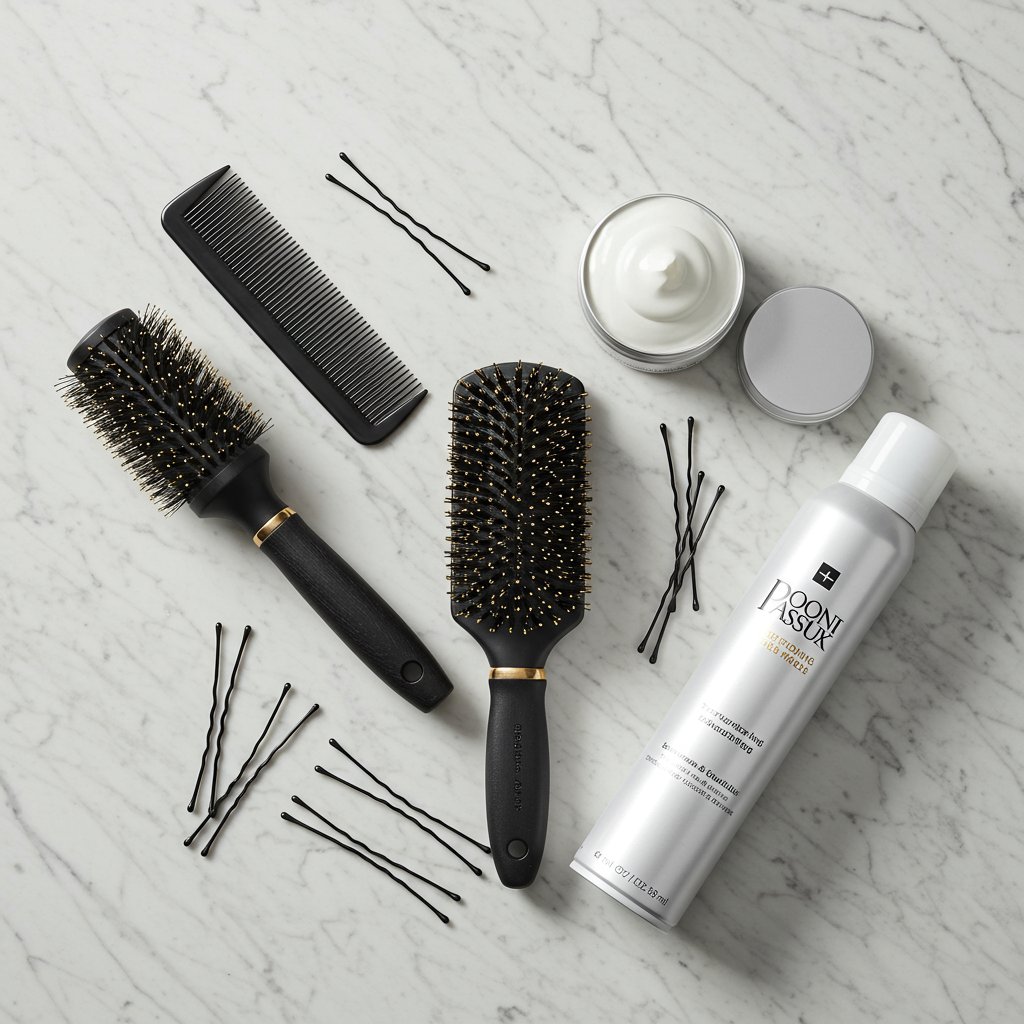
Gathering your tools beforehand makes the process smooth and efficient. You don't need a complicated kit, just a few key items. A high-quality boar bristle brush is excellent for smoothing hair and taming flyaways without creating static. You will also need several bobby pins and a few larger, U-shaped hairpins; the latter are fantastic for anchoring the main body of the twist without being visible. A fine-tooth comb is useful for backcombing or creating a clean parting. Finally, a flexible-hold hairspray will set the style without making it feel stiff, while a shine spray can provide a polished, salon-quality finish.The Classic French Twist: A Step-by-Step Guide
With your hair prepped and tools at the ready, you can now create the classic French Twist. The key is to work methodically and confidently. Don't worry if it's not perfect on the first try; practice is essential. This detailed breakdown simplifies the process into four manageable steps.
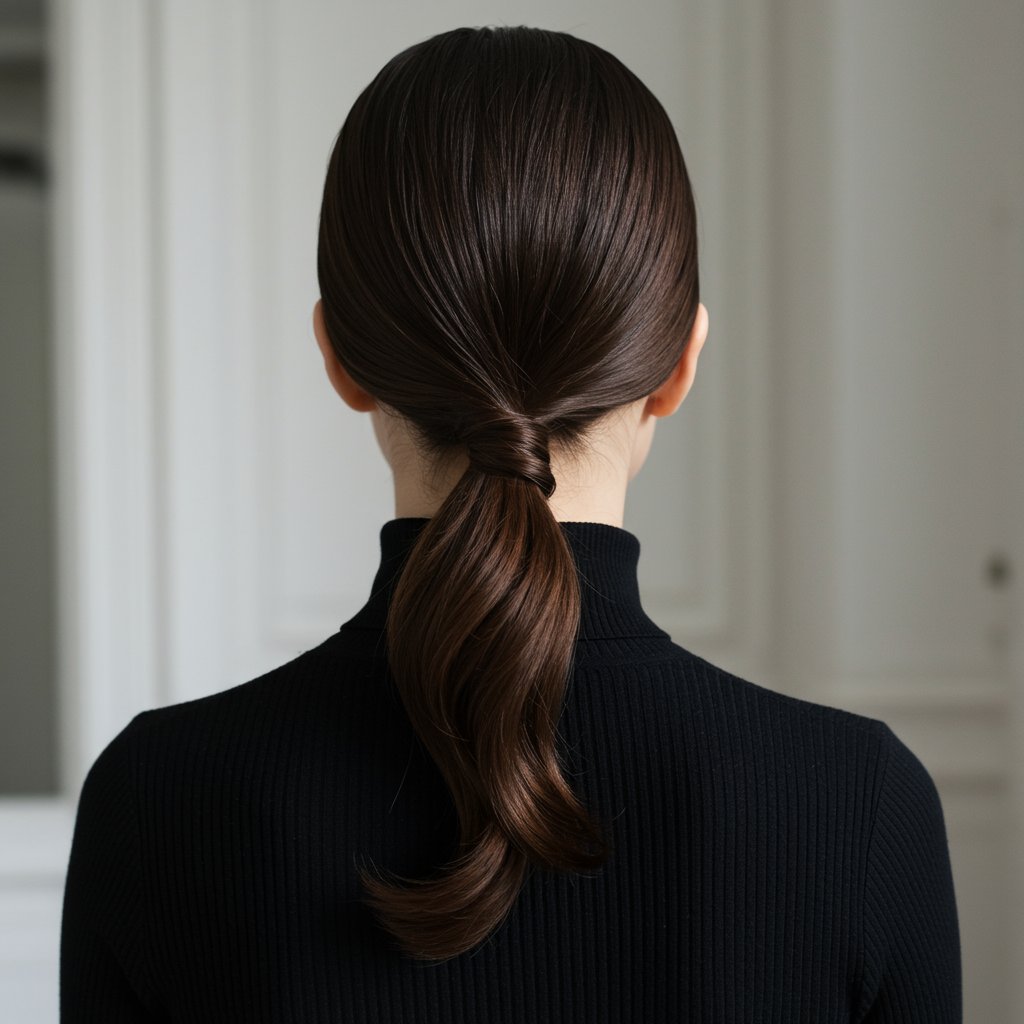
Step 1: Create a Low Ponytail (Without the Tie)
Begin by brushing all of your hair smooth. Gather it at the nape of your neck as if you were making a low ponytail. Hold the base of the 'ponytail' securely with one hand. For a classic, centered twist, gather the hair in the middle. For a slight variation, you can gather it just off-center. The smoothness of this initial gather is crucial, as it sets the foundation for a sleek finish. Use your brush to eliminate any bumps on the crown or sides.Step 2: The Initial Twist
Now, with the hand holding the ponytail, begin twisting the hair upwards, tightly against your head. Twist in one continuous direction—either clockwise or counter-clockwise, whichever feels more natural. As you twist, the hair will naturally start to fold in on itself, forming the beginnings of the iconic roll shape. Use your other hand to guide the twist and keep it flat and snug against your scalp. The tighter this initial twist, the more secure your final style will be.Step 3: Tucking and Rolling
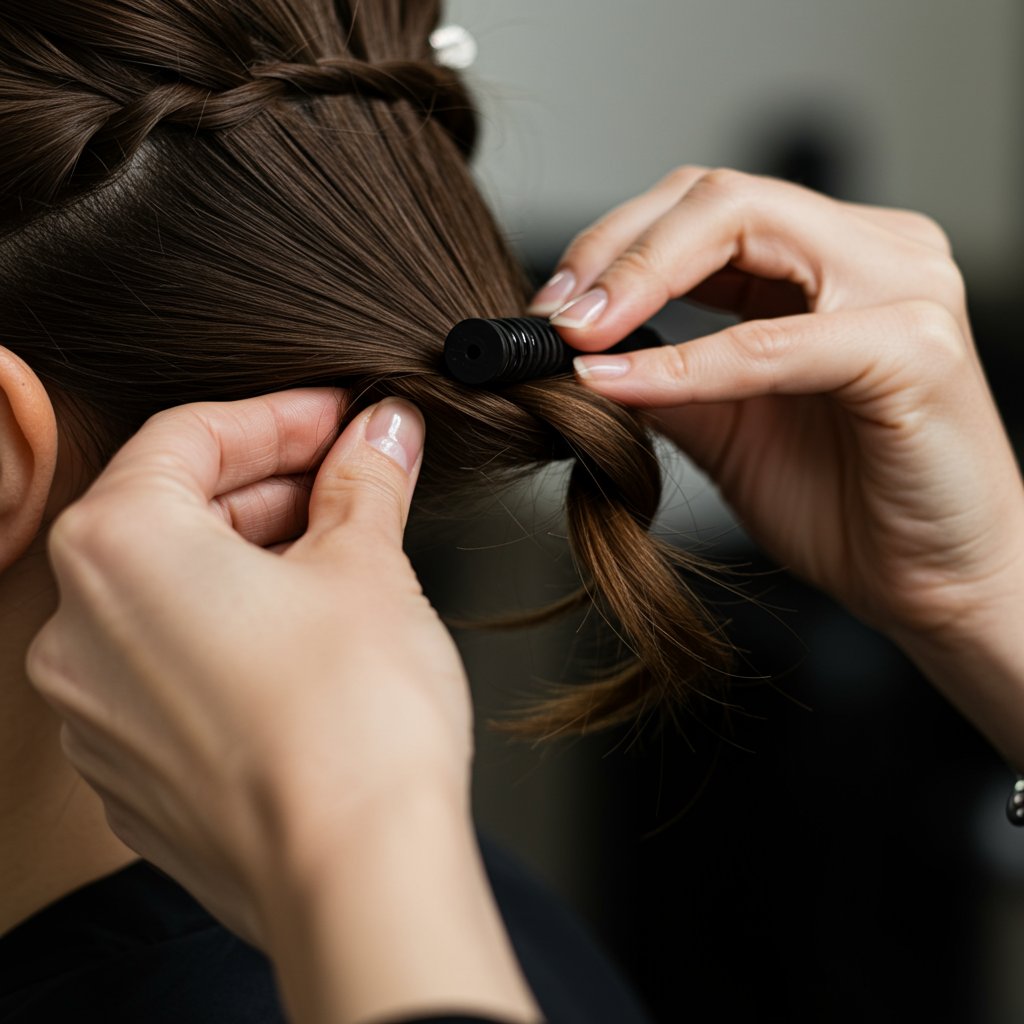
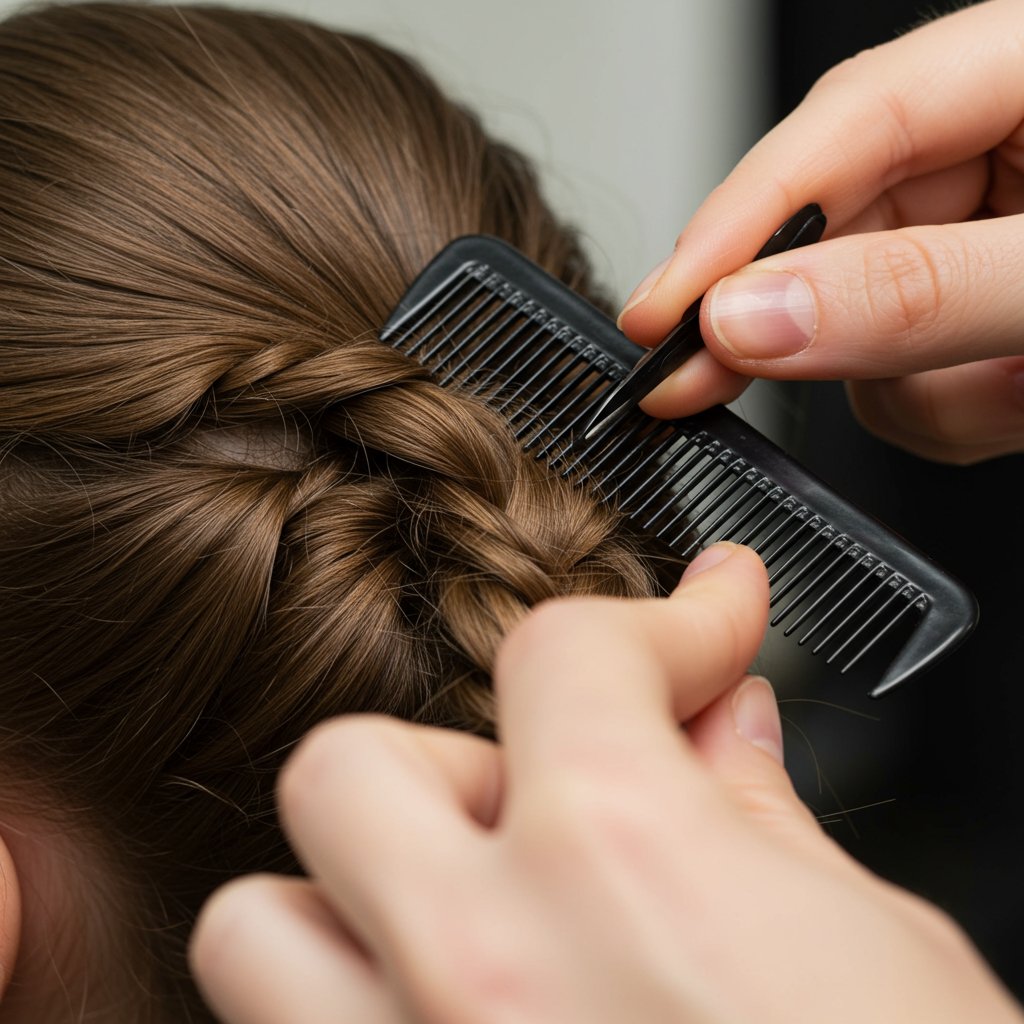
Continue twisting the length of the ponytail upwards towards the crown of your head. Once you reach the ends of your hair, the next step is to tuck them away. Carefully fold the ends of the hair down and tuck them neatly inside the 'seam' or pocket created by the twist. This is the most critical part of the process. Use the fingers of your free hand to hold the roll in place while you use your other hand to tuck the ends smoothly, ensuring none are left poking out.Step 4: Securing the Style
Once the ends are tucked and the roll is formed, it's time to pin it in place. This is where the magic of U-shaped hairpins and bobby pins comes in. Start by inserting a few U-shaped pins vertically along the seam, catching hair from the roll and anchoring it to the hair on your scalp. Next, use bobby pins for extra security. The trick is to insert them so they are hidden within the seam. Open the bobby pin slightly, catch a small section of hair from the outer edge of the twist, then angle the pin inwards and push it into the base of the style. Use as many pins as you need to feel completely secure.Modern Variations on a Classic Theme
While the classic French Twist is a paragon of elegance, its modern interpretations offer versatility and personality. These variations allow you to adapt the style to different occasions, outfits, and moods, proving its remarkable range. Playing with texture, placement, and accessories can completely transform the look from formal and polished to relaxed and romantic.

The Undone, Messy French Twist
Perfect for a more casual or bohemian aesthetic, the messy French Twist embraces imperfection. To achieve this look, start with hair that has natural or created texture (think beach waves or soft curls). When you gather and twist the hair, do it more loosely. Don't worry about smoothing every flyaway. Once the twist is pinned, gently pull out a few face-framing tendrils and slightly tug at the roll itself to create more volume and a softer, 'lived-in' feel. This version is incredibly romantic and pairs beautifully with more relaxed outfits.The Low-Slung Horizontal Twist
This chic, modern take involves creating the twist horizontally at the nape of the neck instead of vertically up the back of the head. Gather the hair into a low ponytail, then twist it sideways and roll it in on itself, tucking the ends and pinning it horizontally. This creates a beautiful, chignon-like roll that is both sophisticated and contemporary. It works particularly well on medium-length hair and is an excellent choice for professional settings or minimalist evening wear.The Accessorized Twist
Elevate your French Twist for a special occasion by adding accessories. After the twist is secured, slide in a decorative hair comb along the seam for a touch of vintage glamour. For a more modern or bridal look, a series of delicate pearl or crystal pins can be scattered along the roll. Even a simple silk scarf tied around the base or woven through the hair before twisting can add a unique and personal touch. The clean canvas of the French Twist makes it the perfect backdrop for showcasing beautiful hair accessories.Tailoring the Twist to Your Hair Type
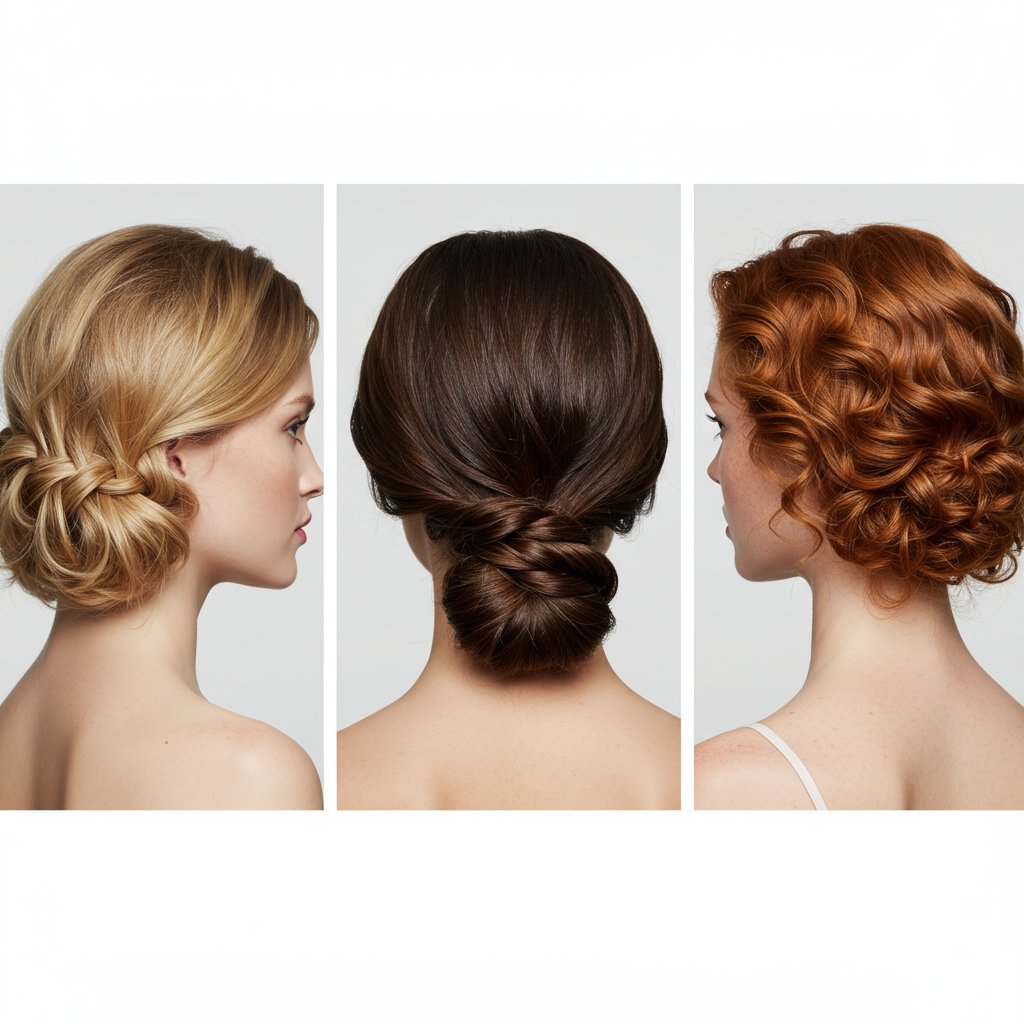
One of the reasons the French Twist has remained so popular is its adaptability to different hair types. However, achieving the perfect result often requires slightly different techniques and products depending on whether your hair is fine, thick, or curly. Understanding how to work with your unique texture is the key to a successful and long-lasting style.
For Fine or Thin Hair
Volume and grip are the main challenges for fine hair. Before styling, use a volumizing mousse and blow-dry your hair upside down. A light backcombing at the crown and at the base of the ponytail before you start twisting can create a fuller-looking foundation. When you form the twist, try not to pull it too tightly, as this can make the hair look even thinner. After pinning, you can gently use your fingers or the tail of a comb to slightly pull at the twist to create the illusion of more volume. Using smaller, lightweight bobby pins will also prevent the style from being weighed down.For Thick or Heavy Hair
For those with thick hair, the challenge is managing the weight and bulk. Sectioning the hair can be a game-changer. Create a vertical section from the crown to the nape and twist and pin the first half. Then, bring the second section over, wrapping it around the first twist before tucking and pinning. This distributes the weight more evenly and creates a more secure hold. Use larger, more heavy-duty U-shaped hairpins and bobby pins to ensure the style is properly anchored and won't sag or fall out during the day.For Curly or Textured Hair
Curly hair brings beautiful texture and volume to a French Twist, creating a wonderfully romantic and less severe look. Instead of brushing the hair smooth, work with its natural texture. Use your fingers to gather the hair to preserve the curl pattern. You may not need texturizing products, but a curl cream can help define the curls and reduce frizz. The final look will be softer and more voluminous. Don't be afraid to let a few curls escape around the hairline and nape for a beautifully undone finish. The inherent grip of curly hair often means you'll need fewer pins to secure the style.Common Mistakes to Avoid (And How to Fix Them)
Even with a great tutorial, a few common issues can arise when creating a French Twist. Knowing how to identify and correct these problems is the final step in mastering the style. Don't get discouraged—most mistakes are easily fixable with a minor adjustment.
The Slipping Twist
This is the most common issue, usually caused by hair that is too clean or silky. The fix starts with preparation. Ensure you've used a texturizing spray or dry shampoo to create grip. If it still slips, the twist may be too loose. Unpin it and re-twist, pulling it tighter against your head. Another pro trick is to create a line of interlocked bobby pins vertically up the back of your head before you start, giving the twist something to grip onto as you roll the hair over it.Bumps and Lumps
Unsightly bumps can ruin the sleek silhouette of a classic French Twist. These are typically caused by not brushing the hair smoothly enough at the beginning. If you notice a bump after you've started twisting, it's best to stop and brush it out. To fix small bumps in a finished style, use the tail end of a fine-tooth comb to gently smooth them over, tucking the loose hair under the roll and securing with a spritz of hairspray.Visible Pins
A truly elegant French Twist looks as if it's held by magic, not a dozen shiny bobby pins. The key to hiding them is in the technique. When inserting a bobby pin, catch a bit of hair from the roll's outer edge, then turn the pin so it slides underneath the roll, anchoring it to the scalp hair. The pin should be almost parallel to the seam of the twist. U-shaped hairpins are even easier to hide; simply push them deep into the body of the twist.Pro Tips for a Salon-Worthy Finish
To take your homemade French Twist from simply good to absolutely stunning, incorporate a few finishing techniques used by professional hairstylists. These small details make a significant difference, ensuring your style looks polished and lasts from morning to night.
The Art of Pinning
Professionals often use a crisscross technique for maximum hold. When using bobby pins, insert one, and then slide a second one over it in an 'X' shape. This locks them together and provides a much stronger anchor. Additionally, before inserting a bobby pin, give it a light spray with a strong-hold hairspray. The slight tackiness will give it extra grip in the hair, preventing any slipping.The Perfect Hairspray Technique
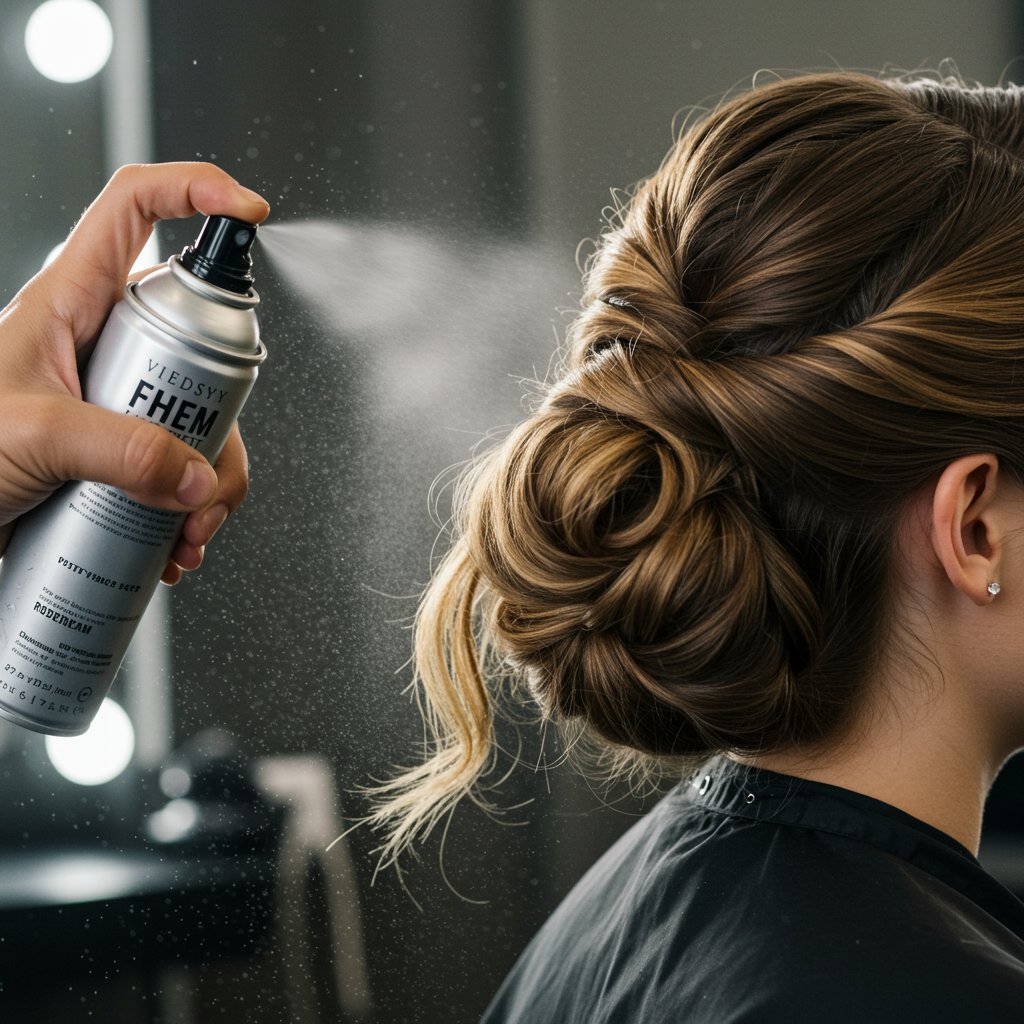
Instead of blasting your finished style with a heavy coat of hairspray, which can look stiff and unnatural, use a lighter touch. Hold the can about 10-12 inches away from your head and mist it lightly all over. For targeted control of flyaways, spray a small amount of hairspray onto a clean toothbrush or a mascara spoolie and gently brush down any stray hairs along your hairline or on the twist itself. This gives you precise control without disturbing the rest of the style.Adding Shine and Taming Flyaways
For that final touch of glamour, a lightweight shine spray is your best friend. After your hairspray has dried, a quick mist of shine spray will catch the light beautifully and give your updo a healthy, polished look. Be careful not to overdo it, as too much can make the hair look greasy. A little goes a long way in creating that enviable, high-gloss finish that you see on the red carpet.Frequently Asked Questions About the French Twist
How long does my hair need to be for a French Twist?
Ideally, your hair should be at least shoulder-length. This provides enough length to twist, fold over, and tuck the ends securely. While it's possible on slightly shorter, layered hair, it becomes much more challenging to contain all the ends.Can I do a French Twist on layered hair?
Yes, but it requires a bit more prep. Layers are prone to poking out of the twist. To combat this, make sure your hair has plenty of texturizing product for grip. As you twist, you may need to pause and smooth down layers. Using more bobby pins to tuck in and secure shorter pieces along the seam will be necessary.What's the best way to make my French Twist last all day?
Durability comes from three things: preparation, a tight twist, and proper pinning. Start with textured, second-day hair. Make the twist itself snug and tight against your head. Finally, use a combination of U-shaped pins and bobby pins, ensuring they anchor the roll to the base hair on your scalp. A final mist of a firm but flexible hairspray will seal the deal.Is the French Twist suitable for a formal event like a wedding?
Absolutely. The French Twist is a quintessential formal hairstyle. Its elegance and sophistication make it a perfect choice for brides, bridesmaids, or wedding guests. It can be elevated with accessories like pearl pins, a decorative comb, or fresh flowers to match the occasion's dress code.Can I do this hairstyle on wet hair?
It is not recommended to do a classic French Twist on wet hair. Wet hair is heavier and more fragile, making it difficult to secure. It also won't have the volume or texture needed for a full, elegant roll. It's best to style on completely dry, prepped hair.Conclusion: Embrace Timeless Elegance
The French Twist is more than just an updo; it is a testament to the power of classic style. Its enduring appeal lies in its perfect balance of grace, polish, and practicality. What once may have seemed like a complicated style reserved for special occasions is, with the right knowledge, an accessible and speedy solution for instant elegance. By mastering the fundamentals of preparation, technique, and finishing, you can confidently create a beautiful French Twist in minutes.
Whether you opt for the sleek, traditional version for a professional setting or a soft, messy twist for a casual weekend, this versatile hairstyle adapts to your needs. We encourage you to practice these steps, experiment with different variations, and make the French Twist your own. For those milestone events where you desire absolute perfection, seeking the expertise of a professional stylist can ensure a flawless and stress-free experience, allowing you to fully enjoy your special day with impeccable style.


