The Ultimate Guide to a Bouncy At-Home Blowout | Salon-Worthy Volume & Shine
The Allure of the Bouncy Blowout: Your Salon-Worthy Dream at Home
There's an undeniable confidence that comes with a fresh, professionally styled blowout. The movement, the volume, the incredible shine—it's a look that feels both polished and effortlessly glamorous. For years, this level of perfection felt like a luxury reserved for salon visits. But what if you could capture that magic in your own bathroom? Achieving a truly bouncy at-home blowout is not just possible; it's a skill you can master. It's about understanding the synergy between the right preparation, the correct tools, and a technique that builds volume from the root to the tip. Forget flat, lifeless hair and say hello to long-lasting body and bounce.

This ultimate guide is your personal masterclass, designed to demystify the process and empower you with the knowledge to transform your hair. We will walk you through every critical stage, from the foundational prep work in the shower to the final spritz of hairspray that locks in your masterpiece. You'll learn why sectioning is non-negotiable, how a simple cool shot button can make all the difference, and which products are truly worth the investment. This isn't about simply drying your hair; it's about sculpting it. Prepare to turn heads and answer the inevitable question, "Where did you get your hair done?" with a confident, "I did it myself."
Whether you have fine hair that craves lift or thick hair that needs taming and shaping, the principles of a great blowout are universal. By following these steps, you'll not only achieve a beautiful style but also protect the health of your hair, ensuring it remains strong and radiant. Let's dive into the art and science of the perfect bouncy at-home blowout and unlock the secret to salon-worthy hair, any day of the week.
Prep is Everything: The Foundation for a Lasting Blowout
Before a single blast of hot air touches your strands, the foundation for a successful blowout is laid. The process begins in the shower, where your product choices can either set you up for voluminous success or weigh your hair down from the start. Opt for a volumizing shampoo and conditioner duo specifically formulated to add body without heavy residues. When shampooing, focus the product on your scalp to cleanse away oils and buildup that can flatten your roots. Apply conditioner primarily from the mid-lengths to the ends, avoiding the root area to prevent greasiness and maintain lift.
Once you step out of the shower, your towel technique becomes crucial. Traditional terry cloth towels can be rough on the hair cuticle, causing friction that leads to frizz and breakage. Instead, switch to a microfiber towel or even a soft cotton t-shirt. Rather than vigorously rubbing your hair, gently squeeze and blot out excess water. The goal is to get your hair to a state of being damp, not sopping wet—approximately 60-70% dry. Starting your blowout on hair that is too wet significantly increases drying time, which exposes your hair to unnecessary heat damage and can tire your arms out before you've even started styling.
This pre-styling phase is the perfect time to apply your foundational products. While your hair is still damp, it's more receptive to absorbing products that will protect it and help build the style. This is the moment to detangle gently with a wide-tooth comb, starting from the ends and working your way up to the roots to minimize breakage. Rushing this stage is the most common mistake; taking these few extra minutes to properly prep your hair will make the entire styling process smoother, faster, and yield a far more professional and long-lasting result.
Choosing Your Arsenal: The Essential Tools and Products
A craftsman is only as good as their tools, and the same holds true for achieving a flawless bouncy at-home blowout. Investing in high-quality equipment not only makes the process easier but also protects your hair's integrity and delivers superior results. Your core toolkit should consist of a powerful hair dryer, the right brushes for your hair type and length, and sturdy clips for sectioning.

Tools of the Trade: The Dryer, Brushes, and Clips
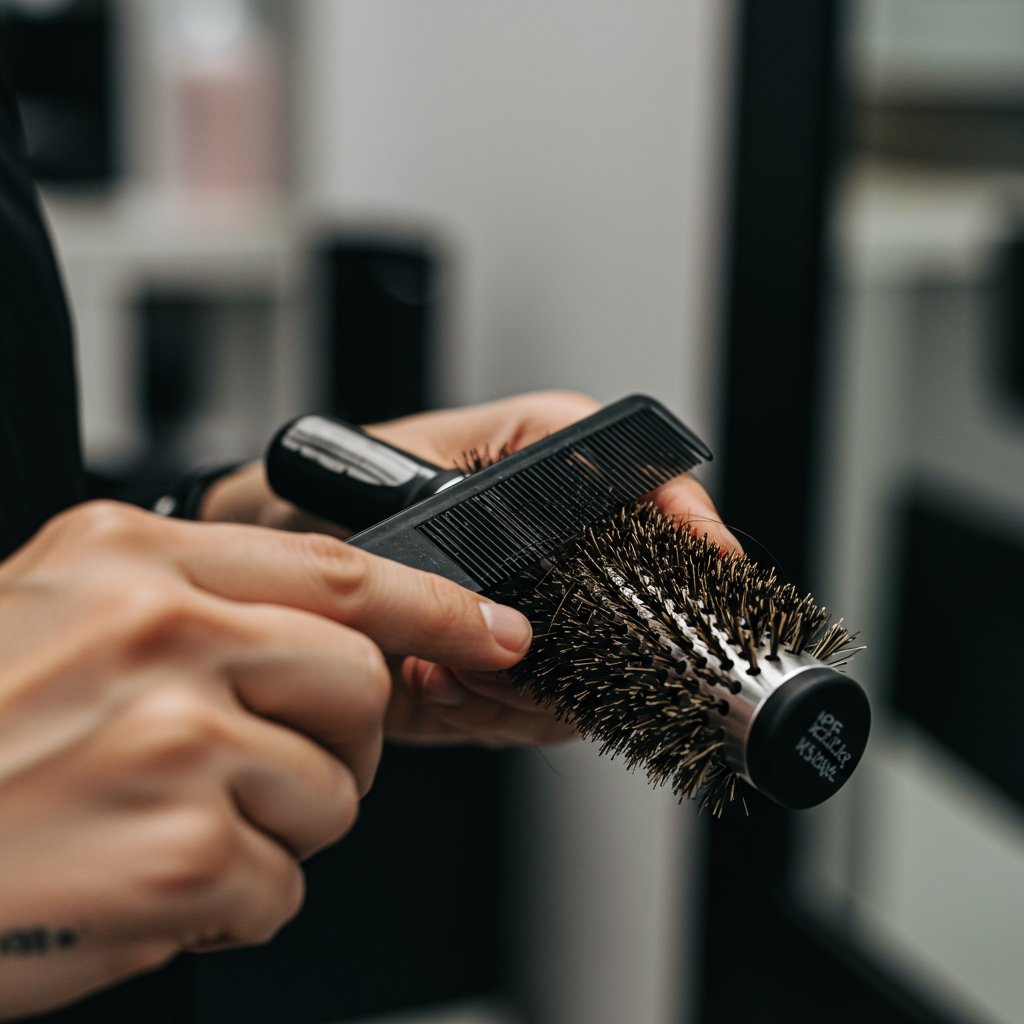
Your hair dryer is the star of the show. Look for a model with at least 1800 watts for efficient drying power. Ionic technology helps to break down water molecules faster and seal the hair cuticle, resulting in less frizz and more shine. A ceramic or tourmaline dryer provides even, gentle heat, which is crucial for preventing hot spots and damage. Most importantly, never, ever use your dryer without its concentrator nozzle. This attachment is essential for directing the airflow precisely down the hair shaft, which is the secret to a smooth, polished finish. For brushes, a set of round brushes is key. A ceramic or tourmaline barrel will heat up with the dryer, acting like a curling iron to shape the hair. The size of the barrel matters: use a small barrel (1-1.5 inches) for shorter hair or tighter curls, a medium barrel (2 inches) for mid-length hair and classic bounce, and a large barrel (2.5-3 inches) for long hair and soft, sweeping waves. Finally, a set of 4-6 professional duckbill or alligator clips are non-negotiable for clean and manageable sectioning.
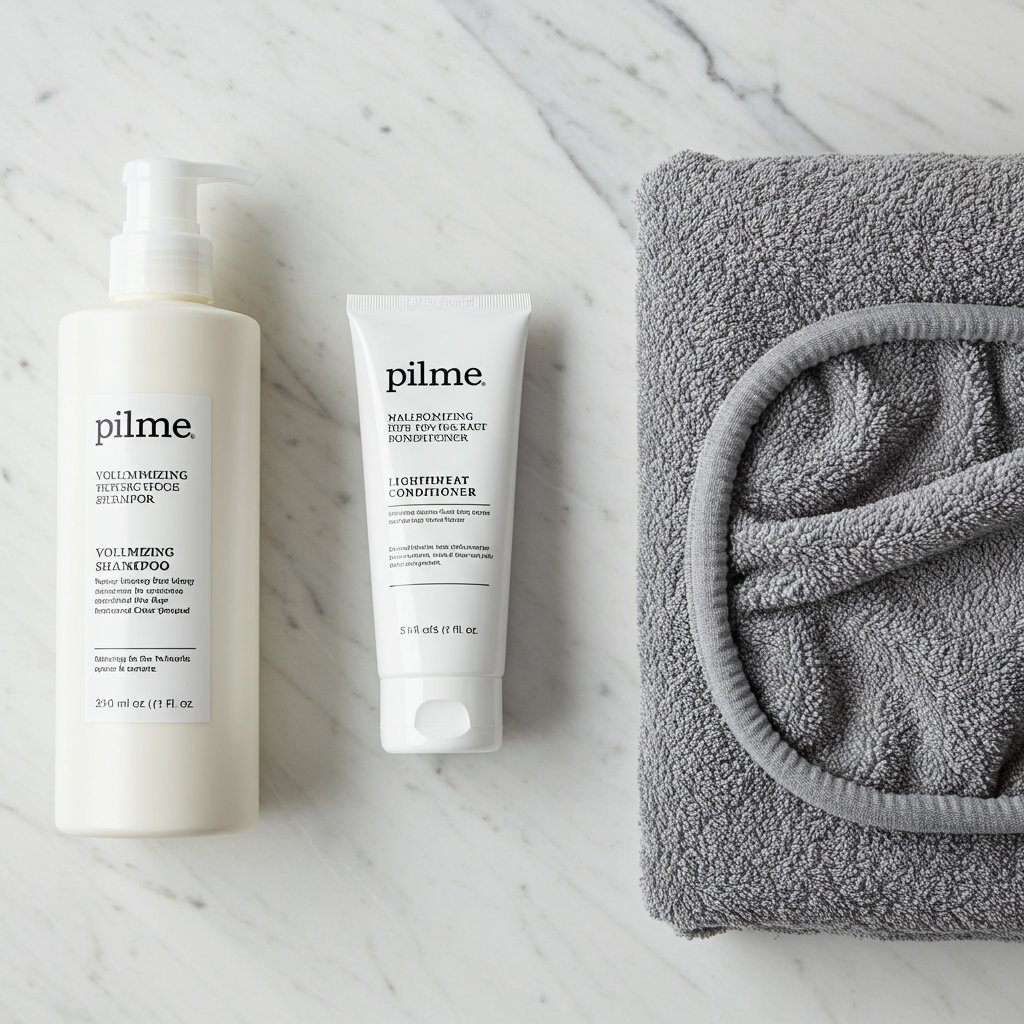
Product Power Players: Building Volume and Protection
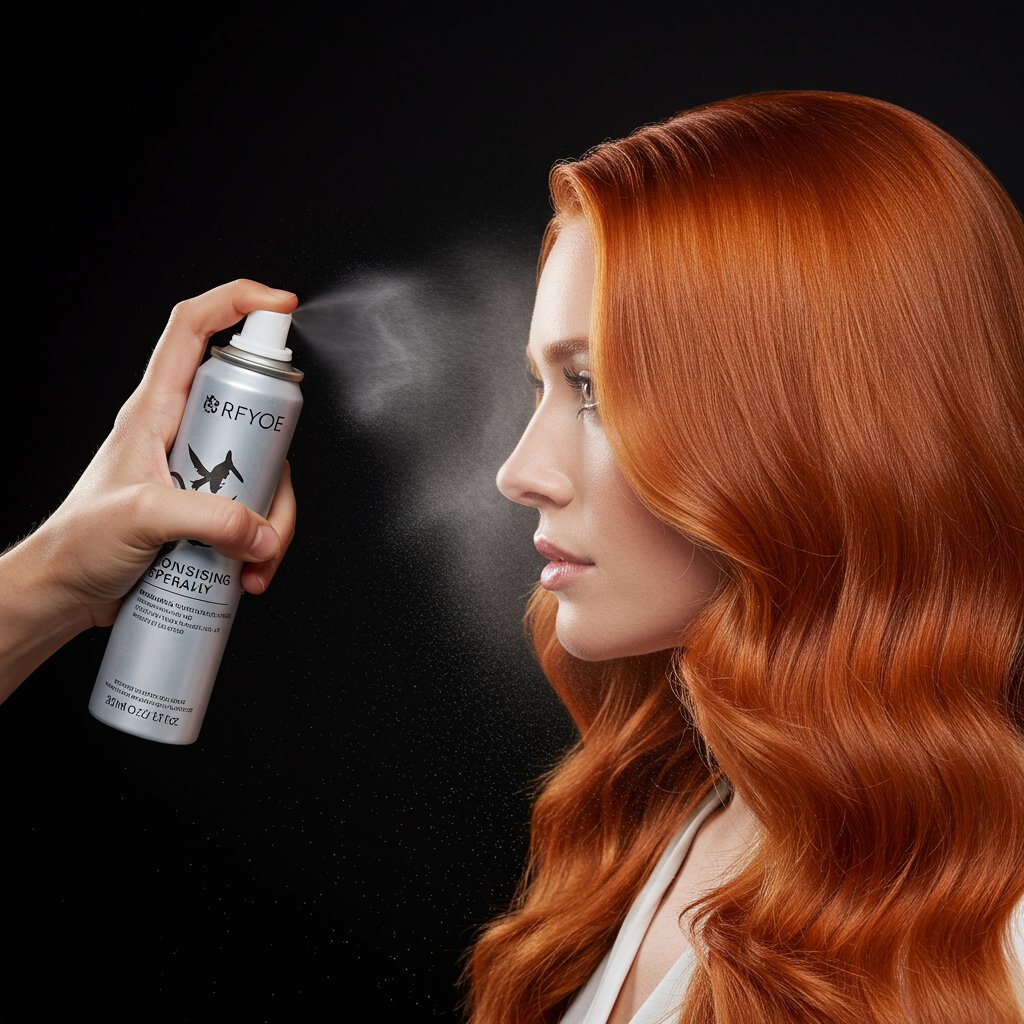
With your tools ready, it's time to select your product lineup. The absolute first product to touch your damp hair should always be a heat protectant. This creates a barrier between your hair and the heat, preventing damage, split ends, and moisture loss. Next, apply a volumizing mousse or root-lifting spray directly to the root area. These products contain polymers that create space between the hair strands, providing the structural support needed for lasting lift. For your mid-lengths and ends, a lightweight blowout cream or serum is ideal. This will help the brush glide through your hair, fight frizz, add shine, and provide a soft hold without weighing the hair down. Remember, less is more; start with a small amount and add more only if needed. Applying the right products in the right places is a strategic move that pays off with incredible volume and a polished finish.
The Art of Sectioning: A Blueprint for Success
If you've ever tried to blow dry your entire head of hair at once, you know the frustration of a tangled, frizzy, and unevenly dried result. Sectioning is the single most important organizational step that separates an amateur attempt from a professional-looking blowout. It provides control, ensures every strand is dried and styled properly, and dramatically cuts down on chaos and arm fatigue. Taking the two minutes required to section your hair is a non-negotiable step for achieving a smooth, voluminous, and bouncy at-home blowout.
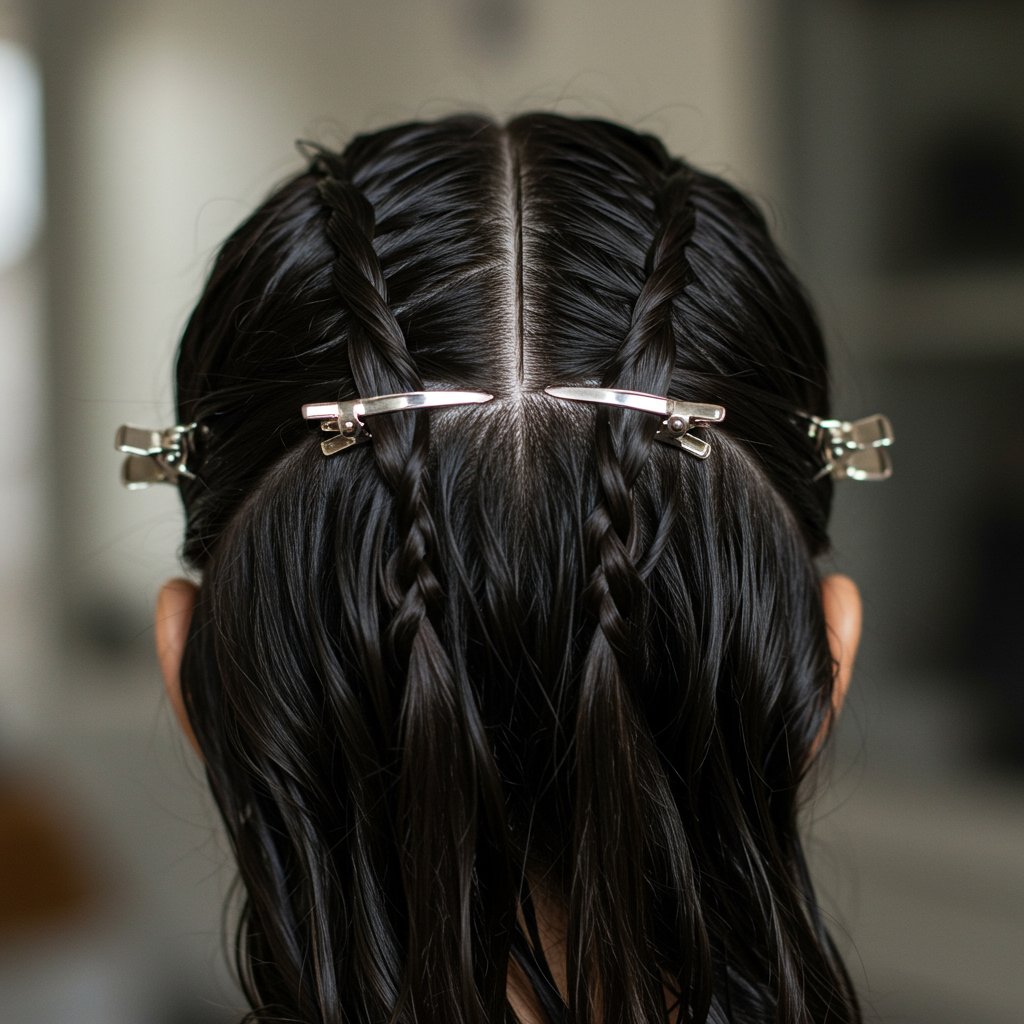
The most effective method for most hair types is the four-quadrant section. Start by creating a center part from your forehead all the way back to the nape of your neck. Then, part your hair horizontally from ear to ear across the crown of your head. This will leave you with four distinct, manageable sections. Use your professional clips to securely twist and fasten each section out of the way, leaving only the section you plan to work on first—typically one of the bottom back sections. This methodical approach prevents damp hair from mixing with dry hair, which can undo your hard work and create frizz.
Working with one small subsection at a time (about 1-2 inches wide, no wider than your brush) allows you to focus the heat and airflow for maximum impact. You can thoroughly dry the roots for lift, smooth the mid-lengths, and perfectly shape the ends. As you complete a section, you can let it cool or even clip it into a curl to set while you move on to the next. This systematic process ensures a consistent, high-quality result across your entire head, eliminating the dreaded puffy roots and limp ends that come from haphazard drying.
Mastering the Technique: The Step-by-Step Blowout Process
With your hair prepped and sectioned, it's time to begin the styling process. This is where technique transforms damp hair into a bouncy, voluminous masterpiece. The process can be broken down into three key phases: the rough dry, the round brush work, and focusing on the crown for that final lift.
Rough Drying for a Head Start
Before you even pick up your round brush, your goal is to get your hair about 80% dry. This step removes the bulk of the moisture, which drastically cuts down on the time you'll spend applying direct, high heat with a brush. Using your fingers, rough dry your hair, focusing the airflow from your dryer at the roots. To build in natural volume, flip your head upside down or use your fingers to lift the roots up and away from your scalp as you dry. Keep the dryer moving constantly to avoid concentrating heat on one spot. This initial phase sets the stage for volume and makes the subsequent brushwork more about styling and smoothing than just basic drying.
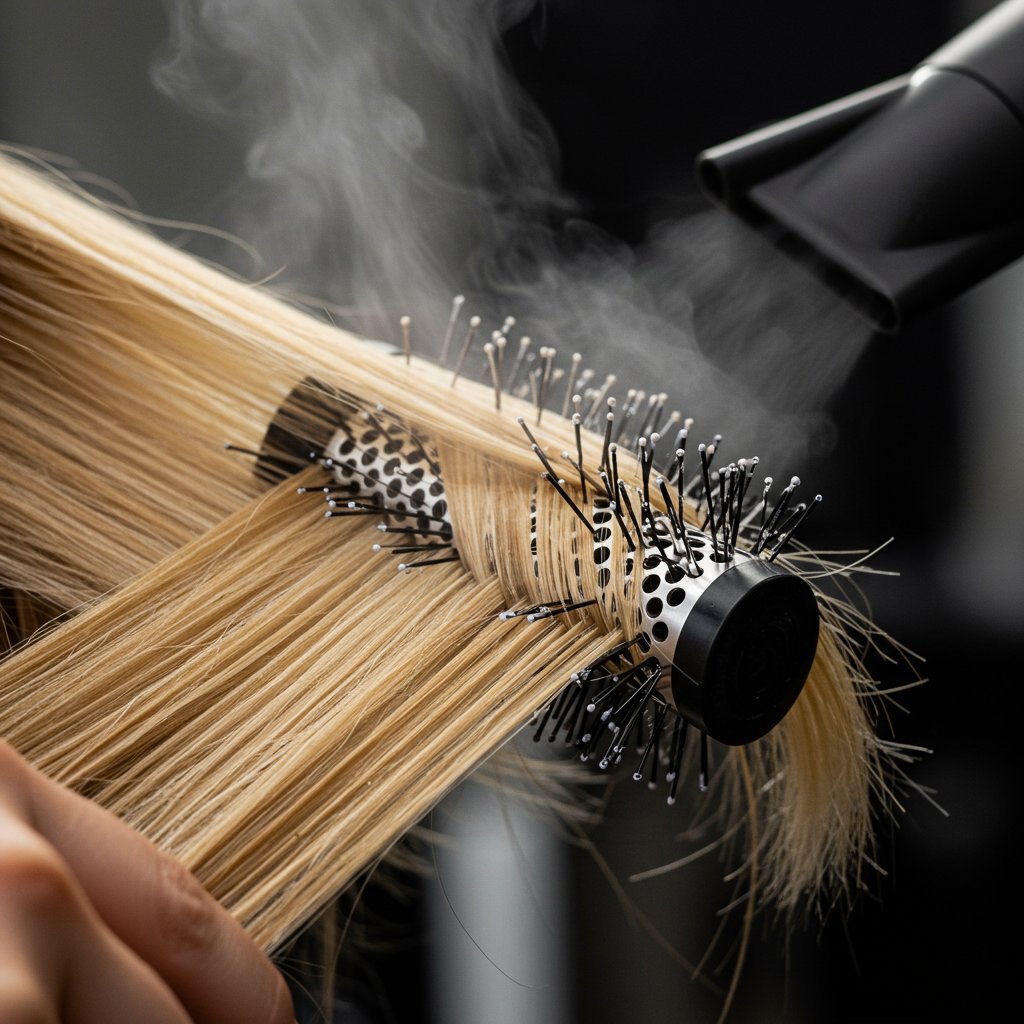
The Round Brush Roll: Creating Volume and Bend
Once your hair is 80% dry, it's time to introduce the round brush. Release your first section of hair from its clip (starting at the nape of your neck). Place the round brush at the root of the subsection and aim the dryer's nozzle (always pointing downwards along the hair shaft) at the brush. The key here is tension. You need to pull the hair taut with the brush as you glide it from root to end. This tension is what creates smoothness and shine. As you move the brush down the hair, follow it closely with the dryer. When you reach the ends, roll the brush back up towards the root a few times to create that signature bouncy curve. Before releasing the section, give it a blast of cool air with the cool shot button to set the shape.
The Crown and Top Sections: The Secret to Maximum Lift
Saving the top and front sections for last is a strategic move. This is the hair that everyone sees, and it's where you want the most dramatic volume. For the sections at the crown (the very top of your head), use the technique of over-direction. Instead of pulling the hair straight out from your head, lift the section straight up towards the ceiling as you dry from root to tip. This forces the root to stand away from the scalp, creating maximum lift. For the front pieces that frame your face, pull them forward and dry them in the direction you want them to fall, rolling the ends away from your face for a soft, flattering, face-framing effect. This meticulous attention to the final sections is the hallmark of a truly professional bouncy at-home blowout.
Setting for Success: Locking in Your Bouncy Blowout
You've done the hard work of building volume and creating shape, but the job isn't finished until the style is properly set. Heat styles hair, but it's the cooling process that locks it into place. Skipping this crucial step is why many at-home blowouts fall flat within an hour. The two most effective tools for setting your style are your hair dryer's cool shot button and a set of rollers.
As you finish drying each section with your round brush, and just before you release the hair, switch your dryer to the cool setting and give the section a 10-second blast of cold air. This rapidly cools the hair and sets the cuticle in the round shape you've created with the brush, dramatically increasing the longevity of the curl and bounce. It's a simple step that makes a world of difference. Think of it like setting a gel; the style is malleable when warm and becomes fixed as it cools. Applying this principle to every section ensures your entire style has staying power.
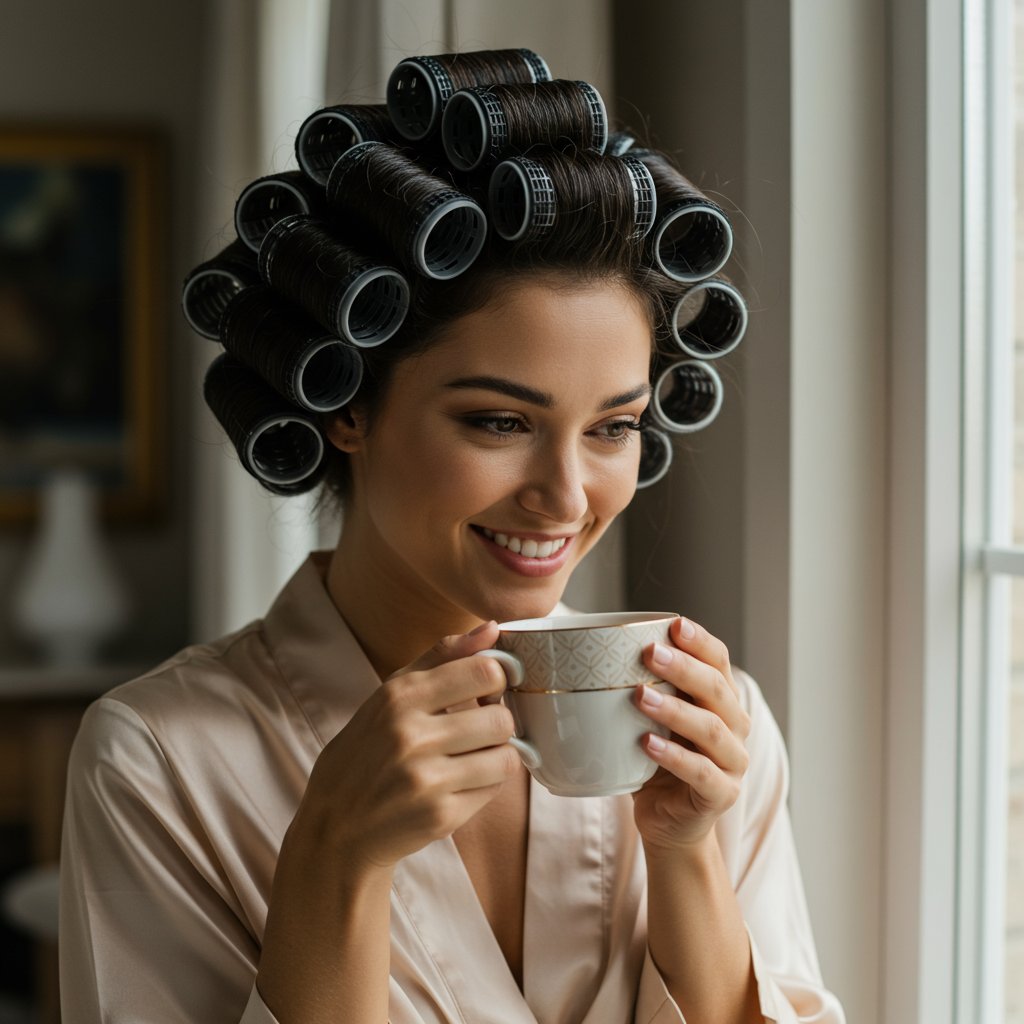
For an even more dramatic and long-lasting result, especially for the top sections where you want the most volume, incorporate velcro or hot rollers into your routine. After drying a section at the crown, and while it is still warm, roll it into a large velcro roller and secure it. Continue this for the entire top portion of your head. Let the rollers sit for at least 10-15 minutes, or until the hair is completely cool to the touch. This allows the hair to cool and set in an elevated, voluminous position, guaranteeing impressive height at the crown that will last all day. When you remove the rollers, your hair will have a beautiful, bouncy memory that won't easily quit.
The Finishing Touches: Perfecting and Preserving Your Style
Your hair is dry, cool, and set. Now it's time for the final touches that will perfect the look and ensure your hard work lasts. The key to this stage is using the right products sparingly to enhance, not hinder, the beautiful movement and volume you've created. A light touch is essential; you want your hair to look effortlessly bouncy, not stiff or weighed down.
Once you've removed any setting rollers, gently use your fingers to break up the curls and blend the sections together. Avoid brushing through your hair with a paddle brush at this stage, as it can pull out the volume. If you need to tame any flyaways, a small amount of smoothing cream or a light mist of shine spray on your palms, lightly grazed over the surface of your hair, will work wonders. To lock everything in, choose a flexible-hold hairspray. Hold the can about 10-12 inches away from your head and mist it lightly all over. For extra root lift, you can tilt your head to the side and spray lightly at the roots. For a more modern, piecey look, a texturizing spray can be applied to the mid-lengths and ends to add definition and lived-in texture.
Preserving your bouncy at-home blowout for a second or even third day is entirely possible with a few smart tricks. The number one enemy of a lasting blowout is moisture and friction from sleep. Combat this by sleeping on a silk or satin pillowcase, which reduces friction and prevents your hair from getting frizzy and tangled overnight. To maintain volume, you can loosely pile your hair on top of your head in a 'pineapple' using a gentle scrunchie. On day two, revive your roots and absorb any excess oil with a quality dry shampoo. A quick blast of the dryer at the roots can also help bring back some of the initial lift and volume.
Pro Tips for a Flawless Finish
Ready to take your blowout to the next level? Here are some insider tips that professional stylists use to guarantee a flawless finish every time.
- Clean Your Tools: Product buildup and hair on your brushes can transfer back onto your clean hair, making it look dull and greasy. Regularly clean your round brushes to ensure a smooth, clean finish.
- Don't Neglect the Nozzle: The concentrator nozzle is not an optional accessory. It's essential for directing airflow, which smooths the hair cuticle and reduces frizz. Your blowout will be 100% better with it on.
- Work in a Well-Ventilated Space: A hot, steamy bathroom is the enemy of a smooth blowout. The humidity in the air can cause your hair to frizz before you've even finished. Try to style in a cooler, less humid room if possible.
- Patience is a Virtue: Rushing is the fastest way to a mediocre result. Take your time with each section, ensuring it is 100% dry before moving on. Any lingering moisture will cause the style to drop and frizz later.
- Address Your Hairline Last: The fine baby hairs around your hairline dry the fastest and are prone to frizz. Save these for the very end, and use a smaller round brush for more control, directing the air down and away from your face for a polished frame.
Frequently Asked Questions (FAQ)
Why does my bouncy blowout fall flat so quickly?
This is often due to three main factors: your hair wasn't 100% dry, you didn't use the cool shot button, or you used products that were too heavy. Even a tiny bit of moisture left in the hair shaft will cause it to revert to its natural texture and lose volume. Always ensure each section is completely dry, and always set it with a blast of cool air. Also, be mindful of using heavy creams or serums, especially near the roots, as they can weigh the hair down.
Can I achieve a bouncy blowout on fine hair?
Absolutely! The key for fine hair is using the right volumizing products and techniques. Start with a volumizing mousse at the roots, and be diligent about over-directing sections (pulling them up and over) to create lift at the scalp. Using velcro rollers after drying the top sections can also provide incredible, long-lasting volume for finer hair types.
How often can I do a blowout at home without damaging my hair?
While a blowout is less damaging than direct-contact tools like flat irons, it's still heat styling. To minimize damage, always use a high-quality heat protectant. Listen to your hair; if it starts to feel dry or brittle, give it a break for a few days. Generally, 2-3 times a week is acceptable for healthy, well-protected hair. You can also extend the life of your blowout with dry shampoo to reduce the frequency.
What's the biggest mistake people make when doing an at-home blowout?
The most common mistake is improper sectioning or not sectioning at all. Trying to dry large, unmanageable chunks of hair leads to an uneven result with frizzy, still-damp spots underneath and overly dry sections on top. Taking the time to create clean, small sections is the number one thing you can do to improve your results.
Is a blowout brush better than a traditional dryer and round brush?
Blowout brushes (one-step dryer brushes) can be a fantastic tool for beginners as they are easier to handle than juggling a brush and dryer. They can create a very smooth, voluminous look. However, a traditional dryer and round brush offer more versatility and precision. You have more control over the heat, airflow, and tension, which allows for more customized styling, especially for creating lift at the root and defining layers.
How do I avoid frizz when doing a blowout?
Frizz control starts in the shower with a moisturizing conditioner. Use a microfiber towel to blot, not rub, your hair. Always apply a heat protectant, many of which have anti-frizz properties. During the blowout, make sure the dryer's nozzle is always attached and pointing down the hair shaft to smooth the cuticle. Finally, a thorough cool shot on each section will seal the cuticle shut, locking out humidity and frizz.
Conclusion: Embrace Your Inner Stylist
Mastering the bouncy at-home blowout is a transformative skill that puts the power of a great hair day firmly in your hands. It's a ritual of self-care that, with practice, becomes an enjoyable and rewarding part of your routine. By understanding the importance of proper preparation, investing in the right tools, and dedicating time to technique—from methodical sectioning to the crucial cool-down—you can consistently achieve the kind of voluminous, shiny, and healthy-looking hair that turns heads.
Remember that every hair type is unique, and part of the journey is discovering the specific combination of products and brush sizes that work best for you. Don't be discouraged if your first few attempts aren't perfect. Like any skill, it takes practice. Embrace the process, and soon you'll be creating salon-worthy styles with confidence and ease. And, of course, for those special occasions when you want to be completely pampered or achieve a specific, intricate look, the experts at professional hair salons are always there to provide their artistic touch and ensure you look and feel your absolute best.


