The Ultimate Knotless Braids Guide: From Prep to Aftercare | 2025 Edition
Introduction: The Gentle Revolution of Knotless Braids
Protective styles are a cornerstone of healthy hair care, offering a much-needed break from daily manipulation and environmental stressors. For years, traditional box braids have been a go-to choice, but a modern, gentler alternative has taken the hair community by storm: knotless braids. Unlike their predecessors, which start with a tight knot at the base, knotless braids begin with your natural hair and gradually feed in braiding hair. This simple yet revolutionary change results in a style that is lightweight, incredibly flexible, and significantly less stressful on the scalp and edges. This tension-free technique has made them a favorite for anyone seeking beauty without the pain.

This ultimate knotless braids guide is your all-encompassing resource for mastering this popular hairstyle. We will walk you through every single step of the journey, from the critical preparation phase that sets the foundation for a flawless install, to the detailed aftercare routines that will keep your braids looking pristine for weeks. Whether you're a seasoned braid enthusiast or considering knotless braids for the first time, this guide will provide the expert knowledge you need to protect your natural hair, extend the life of your style, and ensure a beautiful, healthy, and comfortable experience. Prepare to unlock the secrets to achieving and maintaining the perfect set of knotless braids.
What Are Knotless Braids and Why Are They So Popular?
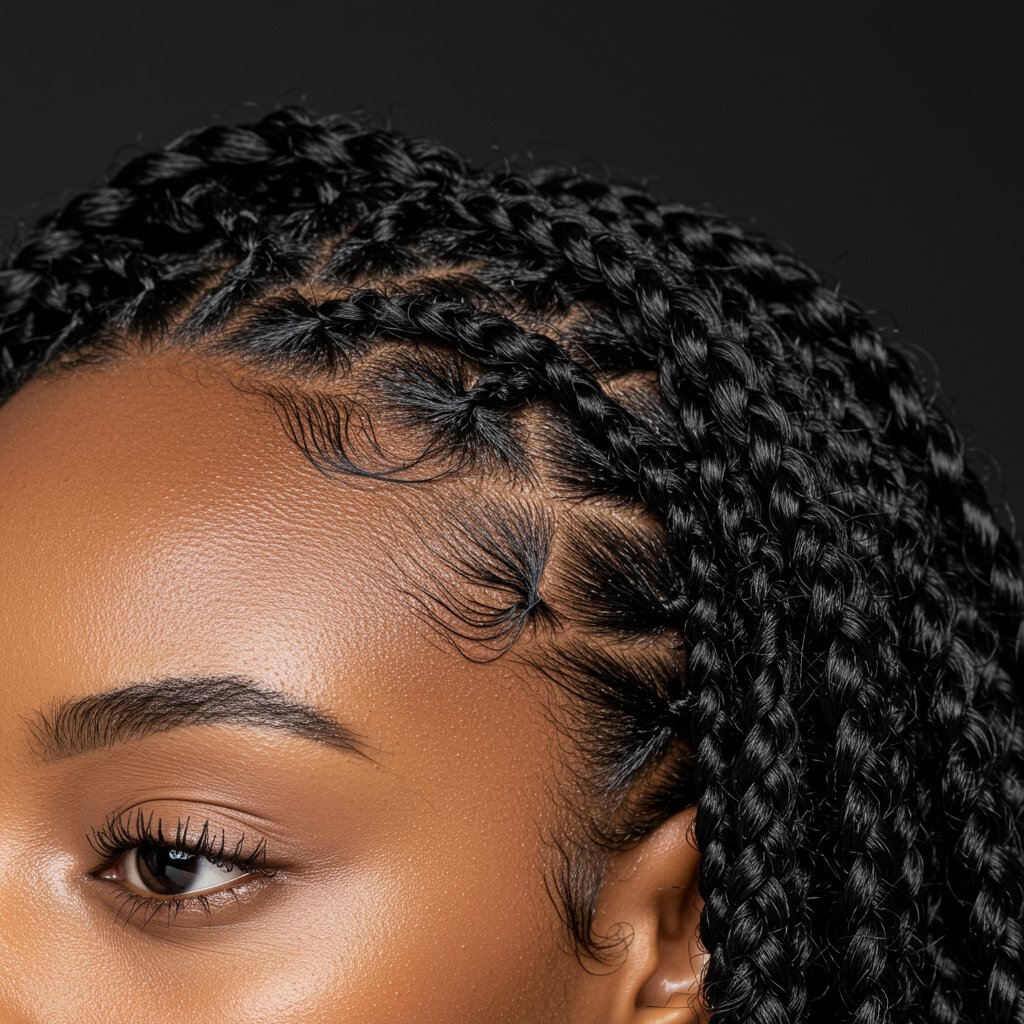
At its core, the knotless braiding technique is defined by its beginning. Traditional box braids are created by wrapping a knot of braiding hair tightly around a section of natural hair at the root. This knot secures the extension but is also the primary source of tension, which can lead to scalp sensitivity, traction alopecia, and limited initial styling flexibility. Knotless braids, however, utilize a feed-in method. The stylist begins by braiding a small section of your natural hair and then incrementally adds small pieces of braiding hair as they move down the hair shaft. This creates a smooth, flat transition from your natural hair to the extension, completely eliminating the bulky, tight knot at the base.
The soaring popularity of knotless braids is directly tied to their significant benefits for hair and scalp health. The most celebrated advantage is the drastic reduction in tension. Without the initial knot pulling at the follicle, the scalp experiences immediate relief. This makes the style comfortable from day one, with no “break-in” period of soreness. This gentler approach is particularly crucial for those with sensitive scalps or fine hair. Furthermore, the flat-lay of the braids allows for immediate versatility—you can pull them into a high ponytail or bun right after your appointment without discomfort. The seamless integration also provides a more natural and authentic appearance, as the braids appear to be growing directly from the scalp.
Beyond comfort and aesthetics, knotless braids promote a healthier environment for your hair to thrive. The reduced tension minimizes the risk of hair breakage and traction alopecia, a form of hair loss caused by constant pulling. This makes them a superior protective style, as they truly protect the hair rather than potentially harming it. The lightweight feel also means less stress on your neck and head, making them a practical choice for long-term wear. This combination of scalp health, comfort, versatility, and a natural look has solidified knotless braids as more than just a trend—they are a new standard in protective styling.
The Ultimate Pre-Braid Prep Routine
A flawless set of knotless braids begins long before you sit in the stylist's chair. Proper preparation of your natural hair is the most critical factor in the longevity of your style and the health of your hair underneath. A well-prepped canvas ensures that your hair is strong, moisturized, and ready to be braided, minimizing potential breakage and ensuring a smooth takedown process weeks later. Neglecting this stage can lead to dryness, scalp irritation, and hair damage. Think of it as priming a wall before painting; it’s the foundational work that guarantees a beautiful and lasting result.
Cleansing and Clarifying
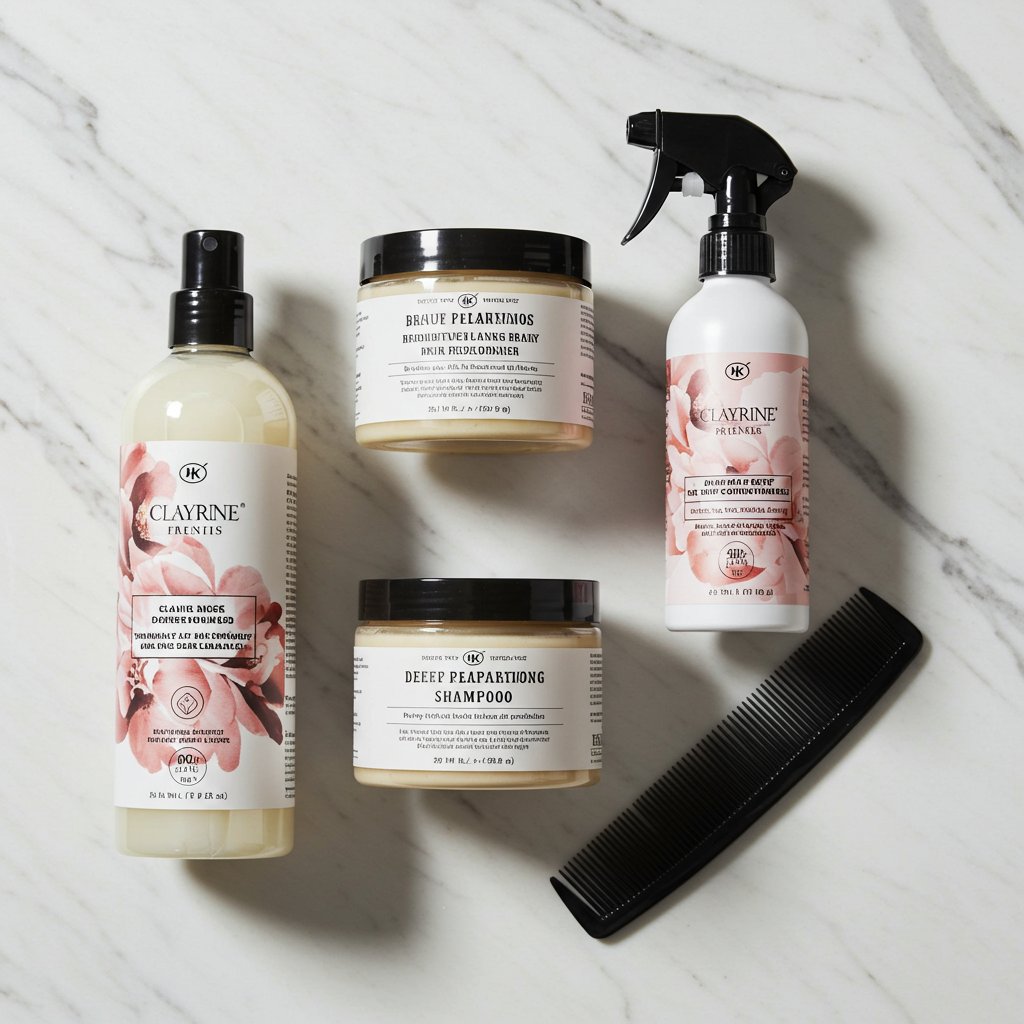
Start your prep with a thorough wash day, focusing on creating a pristine scalp environment. Use a sulfate-free clarifying shampoo to remove any product buildup, dirt, and excess oils from your scalp and hair strands. A clean scalp is essential for promoting healthy hair growth and preventing issues like itchiness or flakiness once the braids are installed. Pay close attention to your scalp, using the pads of your fingers to massage the shampoo in and lift away impurities. Follow up with a moisturizing shampoo to replenish any hydration that was stripped during the clarifying process, ensuring your hair isn't left feeling dry.Deep Conditioning and Moisturizing
This is a non-negotiable step. After cleansing, apply a rich, hydrating deep conditioner or hair mask from root to tip. Protective styles keep your hair tucked away for weeks, so it’s vital to infuse it with as much moisture as possible beforehand. Choose a product with ingredients like shea butter, argan oil, or glycerin. For an extra boost, use a steamer or a plastic cap to trap heat, which helps the conditioner penetrate the hair shaft more effectively. Let it sit for at least 30 minutes before rinsing thoroughly. Once rinsed, apply a quality leave-in conditioner and seal that moisture in with a lightweight oil, focusing on your ends, which are the oldest and most fragile part of your hair.Detangling and Stretching
Finally, your hair must be fully detangled and stretched. Working in small, manageable sections, use a wide-tooth comb or your fingers to gently remove all knots and tangles, starting from the ends and working your way up to the roots. This prevents breakage during the parting and braiding process. After detangling, it’s crucial to stretch your hair. This can be done by blow-drying on a low to medium heat setting (always with a heat protectant), or through heatless methods like banding, African threading, or large braids/twists left to air-dry. Stretched hair allows the stylist to create cleaner parts and ensures a smoother, neater braid application, resulting in a sleeker final look.Choosing the Right Hair and Stylist
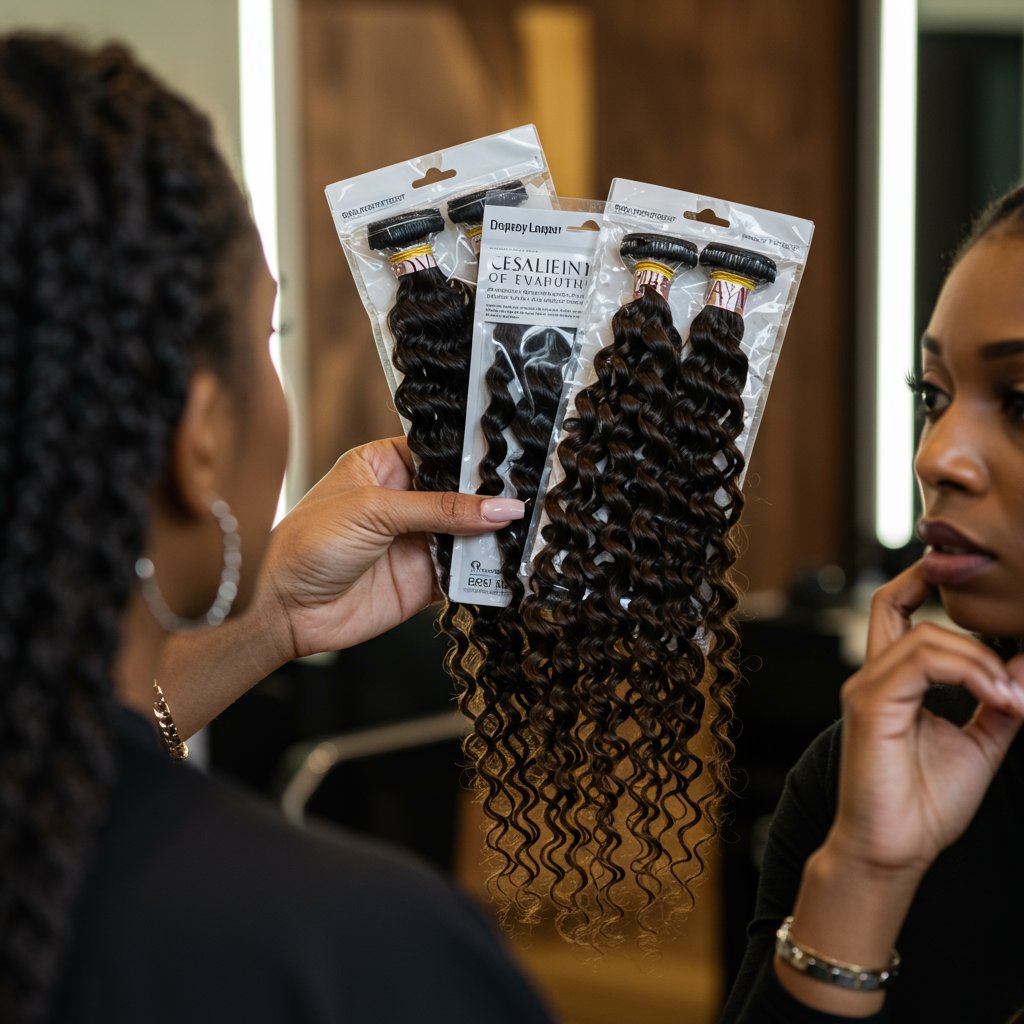
The final outcome of your knotless braids depends heavily on two key decisions: the type of braiding hair you use and the skill of the stylist you choose. These elements work in tandem to create the desired look, feel, and durability of your style. Selecting the right hair can affect everything from the weight of the braids to their texture and finish, while a talented stylist ensures the technique is executed flawlessly for optimal scalp health and aesthetic appeal. Investing time in these choices will pay dividends in the quality and longevity of your protective style.
Types of Braiding Hair
The most common and popular choice for knotless braids is pre-stretched Kanekalon hair. This synthetic fiber is lightweight, easy to work with, and comes in a vast array of colors. The "pre-stretched" aspect is crucial, as it means the fibers are already tapered at the ends, saving the stylist time and creating a more natural, less bulky finish. Another option is human hair, which offers the most natural look and feel but comes at a significantly higher price point and can be heavier. For most, high-quality, pre-stretched synthetic hair like X-Pression or Ruwa is the perfect balance of quality, affordability, and ease of use.Selecting a Braid Size and Length
Knotless braids are incredibly versatile, and the size and length you choose will define your look. Small or micro braids offer a very full, long-lasting style but require a longer installation time and can be more difficult to take down. Medium braids are the most popular choice, offering a perfect balance of fullness, manageable installation time, and ease of maintenance. Large or jumbo braids are quicker to install and make a bold statement, but they may not last as long and can sometimes put more weight on individual sections of hair. Consider your lifestyle, hair density, and desired maintenance level when deciding on the perfect size and length for you.Finding a Qualified Braider
Entrusting your hair to a skilled professional is paramount. Look for a stylist who specializes in knotless braids and has a strong portfolio showcasing their work. Check online reviews, social media pages, and ask for recommendations. A great braider will prioritize the health of your natural hair. During a consultation, they should be able to discuss proper parting, tension, and aftercare. Pay attention to their technique; a qualified stylist will have a gentle hand and ensure the braids are not installed too tightly at the root. Cleanliness of their workspace and tools is also a critical indicator of their professionalism.The Knotless Braiding Process: What to Expect
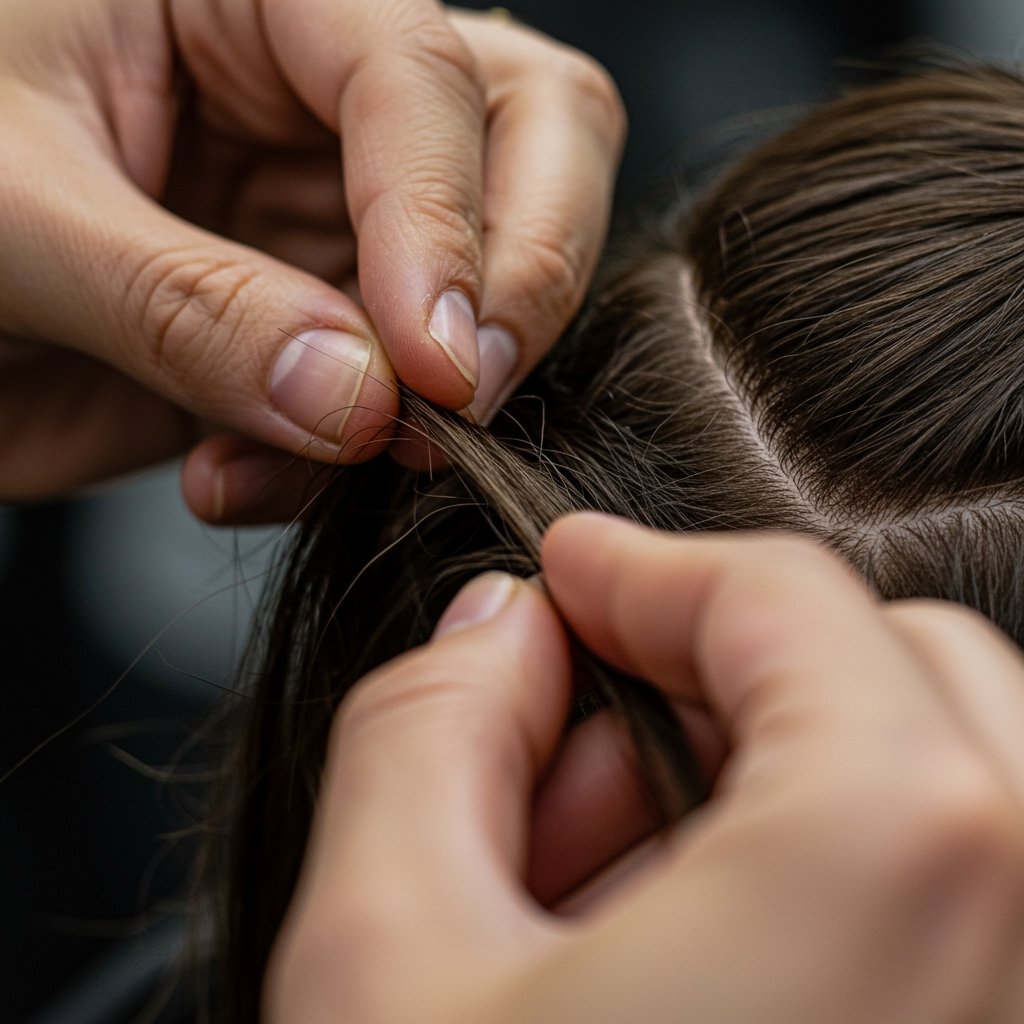
Understanding the knotless braiding process can help you feel more comfortable and prepared for your appointment. Unlike the often-uncomfortable start of traditional braids, the knotless technique is designed to be gentle from the very first step. The duration of the appointment can vary significantly, typically ranging from 4 to 9 hours, depending on the desired size and length of the braids, as well as your hair's density and the stylist's speed. It's a lengthy process, so it's wise to bring snacks, a drink, and some form of entertainment. Clear communication with your stylist about your desired outcome before they begin is key to ensuring you leave happy with the final result.
The process begins with precise parting. Your stylist will section your clean, stretched hair into the desired pattern—typically box, triangle, or free-form parts. The neatness of these parts forms the foundation of the entire style. Once a section is isolated, the magic of the knotless technique begins. The stylist will start braiding with just your natural hair for the first few stitches, right at the scalp. This is the crucial difference that eliminates the tension-causing knot. After the base is established, they will begin the feed-in process, seamlessly adding small pieces of braiding hair into the braid as they work their way down. This is repeated meticulously across your entire head until the style is complete. The ends are then sealed, usually by dipping them in hot water, which secures the braid and gives it a smooth, clean finish.
Daily and Weekly Aftercare for Long-Lasting Braids
Once your beautiful knotless braids are installed, a consistent aftercare routine is essential to keep them looking fresh and to maintain the health of your natural hair underneath. Proper maintenance prevents scalp dryness, reduces frizz, and extends the life of your style, ensuring you get the most out of your investment. A simple yet diligent routine can make the difference between braids that last four weeks and braids that look great for up to eight.
Moisturizing Your Scalp and Hair
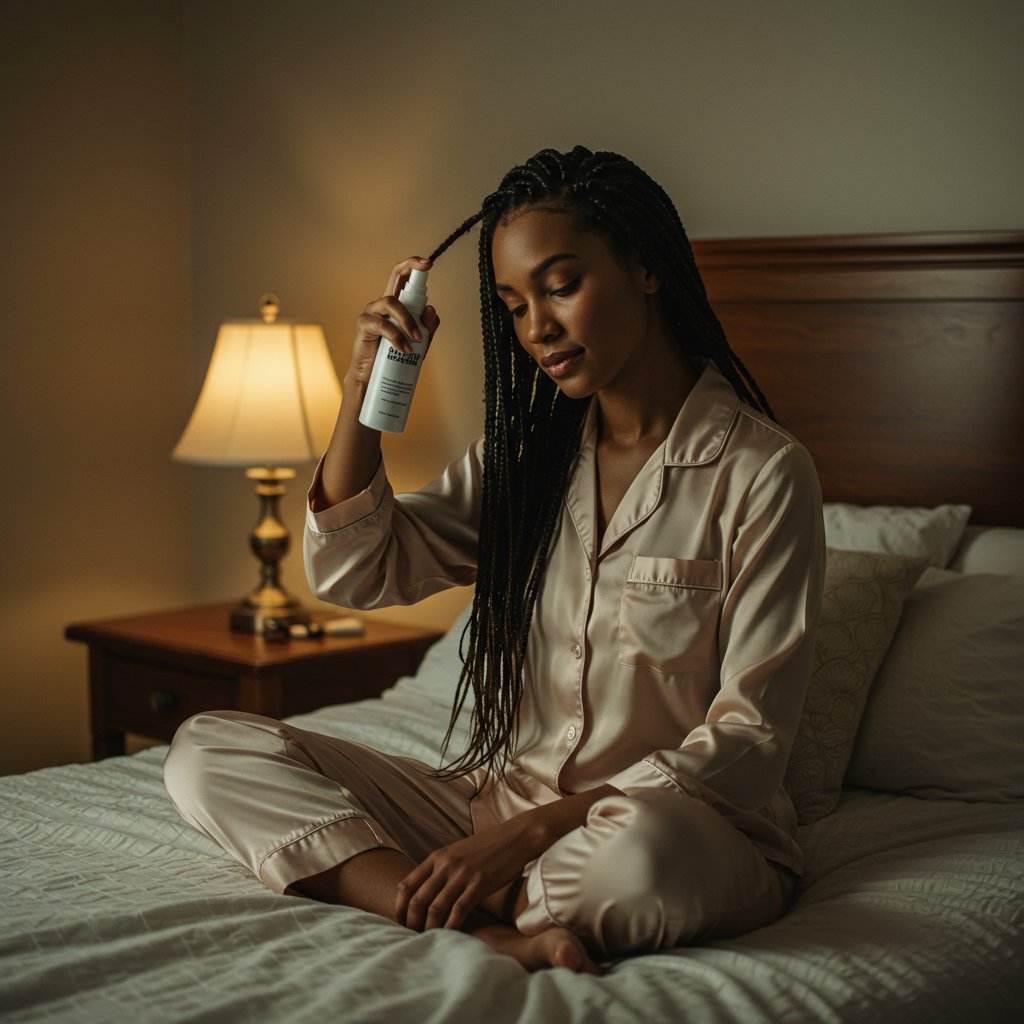
Your scalp and the natural hair within the braids still need moisture. Daily or every other day, use a lightweight, water-based leave-in spray to hydrate your hair. Look for products with ingredients like aloe vera or glycerin. Lightly mist your braids and focus the spray on your scalp. Follow up by applying a light natural oil, such as jojoba, grapeseed, or almond oil, directly to your scalp and along the length of your braids to seal in the moisture. This helps prevent a dry, itchy scalp and keeps your natural hair from becoming brittle. Avoid heavy creams or greases, as they can cause significant product buildup that is difficult to wash out.Nighttime Protection
Protecting your braids while you sleep is non-negotiable. Friction from cotton pillowcases can cause frizz, lead to moisture loss, and even weaken your edges over time. To prevent this, always sleep in a large satin or silk bonnet or scarf. This will keep your braids smooth, neat, and protected. If you find bonnets uncomfortable, using a satin or silk pillowcase is an excellent alternative that provides similar benefits for both your hair and skin.Cleansing Your Braids
Yes, you should wash your braids! Aim to cleanse your scalp and hair every 2-3 weeks to remove product buildup and sweat. To do this, dilute a sulfate-free shampoo with water in an applicator bottle. Apply the mixture directly to your scalp, section by section. Gently massage your scalp with the pads of your fingers to lift dirt. Let the shampoo run down the length of the braids, but avoid vigorous rubbing, which can cause frizz. Rinse thoroughly, ensuring all shampoo is gone. Follow up with a diluted leave-in conditioner sprayed along the braids. Gently squeeze out excess water with a microfiber towel or an old t-shirt and allow them to air-dry completely to prevent mildew.Extending the Life of Your Knotless Braids
While knotless braids are a relatively long-lasting style, there are several techniques you can employ to maximize their lifespan and keep them looking sharp. The main culprits that shorten the life of braids are frizz and new growth. With a few strategic touch-ups and maintenance habits, you can easily push your style from a 4-week look to a 6 or even 8-week masterpiece, all while ensuring your natural hair remains healthy.

One of the most effective ways to refresh your style is by getting a touch-up. After 3-4 weeks, the braids around your hairline and main part are often the first to look grown out. Many stylists offer a touch-up service where they will take down and reinstall the first one or two rows of braids around the perimeter of your head. This gives the illusion of a brand new set of braids for a fraction of the time and cost of a full reinstallation. It's an excellent way to extend the wear of your style for another couple of weeks.
To manage frizz and flyaways that appear over time, a good quality mousse is your best friend. Apply a generous amount of a non-alcoholic styling mousse over your braids, smooth it down with your hands, and then tie your hair down with a silk or satin scarf for at least 30 minutes, or until dry. This will lay down any stray hairs and restore that sleek, fresh-from-the-salon look. Additionally, be mindful of how you style your braids. While knotless braids are versatile, constantly pulling them into tight, high styles can accelerate frizz and put stress on your edges. Opt for looser styles more often to preserve the neatness of your roots.
The Safe Takedown Process
The final and perhaps most crucial phase of your knotless braids journey is the takedown. How you remove your braids is just as important as how they were installed and maintained. A rushed or improper takedown can lead to massive amounts of breakage and shedding, negating all the benefits of the protective style. Set aside several hours for this process, be patient, and treat your hair with the utmost care. It's a great time to put on your favorite show or podcast and settle in.

Gathering Your Tools
Before you begin, gather everything you'll need to make the process smooth and efficient. You will want a pair of small scissors, a rat-tail comb for unraveling, and a bottle of conditioner mixed with water in a spray bottle or a good detangling product. Having a few hair clips to section off your hair as you work is also incredibly helpful. The conditioner spray will provide slip, making it easier to comb through the shed hair and product buildup at the base of each braid.Step-by-Step Removal
Start by cutting the braid a few inches below where your natural hair ends. If you're unsure, it's always better to cut lower down to avoid accidentally snipping your own hair. After cutting the end, begin to gently unravel the braid from the bottom up. Once you reach the base where your natural hair begins, you will likely find some product and shed hair buildup. Spray this area with your conditioner mix and use your fingers or the tail of the rat-tail comb to gently work through it. Hair naturally sheds 50-100 strands a day, so it's normal to see a significant amount of shed hair that has been trapped in the braid. Do not panic. Work through each braid one by one, and do not attempt to comb through your entire head of hair until all braids have been removed.Post-Takedown Hair Care
Once all the braids are out, your hair will need some serious TLC. Before you even think about shampooing, apply a generous amount of conditioner or an oil like coconut or olive oil to your dry hair and begin to gently detangle with your fingers, section by section. This pre-poo step helps to melt away the last of the buildup and makes the final detangling process much easier. After you've finger-detangled, use a wide-tooth comb to finish. Then, proceed with a clarifying shampoo followed by a deeply hydrating and protein-rich treatment to restore strength and moisture to your strands. Let your hair breathe for at least a week or two before installing another long-term protective style.Pro Tips for the Best Knotless Braid Experience
- Communicate Clearly: Have a detailed conversation with your stylist before they start. Show them inspiration pictures of the size, length, and parting style you want.
- Listen to Your Scalp: While knotless braids are low-tension, if any particular braid feels uncomfortably tight, speak up immediately. A good stylist will happily adjust it.
- Don't Neglect Your Edges: Apply a light oil to your edges nightly and avoid styles that pull on them excessively to keep them healthy and full.
- Stay Hydrated: Healthy hair starts from within. Drinking plenty of water contributes to hydrated, healthy hair growth under your braids.
- Trim Your Ends: Before your install, get a light trim to remove any split ends. This prevents them from traveling up the hair shaft while in the protective style.
- Patience is Key: Both the installation and takedown processes are long. Do not rush either one to ensure the best results and minimal damage to your hair.
Knotless Braids FAQ
Q1: How long do knotless braids last?
Knotless braids typically last between 4 to 8 weeks. The exact duration depends on the size of the braids (smaller braids tend to last longer), your hair texture, and how well you follow your aftercare routine.
Q2: Are knotless braids damaging to your hair?
When installed and maintained correctly, knotless braids are one of the least damaging protective styles available. Because they don't start with a tight knot at the root, they place minimal tension on the scalp and follicles, significantly reducing the risk of traction alopecia and breakage.
Q3: Can I get knotless braids with short hair?
Yes, you can get knotless braids with short hair, but you'll generally need at least 2-3 inches of hair for the stylist to have enough to grip and begin the braid securely. The feed-in method works very well for blending shorter hair.
Q4: How much do knotless braids typically cost?
The cost varies widely based on your location, the stylist's experience, and the size and length of the braids you choose. Generally, you can expect to pay anywhere from $150 to $600+. Smaller, longer braids will be at the higher end of the price range due to the increased time and labor involved.
Q5: Can I swim with knotless braids?
You can swim with knotless braids, but it requires some aftercare. The braids can become very heavy when wet. After swimming, it's crucial to thoroughly rinse your hair with fresh water to remove chlorine or salt. Then, gently squeeze out excess water and ensure your scalp and braids dry completely to prevent mildew.
Q6: How do I stop my scalp from itching?
Itching is usually caused by a dry scalp or product buildup. To combat this, regularly spritz your scalp with a moisturizing spray containing ingredients like tea tree oil or aloe vera. You can also do a scalp cleanse with an apple cider vinegar rinse between washes. If you have a sensitivity to synthetic hair, soaking the braiding hair in an apple cider vinegar solution and allowing it to dry before your appointment can remove the alkaline coating that often causes irritation.
Conclusion: Embrace the Beauty and Comfort
Knotless braids represent a significant evolution in the world of protective styling, offering a beautiful, versatile, and—most importantly—healthy way to protect your natural hair. From the crucial first step of preparing your hair to be a perfect canvas, to the diligent aftercare that keeps them looking flawless, every stage of the process plays a role in your final result. By understanding the technique, choosing a skilled stylist, and committing to a consistent maintenance routine, you can enjoy this stunning style without compromising the health of your hair and scalp.
This guide has armed you with the comprehensive knowledge needed to embark on your knotless braids journey with confidence. Remember that protective styles are not just about aesthetics; they are a tool for nurturing and growing your natural hair. Embrace the freedom, comfort, and elegance that knotless braids provide, and enjoy a style that truly cares for your hair as much as you do.


