Twists and Twist-Outs for Natural Hair: The Ultimate Guide to Definition and Health | Professional Salon Insights
The Timeless Allure of Twists and Twist-Outs for Natural Hair
In the vibrant world of natural hair, few styles offer the versatility, protective benefits, and stunning results of twists and twist-outs. This iconic duo is more than just a hairstyle; it's a fundamental technique that unlocks the full potential of coily, kinky, and curly textures. From elegant, rope-like twists that serve as a long-lasting protective style to the bouncy, defined curls of a perfect twist-out, this method is a cornerstone of healthy hair care routines. Whether you're a seasoned naturalista or just beginning your journey, mastering twists and twist-outs for natural hair is an essential skill that promotes hair health while delivering breathtaking aesthetic results.

This comprehensive guide serves as your ultimate resource for everything related to this beloved styling technique. We will delve deep into the nuances of preparation, explore various twisting methods, and provide a step-by-step roadmap to achieving a flawless, frizz-free twist-out every time. Understanding the science behind product application, the importance of proper takedown, and the secrets to long-lasting styles will empower you to embrace your natural texture with confidence. Get ready to transform your hair care regimen and discover why twists and twist-outs remain a celebrated staple for achieving defined, moisturized, and healthy natural hair.
Understanding the Foundation: What Are Twists and Twist-Outs?
Before diving into the techniques, it's crucial to understand the distinction and relationship between twists and the resulting twist-out. They are two sides of the same coin, each offering unique benefits. Twists, in their most basic form, are a hairstyle created by wrapping two strands of hair around each other from root to tip. This can be done on damp or dry hair and serves as a beautiful protective style on its own. It minimizes manipulation, tucks away ends to prevent breakage, and helps retain moisture, making it an excellent choice for promoting hair growth and length retention.
Twists: The Protective Style
Twists are incredibly versatile. They can be worn for days or even weeks, depending on their size and the maintenance routine. They can be styled into updos, ponytails, or simply worn down. The process of installing twists helps to stretch the hair gently, which can reduce shrinkage and make detangling easier down the line. It's a style that works for you, protecting your strands from environmental stressors and the friction of daily styling.The Twist-Out: The Defined Result
The twist-out is the hairstyle that is revealed after the twists are carefully taken down. As the hair dries and sets in the twisted pattern, it creates a beautifully defined, elongated curl or wave. The final look depends heavily on the size of the twists, the products used, and the takedown method. A successful twist-out results in voluminous, soft, and highly defined curls that showcase the hair's natural texture in a more uniform pattern. It is the celebrated outcome of the initial protective style, offering a completely new look without additional heat or complex styling.Choosing Your Twist: A Guide to Different Styles and Sizes
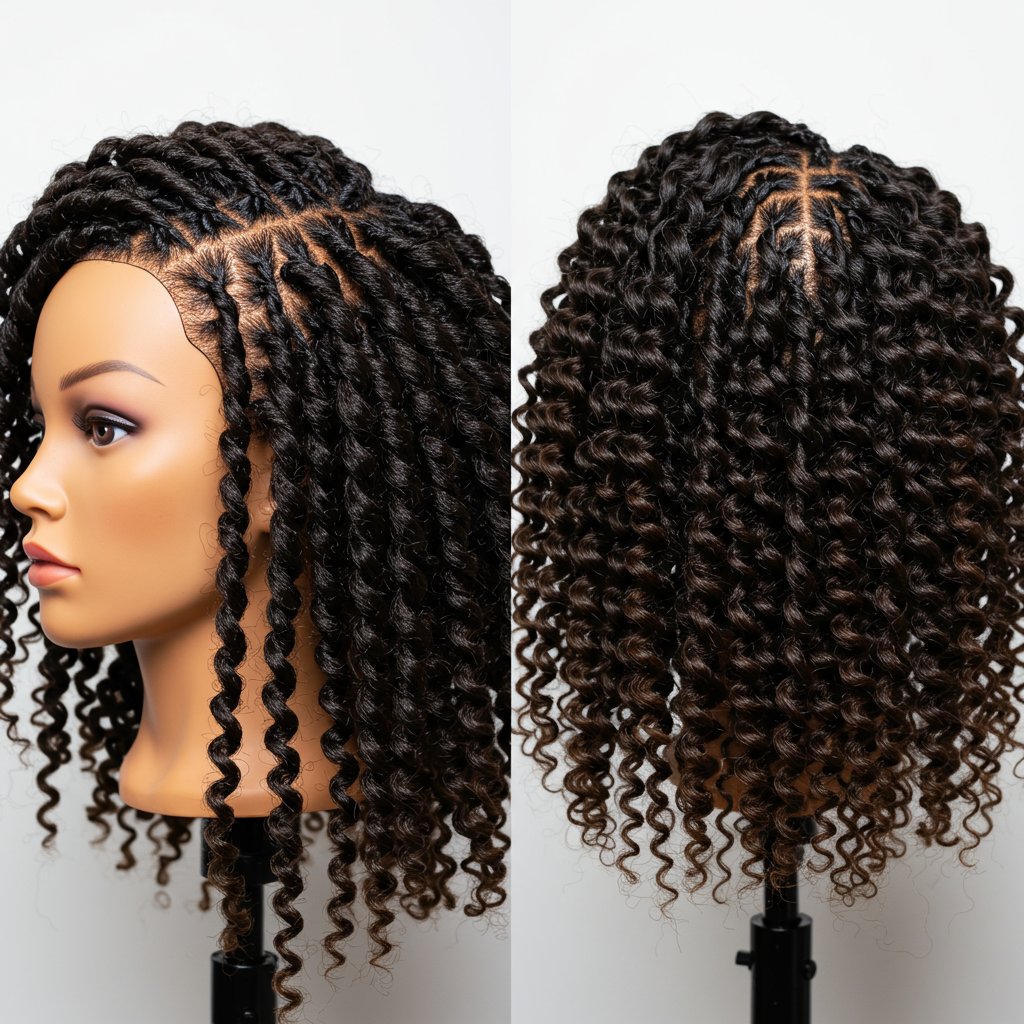
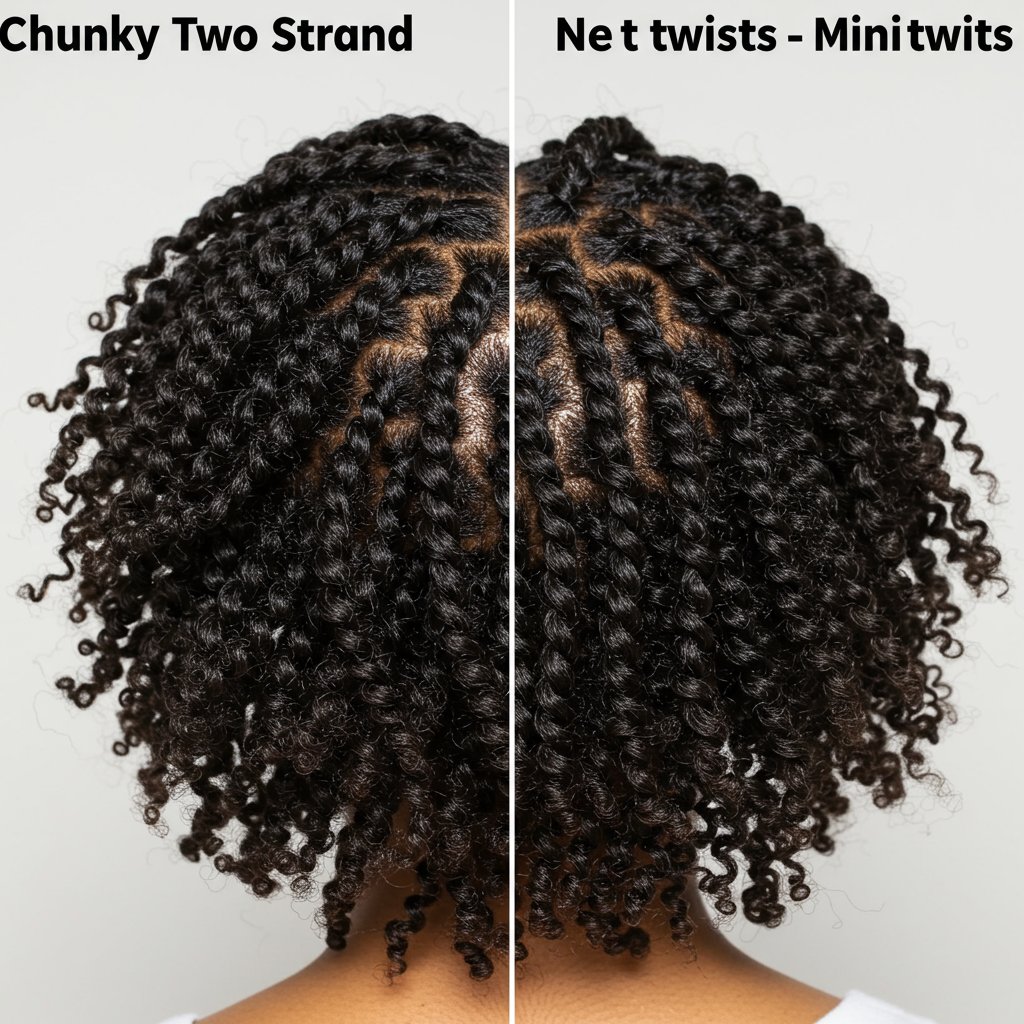
The beauty of twists lies in their adaptability. The size and type of twist you choose will dramatically influence both the look of the twists themselves and the final twist-out. Understanding these variations allows you to customize your style to match your desired outcome, hair density, and lifestyle. From micro-twists that last for weeks to chunky twists perfect for a quick style, there's a version for everyone.
Two-Strand Twists vs. Flat Twists
The most common method is the two-strand twist, where a section of hair is divided into two and twisted from the root to the end, hanging freely from the scalp. This creates a rope-like effect and results in a very defined, spiral curl in the twist-out. Flat twists, on the other hand, are created by twisting the hair flat against the scalp, similar to a cornrow but with two strands instead of three. This technique is great for creating updos and results in a wave pattern that is more defined at the roots, offering a different kind of volume and texture.The Impact of Size: Mini, Medium, and Chunky Twists
- Mini or Micro Twists: These tiny twists are installed on very small sections of hair. While time-consuming to install, they can last for several weeks and result in a highly defined, shrunken twist-out with incredible volume. They are a fantastic low-manipulation style for those looking to maximize length retention.
- Medium Twists: This is the go-to size for many. They offer a great balance between installation time and longevity. The resulting twist-out provides excellent definition and moderate volume, making it a versatile and classic choice.
- Chunky Twists: Created from large sections of hair, these are quick to install and ideal for those short on time. They create large, loose waves or curls rather than tight coils. The definition may not last as long, but they are perfect for achieving a voluminous, fluffy look with stretched hair.
The Ultimate Prep Routine for Flawless Twists
The success of your twists and twist-out is determined long before you create the first twist. A meticulous preparation routine is non-negotiable for achieving a moisturized, defined, and long-lasting style. Skipping these foundational steps can lead to frizz, dryness, and a style that doesn't last. The goal is to start with a clean, hydrated, and detangled canvas.
First, begin with a thorough cleanse using a sulfate-free, moisturizing shampoo. This removes any product buildup, dirt, or oils without stripping the hair of its natural moisture. Follow up with a rich, deep conditioner. This is a critical step for infusing the hair with hydration and nutrients. For best results, use a hooded dryer, steamer, or even just a plastic cap to allow the conditioner to penetrate the hair shaft deeply for at least 20-30 minutes. This intensive moisture treatment makes the hair more pliable and less prone to breakage during styling.
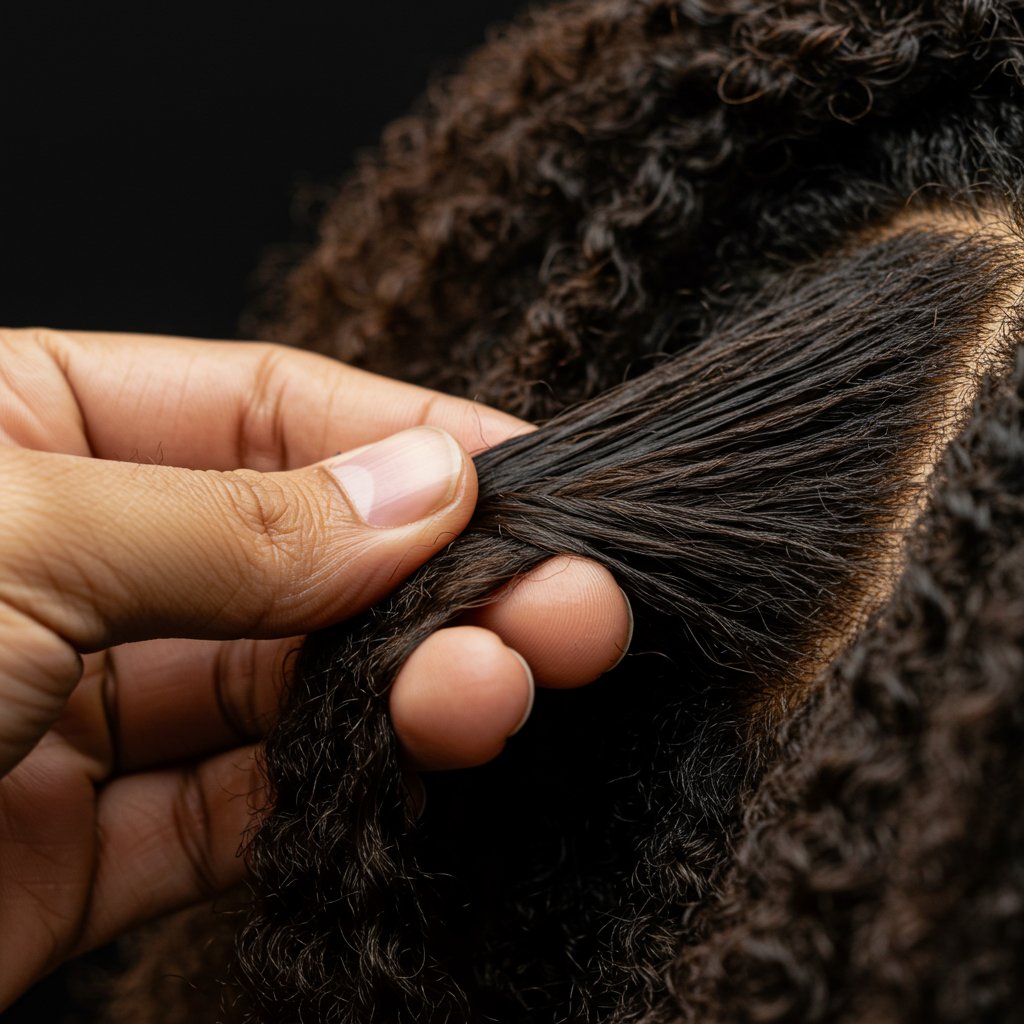
After rinsing the deep conditioner, the next crucial phase is detangling and applying leave-in products. On soaking wet or damp hair, apply a generous amount of a quality leave-in conditioner to help with slip. Gently detangle your hair, starting from the ends and working your way up to the roots, using your fingers or a wide-tooth comb. Once fully detangled, section your hair into four to six manageable parts and secure them with clips. This organization prevents re-tangling and makes the twisting process much smoother and more efficient.
Mastering the Technique: A Step-by-Step Installation Guide
With your hair prepped and sectioned, you're ready to begin the installation process. The products you choose and the technique you use here will define the outcome of your style. The popular L.O.C. (Leave-in, Oil, Cream) or L.C.O. (Leave-in, Cream, Oil) methods are excellent for layering products to seal in moisture effectively.
Product Application
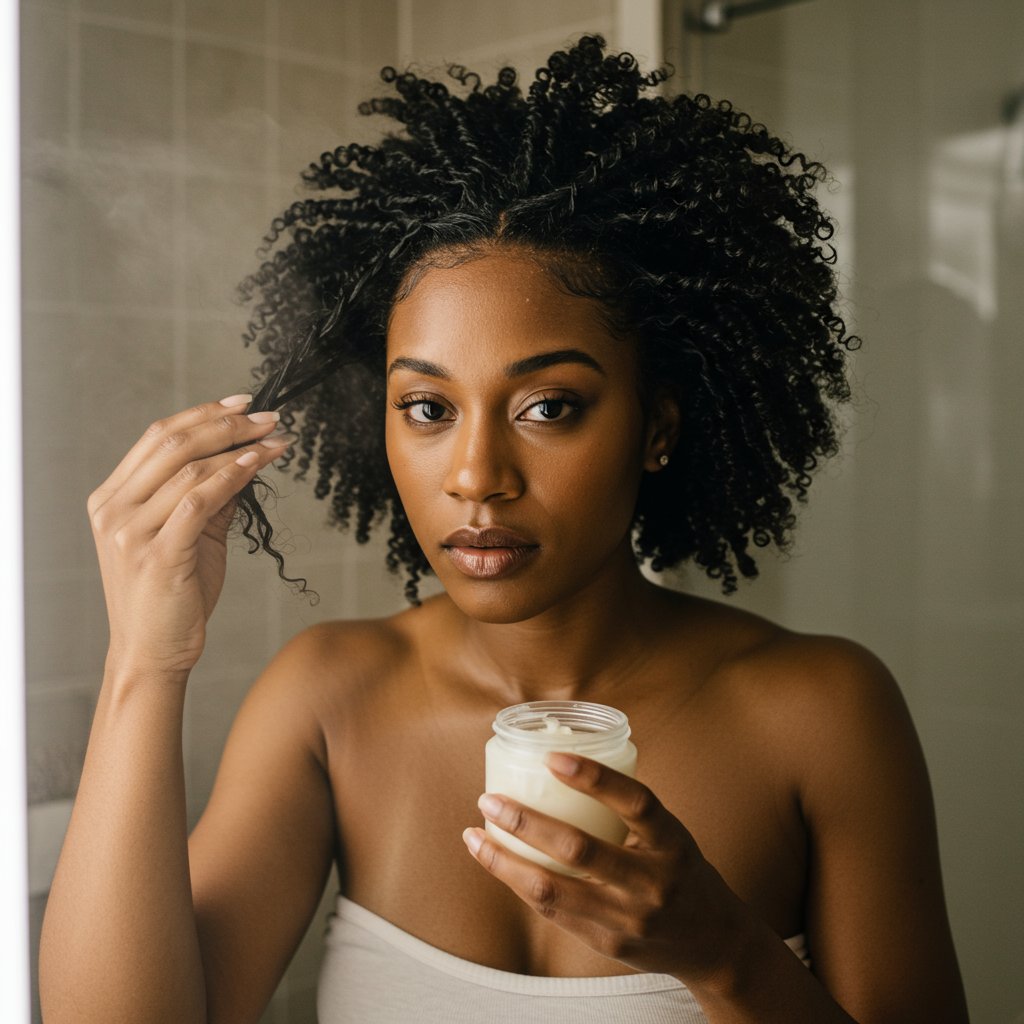
Working one section at a time, take a smaller subsection for your first twist. The size of this subsection will determine the size of your twist. Apply your styling products. Start with your leave-in conditioner (which you may have already applied), followed by a styling cream or twisting butter for hold and definition. These creams often contain ingredients like shea butter or mango butter that provide moisture and a soft hold. Finally, seal all that moisture in with a lightweight oil, focusing on the ends, which are the oldest and most fragile part of the hair.The Twisting Motion
Once the product is evenly distributed, divide the subsection into two equal strands. Begin twisting the two strands around each other from the root all the way to the tip. Maintain consistent tension throughout the twist—not so tight that it puts stress on the scalp, but firm enough to create a neat, uniform twist. A common mistake is twisting the individual strands before wrapping them around each other; instead, simply wrap one strand over the other repeatedly. To ensure the ends are smooth and don't unravel, coil the last inch of hair around your finger (a finger coil) or use a small amount of gel for extra hold.The Grand Reveal: Perfecting Your Twist-Out Takedown
The moment of truth has arrived. The takedown process is just as important as the installation. A rushed or improper takedown can instantly ruin a perfectly good set of twists with frizz and a loss of definition. Patience is your greatest asset here. Before you begin, ensure your twists are 100% dry. Unraveling even slightly damp twists is a guaranteed recipe for a frizzy, undefined style.

To begin, lightly coat your fingertips with a natural oil, such as jojoba, almond, or olive oil. This simple step is a game-changer; the oil minimizes friction between your fingers and your hair, which is the primary cause of frizz during the takedown process. It also adds a beautiful, healthy sheen to your finished style. Starting from the bottom of a twist, gently unravel it in the opposite direction that it was twisted. Do not pull or rip the twist apart.
Once all the twists are unraveled, you'll have sections of defined curls. You can leave them as they are for a chunky, super-defined look, or you can carefully separate them for more volume. To separate, look for the natural points where the curl wants to split and gently pull them apart. Again, make sure your fingers are oiled. For even more volume, you can use a hair pick to gently lift the roots, being careful not to pick through the ends of the hair, which can disrupt the curl pattern. Fluff and arrange until you achieve your desired shape and volume.
Extending the Life of Your Style: Maintenance and Protection
You’ve spent time and effort creating a beautiful twist-out, so you'll want it to last as long as possible. With the right maintenance routine, you can often enjoy your style for three to seven days, or even longer. The key to longevity is proper nighttime protection and daily refreshing. Protecting your hair while you sleep is the most crucial step in preserving your twist-out.
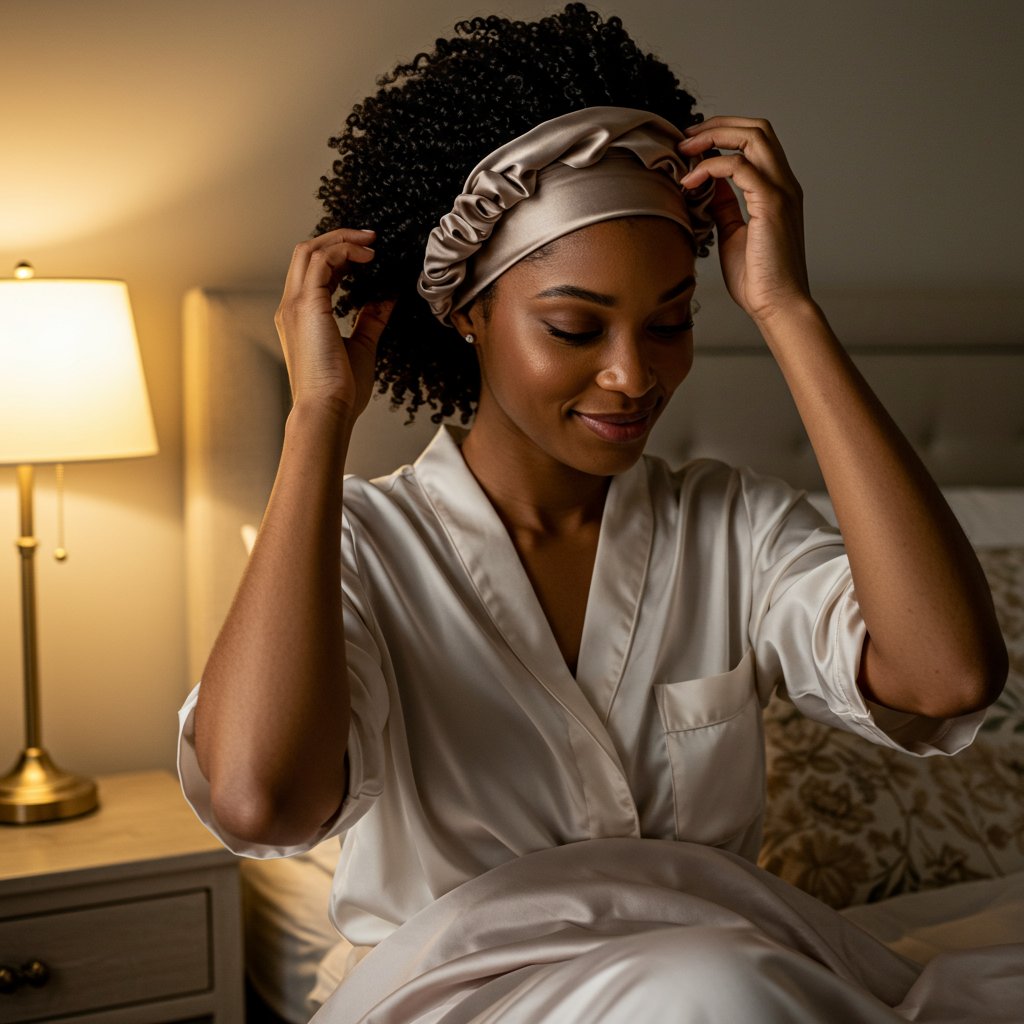
At night, gather your hair into a “pineapple”—a high, loose ponytail on top of your head—using a gentle hair tie like a satin scrunchie. This keeps the curls from getting crushed and flattened while you sleep. For extra protection, cover your hair with a silk or satin bonnet or scarf. Alternatively, sleeping on a silk or satin pillowcase can also reduce friction and prevent moisture loss. These materials are smooth and won't snag or dry out your curls like cotton can.
To refresh your style in the morning, gently take down the pineapple and shake your hair out. You can use a light mist of water or a curl refresher spray to revive any curls that have lost their bounce. If certain areas have become frizzy, you can apply a small amount of styling cream or oil and re-twist just those small sections overnight. This spot treatment allows you to maintain the overall style without having to redo your entire head.
Common Mistakes to Avoid for Picture-Perfect Results
Even with the best intentions, a few common mistakes can stand between you and the perfect twist-out. Being aware of these pitfalls can help you troubleshoot and refine your technique for consistently amazing results. One of the most frequent errors is installing twists on hair that is either too wet or completely dry. Twisting on soaking wet hair can lead to extreme shrinkage and a much longer drying time. Conversely, twisting on dry hair often results in a less defined, frizzy style. The sweet spot is typically damp, well-moisturized hair.

Another common issue is using the wrong products or too much product. Heavy butters and greases can weigh the hair down, leaving it feeling greasy and creating a limp twist-out. On the other hand, not using enough product, particularly a styler with some hold, can result in a style that lacks definition and doesn't last. Experiment to find the right balance for your hair's porosity and density. It's often better to apply products in thin layers rather than one heavy application.
Finally, a lack of patience during the takedown is a major culprit for failed twist-outs. As mentioned before, ensure your hair is completely dry and always use oil on your fingers to minimize frizz. Rushing this final step can undo all your hard work. Remember that a great twist-out is a process, and each step, from prep to takedown, plays a vital role in the final outcome.
Pro-Tips for Next-Level Twists and Twist-Outs
Ready to elevate your styling game? Here are a few professional tips to take your twists and twist-outs for natural hair to the next level:
- Smooth Ends are Key: For the most polished look, ensure the ends of your hair are properly moisturized and trimmed. Raggedy ends can lead to frizz and unraveling. When twisting, apply a tiny bit of gel or pomade to the very ends and coil them around your finger for a perfectly sealed twist.
- Maximize Elongation: To combat shrinkage and get a more stretched style, try the banding method. After creating your twists, gently stretch them and secure them with ouchless hair ties down the length of the twist. Allow them to dry this way for a more elongated result.
- Vary Your Parting: Don't be afraid to experiment with different parting styles. A side part, middle part, or even a creative zig-zag part can completely change the look of your final style. Use a rat-tail comb for clean, precise parts.
- Know Your Porosity: Understanding your hair's porosity (its ability to absorb and retain moisture) will help you choose the right products. Low porosity hair benefits from lighter, water-based products and may require heat to help products penetrate. High porosity hair loves thicker creams and butters to seal in moisture.
Frequently Asked Questions (FAQ)
Q1: How long does it take for twists to dry completely?
The drying time for twists can vary significantly based on hair density, thickness, and the climate. It can take anywhere from a few hours to over 24 hours. For thick, dense hair, it's often best to let them air dry overnight or for a full day. To speed up the process, you can sit under a hooded dryer on a low to medium heat setting.Q2: Can I achieve a good twist-out on short natural hair?
Absolutely! Twists and twist-outs are fantastic for all lengths, including TWA (Teeny Weeny Afro) stages. For shorter hair, you'll create smaller twists. The result is often a beautiful, defined coily or curly fro. The key is to use smaller sections and ensure the hair is properly moisturized.Q3: What's the difference between a twist-out and a braid-out?
A twist-out, created from two-strand twists, generally produces a spiral curl or deep wave pattern. A braid-out, created from three-strand braids, tends to produce a crimped, zig-zag wave pattern. Twist-outs are often softer and more voluminous, while braid-outs can provide more stretch and a different texture.Q4: Why is my twist-out always frizzy?
Frizz is usually caused by a few key factors: styling on hair that isn't properly moisturized, not allowing the twists to dry 100%, or friction during the takedown process. To combat frizz, ensure you use a good leave-in and styling cream, be patient with drying time, and always coat your fingers in oil before unraveling the twists.Q5: How often should I be doing twist-outs?
While twist-outs are a beautiful style, doing them too frequently can lead to over-manipulation. It's a great style to do after your weekly wash day. The twists themselves can be worn as a protective style for several days before taking them down, giving you two styles in one and reducing daily manipulation.Q6: Should I consult a professional for twists?
While twists can be done at home, visiting an experienced stylist at a professional salon can be highly beneficial. A professional can assess your hair's health, recommend the best products for your hair type, and execute the style with a precision that ensures longevity and minimizes breakage. They are also masters at creating complex and elegant styles incorporating flat twists and two-strand twists that can be difficult to achieve on your own.Conclusion: Embrace the Versatility of Twists
Twists and twist-outs for natural hair are more than just a passing trend; they are a fundamental part of a healthy and versatile hair care journey. This dual-purpose style offers the protective benefits of minimizing manipulation while delivering the stunning aesthetic of defined, voluminous curls. By understanding the importance of a solid prep routine, mastering the installation and takedown techniques, and committing to proper maintenance, you can consistently achieve beautiful results that celebrate your natural texture.
Whether you prefer the tight definition of mini twists or the soft waves of chunky twists, this technique is endlessly customizable to your personal style and hair goals. Embrace the process, experiment with different products and sizes, and don't be afraid to seek professional guidance to perfect your technique. Twists and twist-outs are a powerful tool in your styling arsenal, empowering you to nurture your hair's health while showcasing its incredible beauty.


