Waterfall Braids: A Complete Guide to Creating a Cascading Effect | Tips & Inspiration
Discover the Ethereal Beauty of the Waterfall Braid
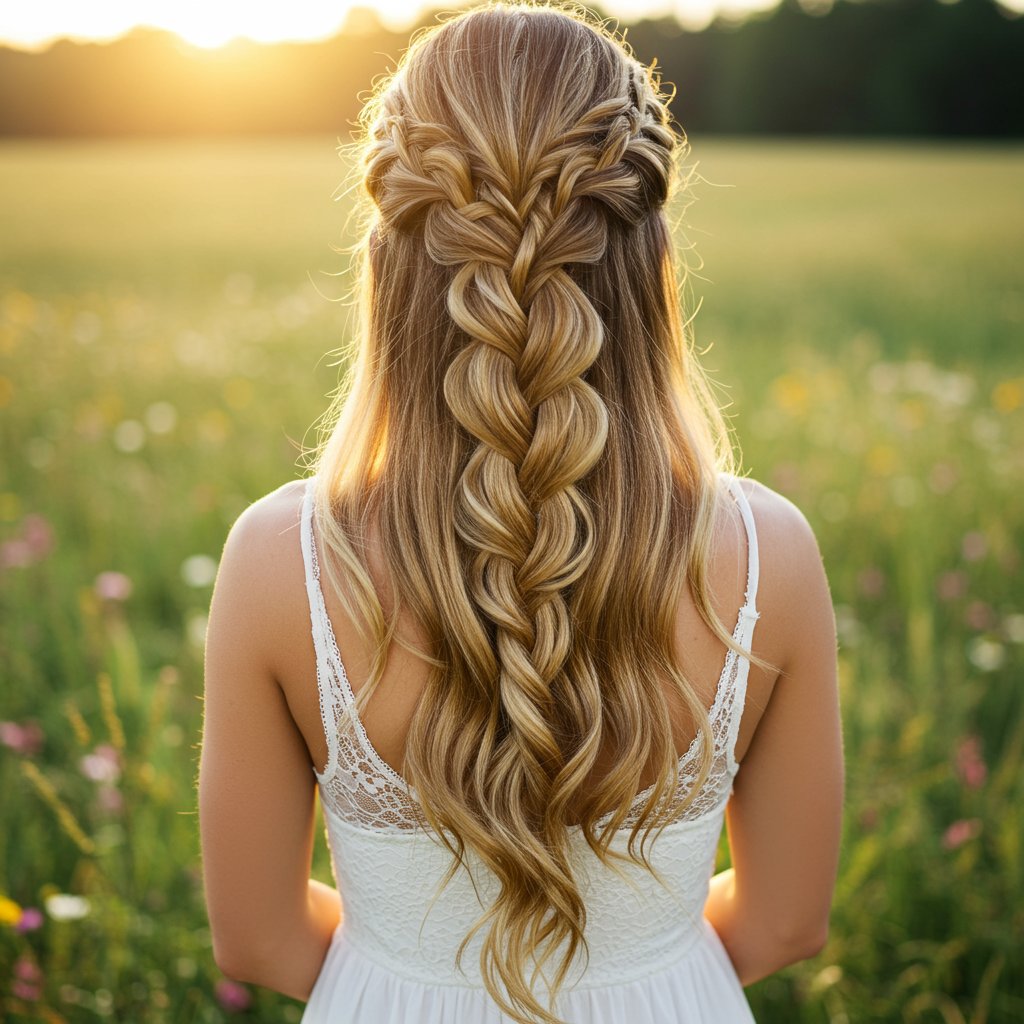
The world of hairstyling is rich with intricate designs and timeless classics, but few capture the essence of romance and whimsy quite like the waterfall braid. This enchanting style, known for its signature cascading effect, weaves together the structure of a braid with the flowing beauty of loose hair. It’s a versatile look that can be adapted for a sun-drenched festival, an elegant wedding, or a sophisticated day at the office. Unlike a traditional French braid that contains all the hair, the waterfall braid allows strands to fall gracefully through the plait, creating a delicate, water-like cascade that moves with you.
This comprehensive guide will demystify the art of creating the perfect waterfall braid. We will explore its unique structure, delve into the essential preparation steps for different hair types, and provide a detailed, step-by-step tutorial that even beginners can master. Furthermore, we'll uncover stunning variations to elevate your look, troubleshoot common mistakes, and discuss why seeking a professional stylist can make all the difference for those milestone events. Whether you’re looking to add a touch of bohemian flair to your everyday style or searching for the perfect romantic updo, understanding the waterfall braid is a valuable skill for any hair enthusiast.
What Exactly is a Waterfall Braid? The Anatomy of a Cascading Style
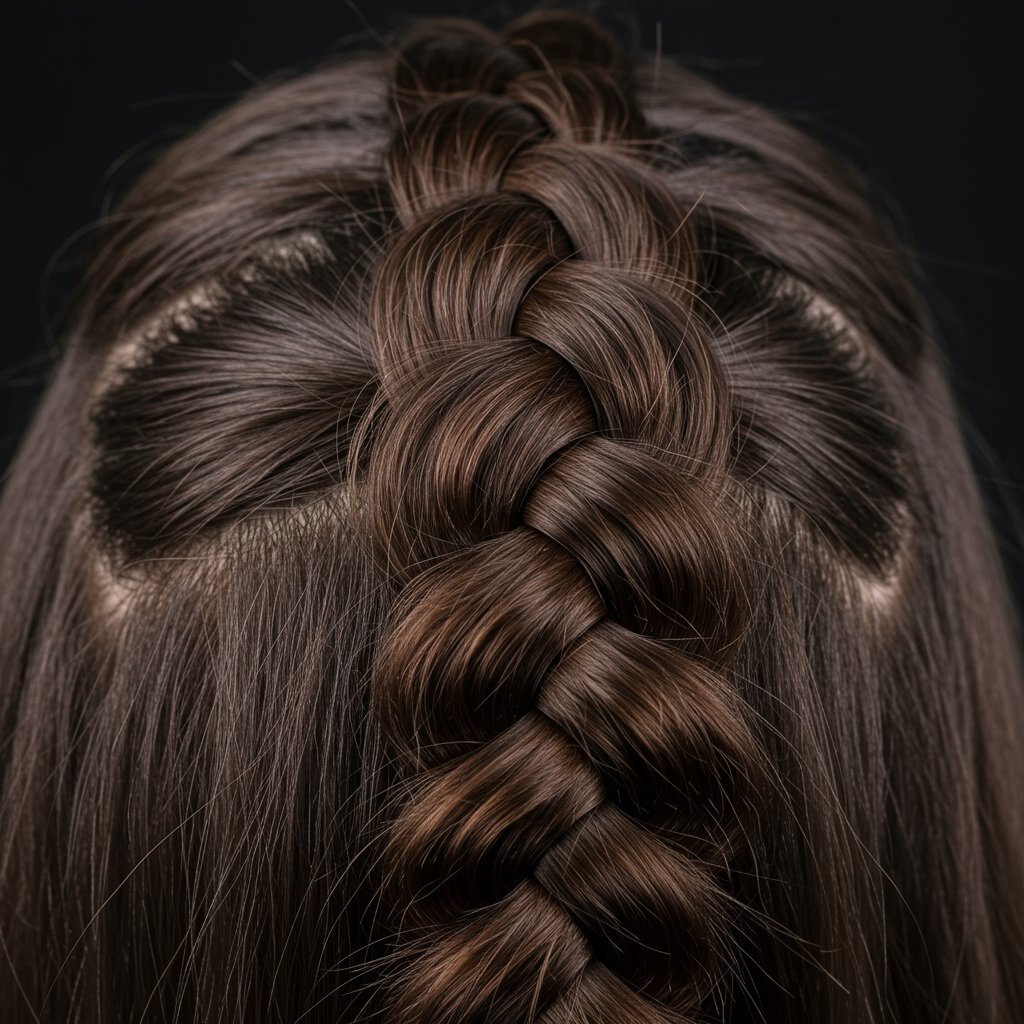
At its core, the waterfall braid is a modified French braid. The foundational technique is similar: you begin with three strands and progressively add new hair to the braid as you work your way across the head. However, the key difference—and the source of its magical effect—lies in what you do with one of the strands. In a standard French braid, you add hair to both the top and bottom strands and continue weaving them into the central plait. In a waterfall braid, you add hair to the top strand as usual, but you intentionally drop the bottom strand, letting it fall loose. You then pick up a new section of hair directly below the dropped strand to continue the braid.
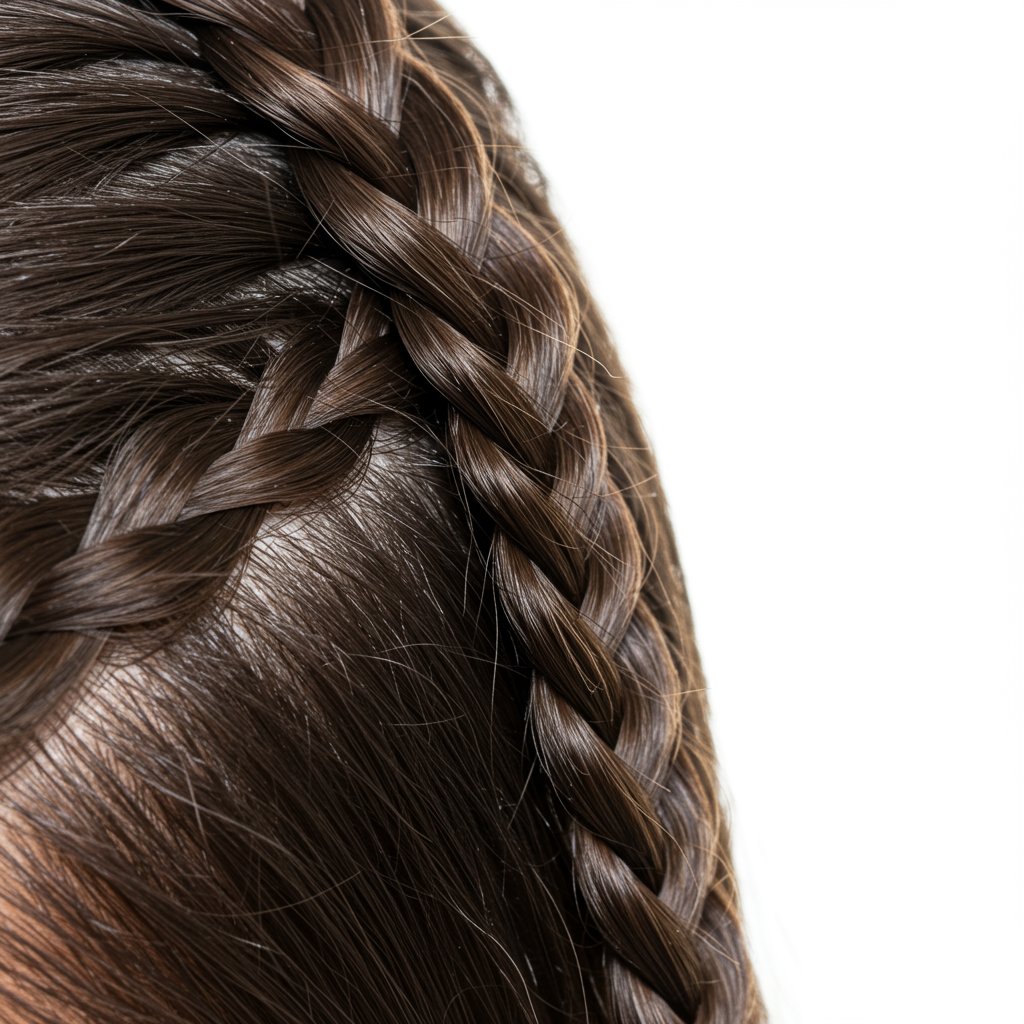
This 'drop and replace' technique is what creates the iconic cascade. The dropped strands become the 'waterfall,' flowing freely down the length of the hair, while the braid itself acts as a beautiful, horizontal crown or accent. This unique structure sets it apart from other popular braids. A Dutch braid, for example, creates a raised, '3D' effect by crossing strands under instead of over. A fishtail braid uses only two strands and creates a more intricate, herringbone pattern. The waterfall braid’s genius is its beautiful paradox: it is both a structured braid and a celebration of loose, flowing hair, offering the best of both worlds.
Understanding this anatomy is crucial for mastering the style. The tension of the braid must be consistent to hold its shape, while the cascading strands should be smooth and untangled to flow naturally. The angle at which you create the braid—whether straight across the back of the head, diagonally, or framing the face—dramatically changes the final look. It’s a style built on precision and a delicate touch, resulting in a look that appears effortlessly romantic and incredibly sophisticated.
The Perfect Canvas: Prepping Your Hair for Flawless Waterfall Braids
Achieving a polished and long-lasting waterfall braid begins long before the first strand is woven. Proper hair preparation is the foundation of any successful hairstyle, and this cascading look is no exception. The ideal canvas is hair that has a bit of grip and texture; overly silky, clean hair can cause the strands to slip, making the braid difficult to secure. For this reason, second-day hair is often perfect for braiding. If you're starting with freshly washed hair, introducing some texture is key. A light spritz of texturizing spray, sea salt spray, or even a bit of dry shampoo at the roots can provide the necessary hold for the braid to stay in place.
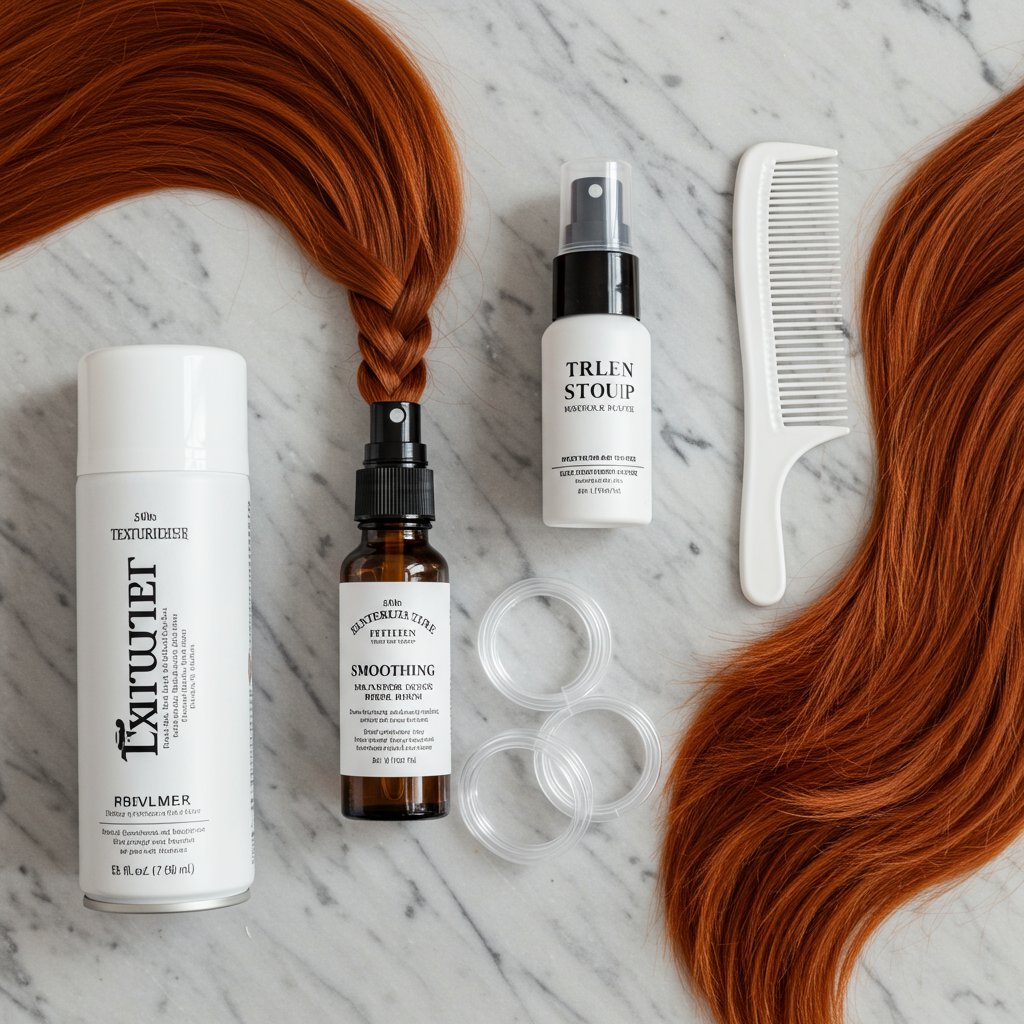
Before you begin, ensure your hair is completely free of tangles. Use a wide-tooth comb or a detangling brush to gently work through any knots, starting from the ends and moving up to the roots. This prevents snagging during the braiding process and ensures that the cascading strands fall smoothly and beautifully. The type of hair you have will also influence your prep. For those with fine hair, a volumizing mousse applied before blow-drying can add body and make the braid appear fuller. For those with thick or curly hair, a smoothing cream can help tame frizz and create a more defined, sleek cascade. A light application of a heat protectant is also recommended if you plan to curl or wave the cascading strands beforehand for a more romantic finish.
Gather your tools before you start. You'll need a fine-tooth comb for creating clean sections, a few small, clear elastics to secure the end of the braid discreetly, and some bobby pins that match your hair color for tucking away any loose ends or securing the braid in place. Having everything within reach allows for a smoother, more focused braiding process. This thoughtful preparation not only makes styling easier but also significantly improves the final look and longevity of your waterfall braid, ensuring it remains flawless throughout the day or night.
Step-by-Step Guide: How to Create the Classic Waterfall Braid
Creating a waterfall braid may look complex, but it's a manageable process when broken down into clear steps. Patience and a light touch are your best friends here. Follow this detailed guide to master the classic technique.
Step 1: Establish Your Starting Point
Decide where you want your braid to begin. A classic look starts near the hairline, just above the temple. Using your fine-tooth comb, create a clean side part. Take a two-inch section of hair from the front, near your part. This will be your starting section.Step 2: Begin a Standard Braid
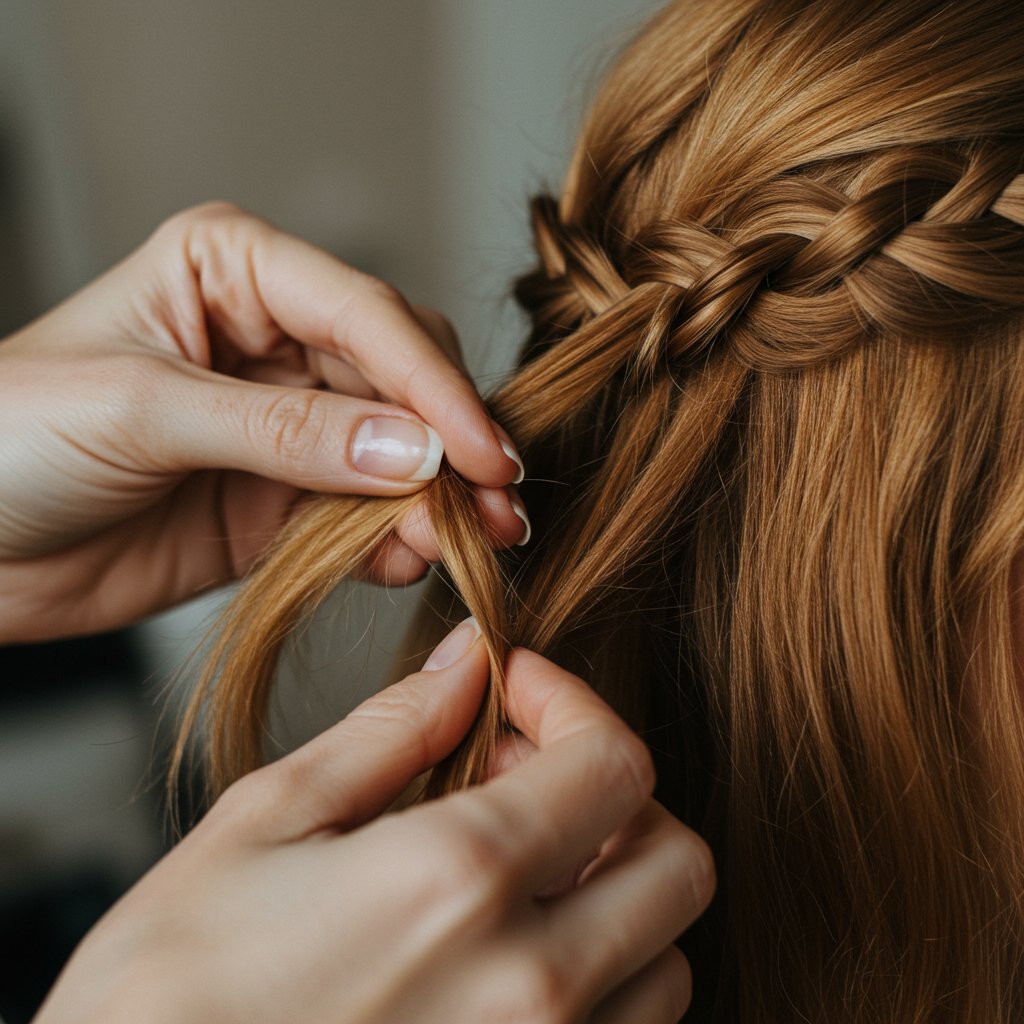
Divide this initial section into three equal strands: a top strand (closest to your part), a middle strand, and a bottom strand (closest to your ear). Begin as you would with a regular three-strand braid to establish the anchor. Cross the top strand over the middle one. Then, cross the bottom strand over the new middle one. Complete this sequence one full time.Step 3: Introduce the 'Waterfall' Technique
Now, the signature technique begins. Take the top strand and cross it over the middle. Before you work with the bottom strand, add a small, new section of hair from the hairline to this top strand, just like you would in a French braid. Now, here is the crucial step: drop the bottom strand completely. Let it fall and blend in with the rest of your loose hair. This is your first 'cascade'.Step 4: Continue the Braid
With the bottom strand now dropped, you only have two strands in your hand. To replace the dropped piece, take a new, small section of hair from directly underneath where you dropped the last one. This new section becomes your new bottom strand. Now, cross this new bottom strand over the middle strand. You have now completed one full cycle of the waterfall braid technique.Step 5: Repeat Across the Head
Continue this pattern across the back of your head. With each sequence, you will:- Add a new section of hair to your top strand.
- Cross the top strand over the middle.
- Drop the bottom strand.
- Pick up a new section of hair to become your new bottom strand.
- Cross the new bottom strand over the middle.
Step 6: Secure the Braid
Once you have braided to your desired end point (often just past the center of the back of your head, or all the way to the other side), stop adding new hair. Finish the last inch or so with a standard three-strand braid to create a tail. Secure the end with a small, clear elastic. You can then use a bobby pin to discreetly pin the end of the braid underneath a section of loose hair.Variations on a Theme: Elevating Your Waterfall Braid
Once you've mastered the classic waterfall braid, a world of creative variations opens up. These twists on the original technique can tailor the style to different occasions, hair types, and personal aesthetics, transforming a simple braid into a true statement piece.
The Double Waterfall Braid
For a more dramatic and intricate look, the double waterfall braid is a stunning choice. This style involves creating two parallel waterfall braids. Start the first braid higher up on the head, near your part. Once completed, create a second waterfall braid directly below the first one, about an inch or two apart. The key is to use the cascading strands from the first braid as the 'new' sections of hair you pick up for the second braid. This creates a beautifully interwoven, lattice-like effect that is perfect for formal events.Fishtail and Dutch Waterfall Braids
Inject a different texture into your cascade by changing the braid type. A Fishtail Waterfall Braid uses the two-strand fishtail technique, creating a more delicate, herringbone pattern for the braided portion. Similarly, a Dutch Waterfall Braid inverts the plait by crossing strands under the middle instead of over. This makes the braid pop from the head for a bolder, more pronounced look, while still allowing the hair to cascade beautifully through it.Waterfall Braid with Buns, Ponytails, and Updos
Your waterfall braid doesn't have to end with a simple pin. It can be a gorgeous foundation for other styles. For a chic updo, create a waterfall braid that wraps around the back of your head, then gather all the remaining hair—including the cascading strands—into a low, messy bun or a sleek chignon. Another popular option is to end the braid and sweep all the hair into a side ponytail. This combines the elegance of the braid with the playful movement of a pony, making it a versatile look for both casual and semi-formal settings.Accessorize for Impact
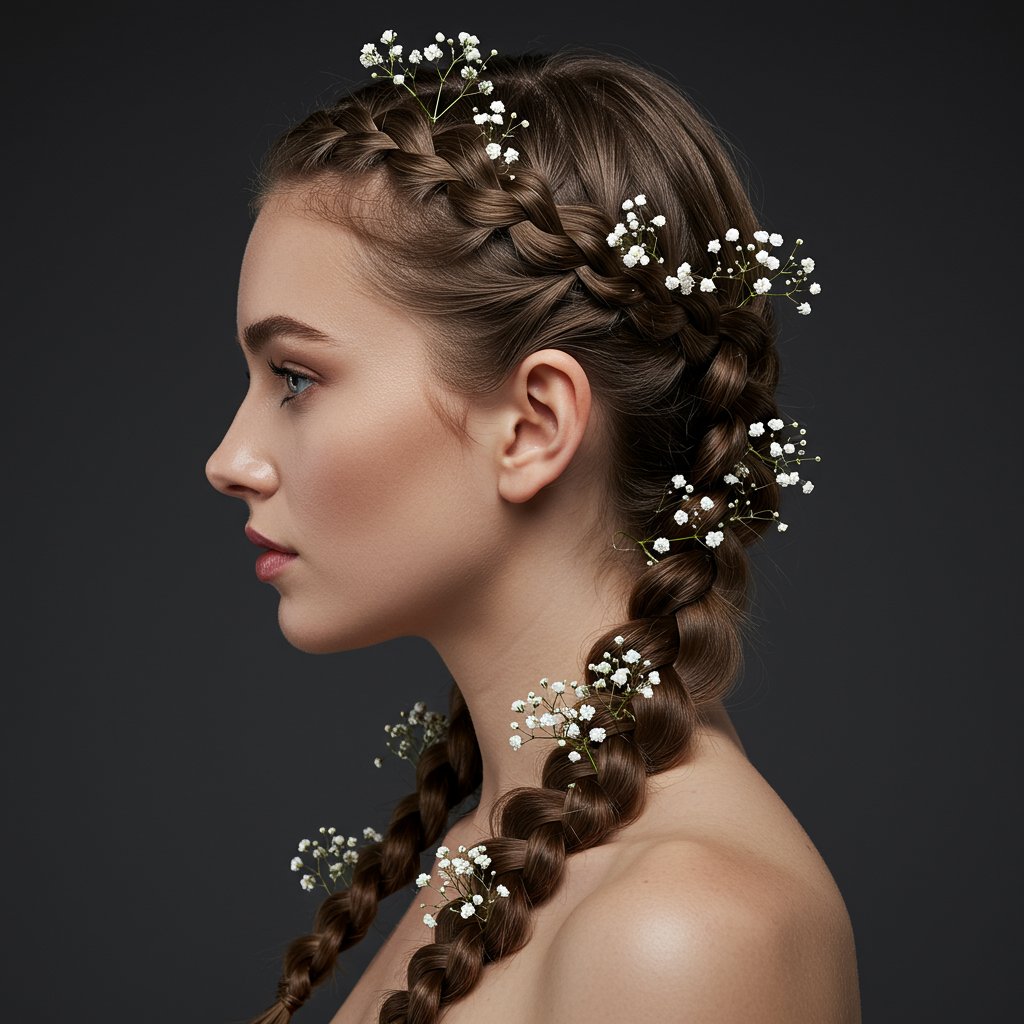
Never underestimate the power of accessories. Weaving a delicate ribbon or a fine metallic thread through the braid can add a pop of color or sparkle. For a bohemian or bridal look, tuck small, fresh flowers like baby's breath or tiny rosebuds into the openings of the braid. Bejeweled clips, pearls, or decorative pins can also be placed along the braid to add a touch of glamour and secure it further.Common Mistakes and How to Avoid Them
Even with a clear tutorial, mastering the waterfall braid can take a few tries. Certain common pitfalls can lead to a less-than-perfect result. Understanding these issues and knowing how to correct them is key to achieving a professional-looking finish every time.
One of the most frequent problems is inconsistent tension. If the braid is too loose, it will sag and lose its definition quickly. If it's too tight, it can look severe and cause discomfort. The goal is a firm but gentle hold. Practice maintaining even pressure with your hands as you braid. If you find your braid is loose, don't be afraid to undo it and start again. It’s better to restart than to finish with a style that won't last. A good tip is to hold the three strands taut but not pulling on the scalp as you work.
Another common issue is the cascading strands getting tangled or mixed up with the hair you are about to pick up. This can make the process confusing and result in a messy look. To avoid this, be methodical. After you drop a strand, use your finger to gently separate it from the rest of the hair, pushing it forward or over your shoulder and out of the way. When you pick up a new section to become the bottom strand, use a comb to ensure it's a clean, neat section. This separation is crucial for a clean, defined waterfall effect.
Finally, many people struggle with making the braid look full and lush, especially on fine hair. If your braid looks thin or sparse, try the 'pancaking' technique. Once the braid is complete and secured, gently tug on the outer loops of the braided portion. Pull them outwards, bit by bit, to create the illusion of more volume and thickness. Be careful not to pull too hard, as this can loosen the entire structure. This simple trick can dramatically enhance the braid's visual impact, giving it a softer, more romantic, and voluminous appearance.
Occasions to Shine: When to Wear a Waterfall Braid
The waterfall braid's unique blend of elegance and effortlessness makes it suitable for an incredibly wide range of occasions. Its versatility is one of its greatest strengths, allowing it to be dressed up or down to match the formality of any event.
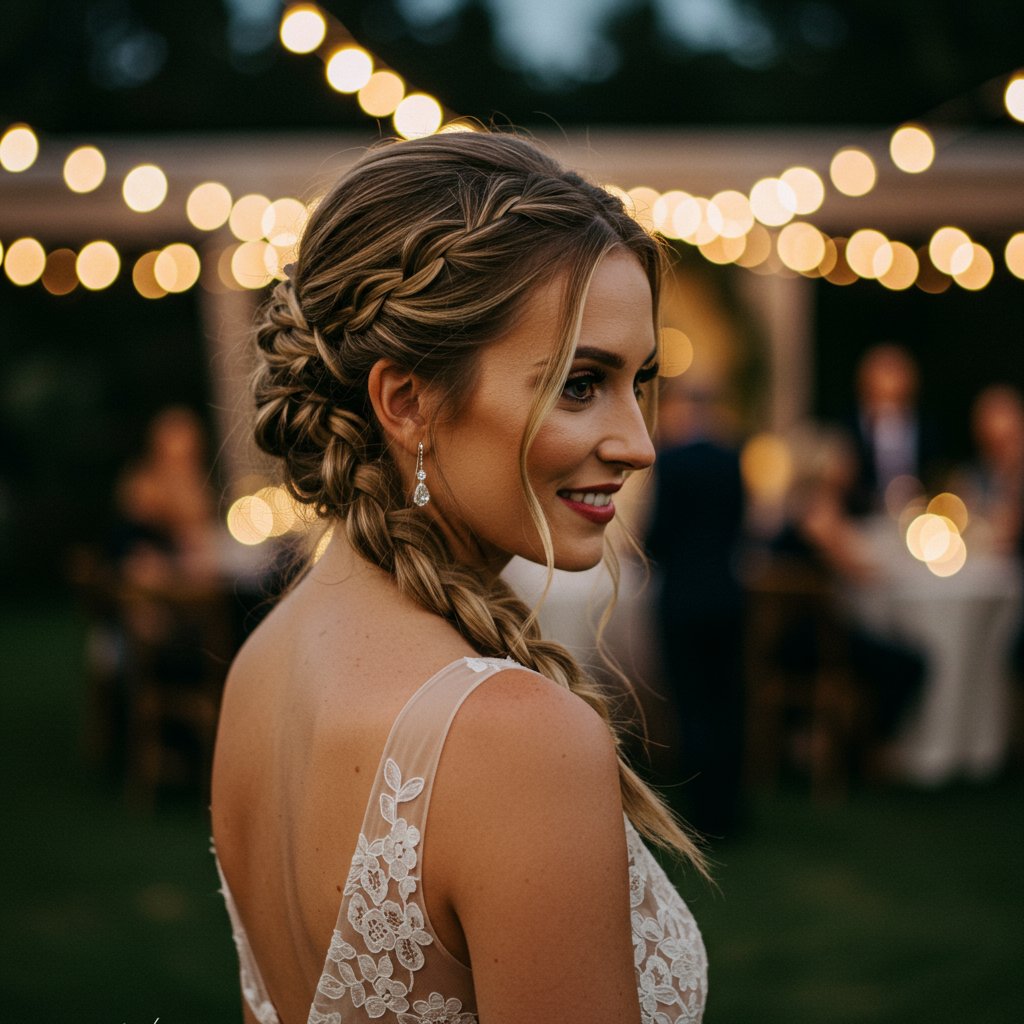
For brides and bridesmaids, the waterfall braid is a perennial favorite. It exudes romance and softness, perfectly complementing wedding attire without being overly structured. It can be adorned with fresh flowers for a rustic or bohemian wedding, or with delicate pearls and crystals for a more classic, glamorous affair. It also photographs beautifully, capturing the light and movement in a way that structured updos cannot. Similarly, for proms, galas, and other formal events, a waterfall braid offers a sophisticated yet youthful alternative to traditional hairstyles. Paired with soft curls or waves, it creates a look that is both polished and enchanting.
Beyond formal wear, the waterfall braid is a perfect choice for more casual, free-spirited events like music festivals, garden parties, or summer barbecues. In these settings, the braid can be styled with a looser, messier finish for a true bohemian vibe. It keeps hair away from the face while still allowing you to show off your length and texture. It's also a practical and stylish choice for everyday wear. A simple waterfall braid can elevate a casual jeans-and-t-shirt look or add a touch of professionalism to your office attire. It's a way to look put-together with minimal effort, showcasing your personality and style.
The Professional Touch: Why Visit a Salon for Your Waterfall Braid?
While mastering the waterfall braid at home is a rewarding skill, there are times when seeking the expertise of a professional stylist is the best choice, especially for significant life events. Professional hair salons offer a level of precision, artistry, and longevity that can be difficult to replicate on your own. A trained stylist has a deep understanding of how to adapt the braid to different hair types, textures, and face shapes, ensuring the final look is perfectly flattering and customized to you.
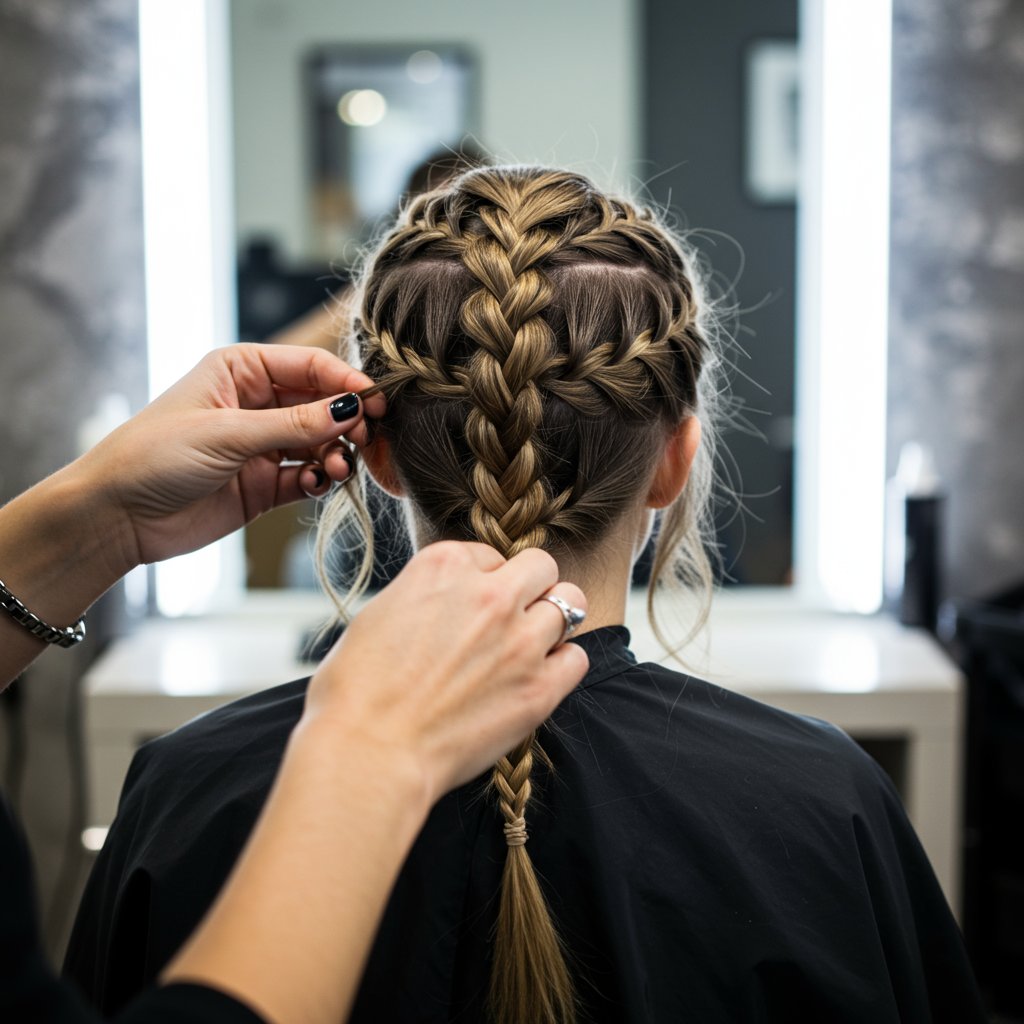
One of the biggest advantages is durability. Stylists use professional-grade products and techniques to prep the hair and set the style, ensuring your waterfall braid remains flawless from the first photo to the last dance. They can expertly conceal pins and elastics, create perfectly balanced tension, and pancake the braid for maximum volume without compromising its structure. This is particularly crucial for weddings, proms, or any event where you need your hair to withstand hours of activity and still look impeccable. They can also seamlessly incorporate extensions for added length or volume, a task that is challenging for the untrained hand.
Furthermore, a salon visit provides a stress-free, pampering experience. Instead of worrying about getting the sections even or reaching the back of your own head, you can relax while an expert creates a work of art. Stylists can also offer creative variations and suggestions you may not have considered, from incorporating a hidden braid to creating a complex, multi-braid updo with the waterfall as its centerpiece. For those milestone moments when you want to look and feel your absolute best, investing in a professional stylist ensures a stunning, stress-free, and picture-perfect result.
Pro Tips for a Long-Lasting Waterfall Braid
- Start with Texture: As mentioned, second-day hair is ideal. If your hair is too clean, a texturizing spray or dry shampoo is your best friend.
- Control Frizz: A small amount of light-hold pomade or smoothing serum warmed between your palms and lightly grazed over the finished braid can tame flyaways.
- Set Your Style: Once your braid is complete, give it a light mist with a flexible-hold hairspray. This will help lock everything in place without making the hair stiff or crunchy.
- Strategic Pinning: Use bobby pins that match your hair color to discreetly secure the end of the braid and any other areas that feel loose. Slide them in underneath the braid to keep them hidden.
- Sleep Smart: If you want to extend the life of your braid overnight, try sleeping on a silk or satin pillowcase to reduce friction and frizz.
Frequently Asked Questions (FAQ)
Can you do a waterfall braid on short hair?
Yes, you can! As long as your hair is at least shoulder-length, you can create a beautiful waterfall braid. The braid might be smaller and frame the face more like a crown or headband, but the cascading effect is still achievable. For very short hair, a half-up version can work well.What hair type is best for waterfall braids?
Waterfall braids are incredibly versatile and work on most hair types. Wavy or loosely curled hair is often considered ideal as it enhances the romantic, flowing look of the cascading strands. However, straight hair provides a very sleek and chic version, while curly hair can create a stunningly voluminous and textured braid. The key is proper preparation for your specific hair type.How can I make my waterfall braid look thicker?
The best technique is 'pancaking'. After you've secured the braid, gently pull on the outer edges of each braided loop. This loosens the plait slightly and spreads the hair out, creating the illusion of a much fuller, thicker braid. Start gently and pull more as needed.How do I stop the strands from slipping out?
This usually comes down to two things: hair prep and tension. Make sure your hair has some grip by using a texturizing product. As you braid, maintain a consistent, firm tension. If you feel a section slipping as you work, tighten your grip slightly before continuing. Don't be afraid to restart a section if it feels too loose.Can I incorporate extensions into a waterfall braid?
Absolutely. A skilled stylist can seamlessly blend extensions into a waterfall braid to add length, volume, or even pops of color. Clip-in extensions are often used, placed strategically underneath the top layer of hair before braiding begins to ensure the wefts are hidden.How is a waterfall braid different from a French braid?
The key difference is the handling of the bottom strand. In a French braid, you add hair to both the top and bottom strands and weave them into the plait. In a waterfall braid, you add hair to the top strand but you drop the bottom strand and pick up a new piece of hair to replace it, creating the cascading effect.A Timeless Style for Effortless Elegance
The waterfall braid is more than just a hairstyle; it's a statement of grace and romanticism. Its unique ability to combine the polished structure of a braid with the carefree beauty of flowing locks makes it a timeless choice for any occasion. From the initial prep to the final, cascading result, each step is an exercise in creativity and detail. Whether you choose to master the classic technique for your everyday look, explore intricate variations for special events, or entrust your style to a professional for a truly flawless finish, the waterfall braid offers endless possibilities.
We hope this guide has inspired you to embrace the cascading effect and try this enchanting style for yourself. With a little practice and the right techniques, you can unlock the secrets to a perfect waterfall braid that is sure to turn heads and leave a lasting impression of effortless elegance. It’s a beautiful way to express your personal style, adding a touch of artistry to your look that is both captivating and unforgettable.


